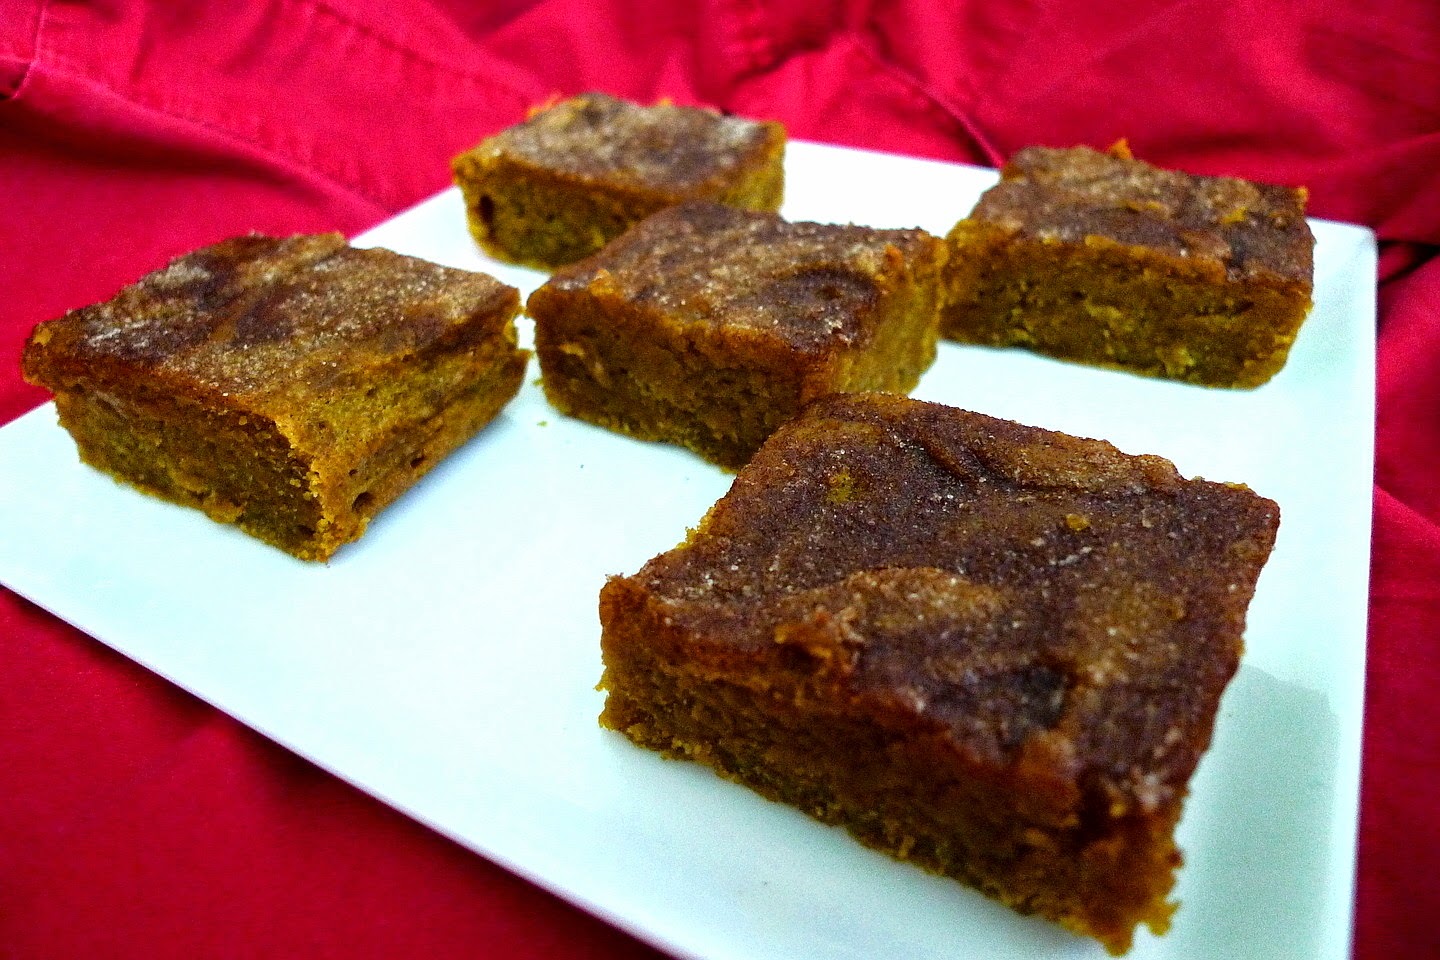
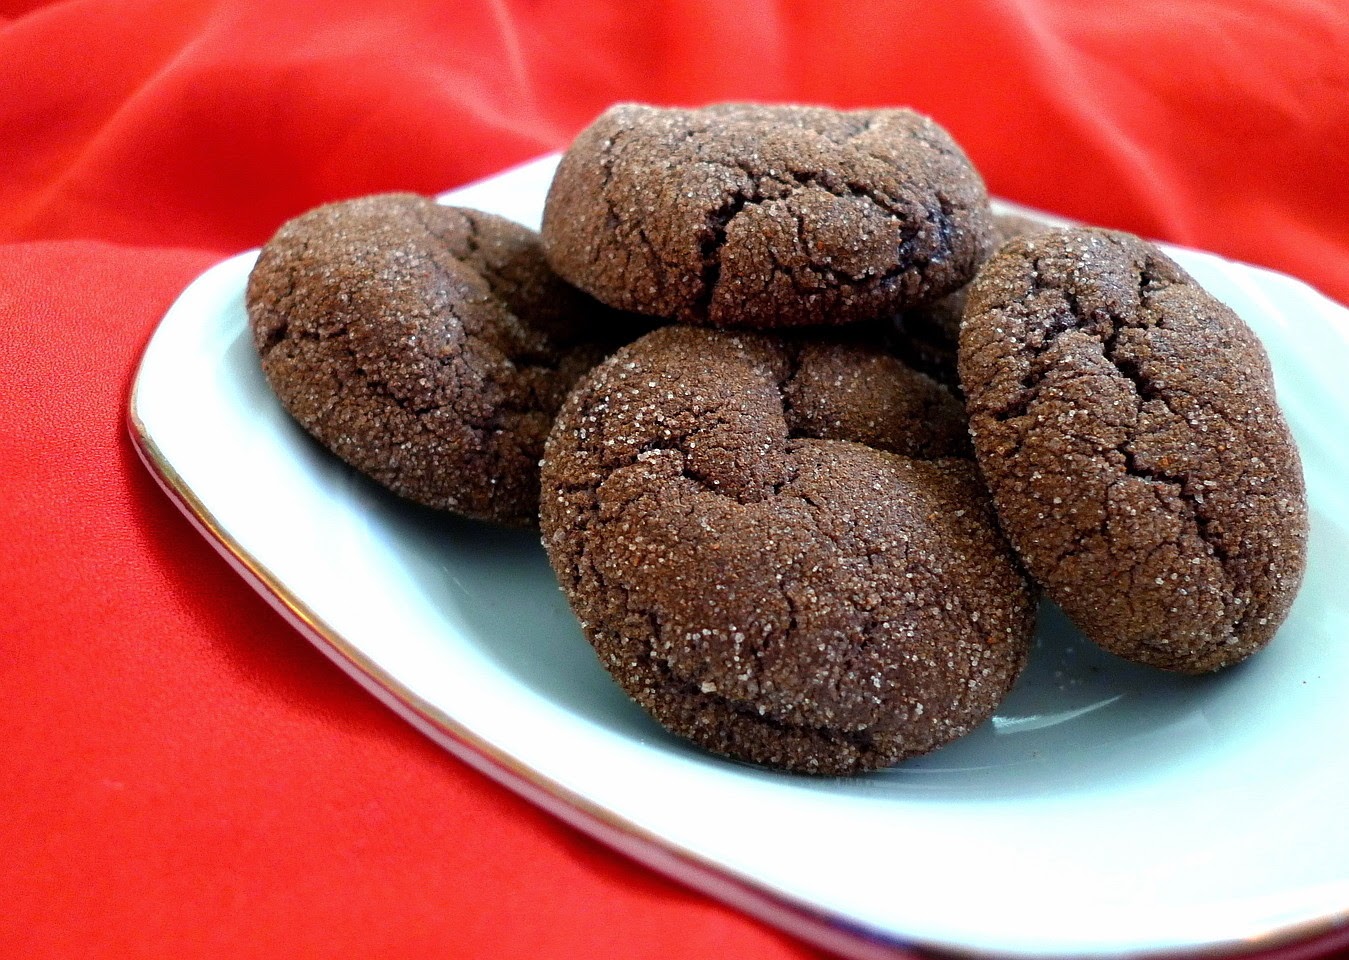
Tuesday, December 16, 2014

White Chocolate Covered Oreos


Several weeks ago, my sister and I were walking in Target and she pointed out the boxes of white chocolate fudge covered Oreos.  She then mentioned how much she wanted to buy them.  My reaction, of course, was along the lines of, "What?  Don't buy that.  I could make you those."  Of course, she then responded, "Well, why don't you then?" 


Well, I've been so busy making other holiday cookies and treats that I just didn't have time to get around to it.  Until the one night I just happened to be melting down some white chocolate to make these White Chocolate Peppermint Shortbread Cookies.  I had more than enough white chocolate for the shortbread cookies, and since I also had a package of Oreos, I decided I better make good on my promise. 


To my surprise, it was actually really quick to make them.  I dressed half of them up with Christmas sprinkles and the other half with crushed candy canes.  Surely these are better than the storebought ones, right?  After all, these were made with love and you can't buy that.  :)  I have a feeling that once my sister eats these, she's going to have me make some more (especially once she finds out that I gave away most of them to some other people).  Well, 'tis the season after all.  And seeing as how it's so easy to do, why not?

White Chocolate Covered Oreos

Oreos
vanilla almond bark or candy coating
sprinkles or crushed candy canes (optional)

Melt the almond bark in the microwave until it's completely fluid.  Dip the Oreos into the mixture and shake off the excess.  Lay on a piece of parchment paper and decorate as desired.       

Sunday, December 14, 2014

White Chocolate Peppermint Shortbread - SRC Cookie Carnival


Ooohh, Christmas is getting closer and that means it's time for Christmas cookies, lots of them!  Every year, I give away dozens of them to neighbors, co-workers, and friends.  Naturally, I also keep back some of them for my family too.  So, I am always on the lookout for new recipes to make and add to my list of faves.  That's why, when Sarah from the Secret Recipe Club came up with the idea for this Cookie Carnival, I eagerly joined in!  What is the "Cookie Carnival" you ask?  Well, the members of the Secret Recipe Club once again received another person's blog to peruse and pick a recipe from it to make.  But, the catch is that it has to be a cookie recipe.  Then, today, we all get to show off the newest addition to our Christmas cookie platters.


I was assigned the blog, Dessert Before Dinner.  With a title like that, I think I've found a kindred spirit in Stephy.  And if you go check out her blog, you'll see that she has no shortage of dessert recipes.  The girl means business!  She has everything from the classics, like Lemon Meringue Pie and Watermelon Sorbet, to more exotic recipes like Yuzu Wasabi White Chocolate Macarons and Grapefruit Cupcakes with Avocado Frosting.  From perusing through her blog, I came to see that she's a person who is bold, daring, and inventive.  She's knows what she likes, but she's also not afraid to try new things and see where her foodie ideas will take her.  You go girl!


This time, I opted for one of her classic recipes, Tartine Bakery Shortbread Cookies.  And oh boy were they ever good.  These shortbread cookies are thick, super buttery, and just sweet enough.  One bite, and they absolutely melt in your mouth.  You'll find yourself reaching for one after another until all you have left is crumbs.  And believe me, you will devour the crumbs as well.  I decided to be a little inventive too and dipped these into white chocolate, then sprinkled them with crushed peppermint candy for a festive, Christmas-y touch.  Simply delightful!  I will definitely put this recipe into my Christmas cookie collection to make every year from now on.


Thank you Stephy for the fantastic recipe!

Tartine Bakery Shortbread (slightly adapted from Dessert Before Dinner)

1 c. + 2 Tbsp. unsalted butter, softened
1/4 tsp. salt (I increased this to 1/2 tsp.)
1 3/4 c. + 2 Tbsp. flour
1/3 c. sugar + more for sprinkling

Cream butter and sugar together.  Mix in the flour and salt until well combined.  Press the dough evenly into an 8x8 pan and sprinkle with more sugar.  Bake at 350F for 30-40 minutes until golden.  Slice while still warm.  Remove from pan once cookies are completely cooled.

If desired, dip the cookies into melted vanilla candy coating and sprinkle with crushed candy canes.  Let sit until the coating sets.   

Blogger:

Sunday, November 30, 2014

Triple Peanut Butter Cookies - SRC


Okay, so you probably realize that this is my second post for this month's Secret Recipe Club.  But, when I found out earlier tonight that we were going to have an orphan, I just couldn't stand by and do nothing.  Especially when it comes to a great blogger like Anna over at her site, Cheese with Noodles.

Do you know that Anna lives in Alaska?  I can't imagine how cold it must be there during the wintertime, but I'm sure that her house is nice and cozy as she spends time with her family, crochets, paints, and, of course, cooks delicious food.  I would have loved to make her Baked Mice (aka mini meatloaves made in the shape of mice - sooo cute).  Her Cinnamon Pancakes with Cream Cheese Icing also looked very tempting.  But, unfortunately, I had no milk in the house.  Plus, I also wanted to try and get the post up tonight.

So, I decided to go with her Triple Peanut Butter Cookies.  Besides, my sister has been begging me to make some cookies so this was a win-win situation.  I just happened to have all the ingredients to make them, though as far as the peanut butter cups go, I could only find six mini ones in my pantry.  Note to self:  keep the pantry stocked with Reeses peanut butter cups.  I added some chocolate chips to make up for the difference.

Anna described these cookies as "soft, thick, and super peanut buttery."  And, you know what?  She was 100% right!  You'll need a big glass of milk to go with these.  I am so glad that I had the chance to scope out Anna's blog and try her cookies.  My sister will thank me.  As for me, I say a big thank you to Anna!


Triple Peanut Butter Cookies (from Cheese with Noodles)

1/2 c. butter
1/2 c. brown sugar
1/4 c. sugar
1 egg
3/4 c. peanut butter
1 tsp. vanilla
1/2 tsp. baking soda
1 1/4 c. flour
3/4 c. peanut butter chips
3/4 c. chopped peanut butter cups

Cream the butter, peanut butter, and sugars.  Beat in the egg and vanilla.  Stir in the flour and baking soda until well combined.  Mix in the peanut butter chips and peanut butter cups.  Form the dough into small balls and bake at 350F for 8-10 minutes (mine took 12 minutes). 


Armenian Gingerbread Cake - SRC


'Tis the season!  I absolutely love this time of year when Christmastime is coming.  Time to decorate, spend time with family, and, if you're a fellow food blogger, then you know it's also time to start baking with flavors like peppermint and gingerbread.  And that's exactly the reason why I decided to choose Easily Good Eats' Armenian Gingerbread Cake for this month's Secret Recipe Club assignment.

In case you didn't know, the Secret Recipe Club is a super fun group.  Each month, we get assigned to someone else's blog, get to choose a recipe from it, and then post about it.  It's a great way to get to know some new foodie friends and try some amazing dishes.  Some of my absolute favorite, make again and again, recipes have come from this group.

For this month, I got assigned to Easily Good Eats.  I was amazed to find out that we both have something in common - i.e. a background in law.  Of course, she also enjoys cooking and baking for family and friends.  In browsing through her blog, I still have my eye on her Swedish Almond Cake, and her Thousand Layer Chocolate Cake

But, I am still incredibly glad that I chose the Armenian Gingerbread Cake.  The neat thing is that it actually has TWO layers to it.  The bottom layer is a crust of crumbs, made from the same cake mixture, and the other half is the cake itself.  In making it, I did make one mistake.  I think I got a little too excited and added the spices into the first half before I realized it.  So, I "fixed" the mistake by adding more spices into the top cake batter layer.

In my opinion, though, you can never have too much spice, so it actually all worked out because that crust was so incredibly good.  I could and did eat some of it all by itself.  Paired with the cake, you've got a combination that can't be beat.  I loved the contrast in textures and the taste was sweet and spicy, but not overpowering in the slightest.  I highly recommend waiting until the next day to eat this cake.  I know, I know, difficult.  But, the flavors will intensify if you let the cake sit for a while and it will be worth the wait.  Mmmm, it already smells and tastes like Christmas in my house!  

Armenian Gingerbread Cake (adapted from Easily Good Eats)

2 c. flour
2 tsp. baking powder
1/2 tsp. salt
1/2 c. butter
1 1/2 c. brown sugar
1 tsp. cinnamon
1 Tbsp. ginger powder 

1 egg
1 Tbsp. molasses (I used dark corn syrup)
3/4 c. milk (I used half Greek yogurt + half water)
1/2 tsp. baking soda
1/2 tsp. cinnamon
1/2 tsp. ginger powder

Combine the dry ingredients and cut in the butter with a pastry cutter until it has the texture of breadcrumbs.  Press half the mixture into a 9-inch round baking pan (about 2 1/2 cups of the mixture). 

Combine the egg, milk, corn syrup, baking soda, 1/2 tsp. cinnamon, and 1/2 tsp. ginger powder.  Add the wet to the dry ingredients and mix well.  Pour into the pan on top of the crust mixture and bake at 350F for 40-45 min., or until a toothpick comes out clean.


Sunday, November 2, 2014

Thai Turkey Meatballs - SRC


For this month's Secret Recipe Club, I was assigned to Andrea's blog, "Adventures in All Things Food."  In actuality, I imagine that Andrea's life itself is full of adventures.  Not only does she have three lovely children, but she's raising them on her a farm.  That means that she picks her own food, fresher than any supermarket's, preserves it, and provides her family with delicious things to last them the whole winter.  In addition, she loves the fact that she's able to also provide her children with "a memorable childhood."  While I'm sure it's a lot of work, from the look of the family pictures on her blog, it looks like they also make the work a lot of fun.

After looking through all her wonderful recipes, I originally wanted to make her Chocolate Brioche.  However, since I needed dinner more than I needed bread, I ended up making her Thai Grilled Chicken Patties.  I'm a big fan of Asian food and they sounded so flavorful what with the inclusion of jalapenos, ginger, garlic, and soy sauce.  Not to mention, Andrea added some grated zucchini and carrots which gives a nice boost of veggies to up the healthy factor.  I did make several changes to the recipe.  First, I used ground turkey instead of ground chicken since that's what was available in my supermarket.  Then, I formed the mixture into meatballs instead of patties.  Finally, since I don't have a grill, I just baked them in my oven.


I admit, that I did leave out the fish sauce in these since I just didn't have any and was reluctant to buy a bottle of it just for this recipe.  However, these meatballs were still really flavorful and I loved how the jalapeno and ginger shone in these.  Dipping them into sweet chili sauce as Andrea recommended was also a nice touch.  After enjoying these for dinner one night, I gladly ate the rest as leftovers the following night.

Thanks Andrea for your delicious recipe!       

Thai Inspired Chicken Meatballs (adapted from Adventures in All Things Food)

 1 1/2 lbs. ground turkey meat
1/2 white onion, chopped
2 garlic cloves, minced
1 c. zucchini, grated and drained
1 carrot, grated
1 Tbsp. fresh ginger, grated
1 tsp. lime zest
2 tsp. soy sauce
2 Tbsp. fish sauce (I omitted this)
1 large egg
1/2 c. panko breadcrumbs

sweet chili dipping sauce

Combine all the ingredients and mix well.  Form into meatballs and place on a baking sheet lined with foil.  Bake at 350F for 20-25 min. until cooked through.  Serve with sweet chili dipping sauce.


Wednesday, October 22, 2014

Nutella Scones


Several years ago, I got myself a copy of the book, Baked Explorations.  It had so many wonderful looking recipes in it, but for some reason or other, I never got around to making any of them.  So, there it sat, on my bookshelf, gathering dust.  Terrible, I know.  Till one lovely Sunday I started looking for a new recipe to make.  Somehow, the Internet didn't have what I was looking for and I decided that it was high time to go old school and open up a book. 

Originally, I though that I'd make some cookies.  But, then, my eyes landed on the recipe for scones.  Not just any scones, rich, chocolatey, scones with Nutella inside AND out.  Oh my gosh, did it ever look irresistible.  That was it!  I just had to have me some scones. 

The recipe is actually quite interesting in that it's almost a process similar to making cinnamon rolls.  You roll out the dough, spread the Nutella on it, then roll it up.  But, instead of cutting it like you would rolls, you proceed to mash it out into a disk again, then bake.  After letting them cool a bit, you then drizzle them with even more Nutella.  Definitely do not skip out on this step because you can never have too much Nutella flavor. 


Let me tell you, these scones were amazing!  The inside was like a fudgy brownie.  Then, you come upon a melty layer of Nutella in the middle of each bite.  They were moist, decadent, and delectable.  Perhaps a little indulgent for breakfast, but oh so worth it.  I wouldn't mind trying these again and filling them with peanut butter or raspberry jam or even marshmallow fluff.  Mmm, possibilities. 

Nutella Scones (from Baked Explorations)

2 c. all-purpose flour
1/4 c. sugar
1/4 c. unsweetened cocoa powder
1 Tbsp. baking powder
1/2 tsp. salt
6 Tbsp. cold, unsalted butter, cut into chunks
1 large egg
1/2 c. heavy cream
1/2 c. Nutella, divided

Combine the dry ingredients.  Cut the butter into the flour with a pastry cutter until the mixture is coarse.  Combine the cream with the egg and stir into the flour mixture until the dough just comes together.  Lay the dough on a piece of parchment paper and gently pat it out into a 6x12" rectangle.  Spread with 1/4 c. of the Nutella, then roll it up into a 6" long cylinder.  Flatten it again into a disk and score it into 6 or 8 wedges.  Bake on a parchment paper lined baking sheet at 375F for 18-20 minutes (mine took 24 minutes).  Let cool, then drizzle with 1/4 c. warmed Nutella.   


Monday, October 20, 2014

Browned Butter Pumpkin Pie Bars


Several years ago, I made these pumpkin pie bars and proclaimed them the best pumpkin brownie/blondie recipe I had ever tried.  They were moist and chock full of pumpkiny, spicy flavors.  I honestly did not think that they could get any better.  I was wrong.  Two words - browned butter.   

It's that whole adage . . . if I knew then what I know now.  Well, what I know now is how to brown butter and I also know that browned butter makes everything, and I mean everything, so much better.  The smell of it alone is like the most delightful perfume in your house.  Intoxicating.  They should make air fresheners and candles scented like browned butter.  I'm totally serious.


But, going back to these bars.  Browned butter immediately adds a depth of flavor that you simply won't get with regular melted butter.  It's true that it takes more time to make, a little more patience, and a bit of skill, but you really won't regret it.  Once you go browned, you'll never go back.  So it was with these pumpkin pie bars.  One taste of them and the difference was like night and day.  Oooohhh, I was in pumpkin heaven.  Correction - browned butter pumpkin heaven.  I eagerly shared these bars with friends of mine and they were just as over the moon about them as I was.  May I never forget this important lesson - browned butter = better!

Browned Butter Pumpkin Pie Bars (slightly adapted from Brown Eyed Baker)

2 c. flour
2 1/2 tsp. cinnamon
1 tsp. ginger
1/4 tsp. nutmeg
1/2 tsp. salt
1 c. butter, browned
2 c. brown sugar
2 eggs
2 tsp. vanilla
1 can (15 oz.) pumpkin puree

For the top:
2 Tbsp. sugar
1 tsp. cinnamon

Line a 9x13 pan with parchment paper.  Combine the dry ingredients and set aside.  Brown the butter until it smells nutty (do not discard the browned bits).  Let the browned butter cool slightly to room temperature.  Combine the butter with the sugar, then beat in the eggs and vanilla.  Mix in the pumpkin.  Stir in the dry ingredients until just combined.

Spread the batter evenly in the pan.  Sprinkle with the cinnamon sugar mixture and bake for 30 minutes, or until a toothpick comes out with moist crumbs on it.  Cool completely before cutting.


Friday, October 17, 2014

Spun Sugar Decorations


Several weeks from now, I will be making a cake for a special occasion.  Which means that for the past week, I've been trying to figure out how I intend to decorate it.  I admit that I could probably recycle one of my old designs and no one would really care.  But, the thing is that I enjoy pushing myself to learn new techniques and exercise my creative side, even if it means a little more time or effort involved.  As with anything, if you want to get better at it, you have to keep going higher (or something like that).

For some reason, the one thing that stuck out in my mind was sugar decorations.  You know, those little spun sugar nests or shards of sugar that look just like glass?  I thought it would be so neat to do something like that, especially since the cake I'll be making has caramel filling.  It would match so perfectly.

I found the recipe for the sugar syrup on the blog, Mimi's Kitchen, and it sounded so easy that I just knew I had to give it a try.  Mimi actually made sugar nests, which you do by drizzling the syrup onto a bowl.  But, I decided to go freestyle and just see where serendipity would take me.   

First, I did the easiest one - toffee shards, which I learned how to do from HERE.  Really, so simple.  Once you've made the burnt sugar, you just pour it, spread it out, let it cool, and break away.  After it was finished, it was a thing of beauty.  It looked just like broken glass and would add such an elegant accent to any cake.


I then made a second batch of sugar syrup and decided to just play around with it.  So, after letting it cool slightly in the pan, I took a fork and just started drizzling it back and forth on some parchment paper.


I just did some long streaky things, but you can let your imagination go wild and do whatever you want to do.  Swirls, amber drops (which will look like jewels), squigglies.  It will all look fantastic.  


Finally, with some of the remaining syrup (which I had to warm up again to soften), I went for the final look - sugary threads.  I know some people line up wooden spoons or broomstick handles or whatnot and then start flicking it back and forth, but I just didn't want to have to go through all that trouble, or risk getting the sugary stuff onto my floor.  So, I dipped the fork into the syrup, let a small bit drip down, and then I caught onto that strand and just started pulling as fast as I could, again and again.  You have to work fast or else it will all turn brittle before you've managed to even pull a couple strands.  Think Rumplestiltzkin spinning straw into gold, just backwards - you're turning the gold back into straw.  Ha!  As long as you don't touch the big glob of syrup on the fork, you don't have to worry about burning your fingers because the little strands cool as soon as they hit the air.  Once I had a mass of sugary threads, I sort of pushed them together with my fingers (gently, or the heat from your fingers will melt the threads) into a nest shape.  Cute!


If you've ever had doubts/fears about working with liquefied sugar, put them to rest.  It could not be any easier, I promise.  And, it was super quick too.  I absolutely love that I've now learned a new skill and I've also now got some great ideas that I may use for my cake.  Give it a try!  

Spun Sugar (Mimi's Kitchen)

1/2 c. sugar
1 Tbsp. water

Combine the sugar and water in a heavy-bottom saucepan.   Heat on medium-high heat until it turns amber colored.  Whatever you do, do not stir it.  If the sugar is too clumped up in one spot, just swirl the pan to distribute the mixture evenly.  Once the mixture is caramelized, remove it from the heat.

To make the toffee shards (from Taste)
Pour out the mixture onto a parchment paper lined baking sheet.  Spread it out evenly and quickly into a thin layer (depending on how thick you want the finished product to be).  Let it cool until it hardens.  Use the parchment paper to hold it and break it into shards.  If you use your hands, it will start to soften.

For the sugar squiggles:
After the caramelized mixture has cooled and thickened slightly in the pan (shouldn't take more than a minute or two), dip in a fork or wire whisk and drizzle the mixture back and forth onto a parchment paper lined baking sheet.  You'll know it's thick enough when you see the sticky strands trailing (not dripping) from the fork after you dip it.

For the sugar nest:
Dip the fork into the hot sugar mixture.  Let a small bit of it drip down and grab onto that small drip.  Start pulling as quickly as you can, back and forth, and the strands should appear.  Keep going until you have a sufficient amount of strands.  Repeat as needed.  Do NOT grab onto the hot glob of syrup itself or you will get burned.  Once you have a good amount of strands, use your fingers to gently mold it into a nested shape.
 
Note:  With the exception of the toffee shards, the other methods are my own.  
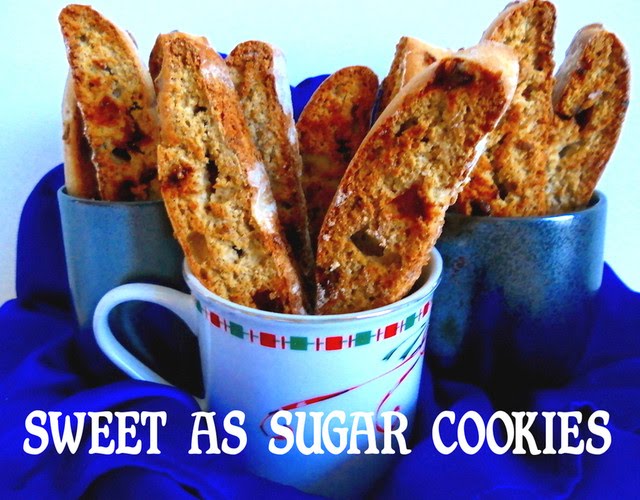


Wednesday, October 15, 2014

Mexican Chocolate Snickerdoodles


When I was assigned to Claire K Creations a week ago, I just couldn't resist making more than one recipe, especially when I saw all the yummy cookie recipes she had.  You know me and my sweet tooth.  And, while I'm not a chocoholic by any means, I am a spice fiend.  Which is why I just had to try the Mexican Chocolate Snickerdoodles. 


These cookies have cayenne pepper in them for a little kick.  Then, you roll them in cinnamon sugar to finish them off.  I just loved the combo of the chocolate and spices in these.  Not to mention, the texture was perfect - crisp on the outside and soft and cakey on the inside.  My sister raved about them.  I think the only change I'd make is to triple the amount of cayenne pepper in them since we couldn't really taste it, even though we also added a little cayenne pepper to the cinnamon-sugar rolling mix.  Although, that's just us.  We tend to have a high tolerance to heat and like to feel the burn in our mouths. 


I will say that I also gave these cookies to a friend of mine and the cookies were devoured in no time at all.  So, if you have a low tolerance to heat, you will love these cookies.  And, even if you have a high tolerance to heat, you will still love these cookies.  They're that 's good.  I'm definitely glad I tried more than one recipe from her blog. 

Mexican Chocolate Snickerdoodles (slightly adapted from Claire K Creations)

1/2 c. butter, softened
3/4 c. sugar
3/4 c. brown sugar, packed
1 tsp. cream of tartar
1/2 tsp. baking soda
1/2 tsp. salt
1/4 tsp. cayenne pepper
2 eggs
2 tsp. vanilla
1/2 c. unsweetened cocoa powder
2 1/4 c. all-purpose flour

For rolling:
1/4 c. sugar
2 tsp. cinnamon
pinch of cayenne pepper 

Cream the butter with the sugars.  Beat in the eggs and vanilla.  Add the dry ingredients and mix to combine well.  Chill the dough until firm, about 1 hour.  Roll the dough into small balls and roll in the cinnnamon-sugar-pepper mixture.  Place on a parchment paper lined baking sheet and bake at 350F for 10-12 minutes until cracked on top. 


Monday, October 13, 2014

Pumpkin Rocky Road Brownies


Originally, I was going to make Pumpkin S'mores Bars.  However, when I opened up the package of graham crackers, something seemed a little off.  They didn't smell way graham crackers usually smelled.  In fact, they kind of reminded me of the way a bottle of oil smells when it has gone bad.  Then, I looked at the date on the box - March 2014.  Okaaay, apparently graham crackers do not last forever.  Who knew?  So, there went the s'mores bars.

But, since I had the pumpkin and the marshmallows, I decided to go ahead and make something else - these Pumpkin Rocky Road Brownies.  I have had these on my pin board for the longest time.  It seems like I just never had all the ingredients at once.  Well, now was the time.  


I decided to alter them a bit.  Instead of putting all the marshmallows and chocolate chips into the batter, I saved half of them and added them onto the top during the last 10 minutes of baking.  Since the recipe calls for both pumpkin and spices, you would think that you would taste them in the brownies themselves.  But, actually, all you really taste is a deep chocolatiness.  I think the pumpkin is what makes these extra fudgy, gooey, and rich.  In fact, I'd recommend keeping them chilled, otherwise, they tend to fall apart a little.  Other than that, they were sensational.  I think you'll love them as much as I did.

Pumpkin Rocky Road Brownies (adapted from Flamingo Musings)

1/2 c. unsalted butter, melted
1 c. cocoa powder
1/2 c. pumpkin puree
1 c. natural cane sugar
1 large egg
1 tsp. vanilla
1/2 c. all-purpose flour
1/2 tsp. baking powder
1/4 tsp. baking soda
1 tsp. cinnamon
1/2 tsp. ginger powder
1/2 tsp. cardamom
1/2 tsp. salt
1 c. chocolate chips (divided)
2 1/4 c. mini marshmallows (divided)

Line a 9x9 pan with foil.  Melt the butter and stir in the cocoa powder.  Mix in the pumpkin puree and spices, then the sugar.  Beat in the egg and vanilla.  Sift in the flour, baking powder, baking soda, and salt.  Fold in 1/2 c. of chocolate chips and 1 c. of marshmallows.  Spread evenly into the pan and bake at 350F for 35 minutes.

Top with the rest of the mini marshmallows and chocolate chips and bake for 10 minutes more.  The brownies will be gooey, so be sure to let cool completely.  I also recommend chilling them in the freezer for easier cutting.  It's also easiest is you dip a knife in warm water before each cut. 


Sunday, October 5, 2014

Olive Bread - Secret Recipe Club


I confess, I may have gone a little overboard with this month's Secret Recipe Club assignment.  Instead of making one recipe, I tried EIGHT!!!  But, seriously, if you were to go and browse Claire's blog, Claire K Creations, you would have done the same.  She has so many amazing recipes that five is barely scraping the surface of all the yummy things I wanted to make.  Definitely go and check out some of these other recipes on my to-do list:  Dill Roasted Carrots, Greek Almond Crescent Biscuits, and Belgium Biscuits.  You'll be glad you did.  Just make sure to set aside an hour or two if you do because once you start looking at her blog, you won't want to stop.

Now, about Claire herself.  Did you know she lives in Australia?  So cool!  She started her blog to share her love of food with others.  And share it she does!  You'll find recipes that reflect her country's unique foodie culture, such as Anzac biscuits and pavlovas.  But, she doesn't only have Australian recipes, she makes food from all over the world.  I felt like I was taking a little trip just browsing through it all.

Still, I had to pick one to share today.  So, while I also ended up making her Condensed Milk Chocolate Chip Cookies, Orange Cookies, Chocolate Spiced Cookies, Mexican Chocolate Snickerdoodles, and Hokey Pokey Biscuits, and loved them all, I might add, I decided to share the Olive Bread to start.

You know from my blog's title that I have a major sweet tooth.  But, bread is and always will be my first love.  I love all the types, especially the artisan breads and one that's always caught my eye in supermarkets is Olive Bread.  I've wanted to try it for the longest time, but it's so expensive for just one little loaf that I've simply resisted.  Then, I found Claire's recipe.  It looked so simple and would cost so much less to make it myself that I just knew I had to try it.

The interesting thing about this bread is that you have to let it rise three times instead of the usual two.  But, there must be some sort of magic about the third rise because I came out with a wonderfully soft, fluffy loaf.  The only change I made was to use all-purpose flour since I had run out of bread flour.  The salty bits of olive gave just the right amount of flavor to each bite and every mouthful was heavenly.  I savored every piece of this bread and just wanted to keep on eating it.  It would surely make some awesome sandwiches, but for now, I just enjoyed eating it on its own.  I know it's one that I'll make again and again, and next time I'll even try it with the bread flour.

Thanks Claire for this super fantastic bread!

Olive Bread (slightly adapted from Claire K Creations)

3 c. bread flour (I used all-purpose flour)
2 tsp. active dry yeast (I used 2 1/2 tsp.)
2 Tbsp. sugar
1 tsp. salt 
1/2 c. chopped olives (I used Kalamata olives)
 3 Tbsp. olive oil
1 1/4 c. warm water (110F)


Combine the yeast, warm water, and a pinch of sugar and let stand until foamy, about 5 minutes.  Add in the sugar and olive oil.  Then, add in the flour, salt and chopped olives.  Knead the dough on a well-floured surface until smooth and elastic.  Put the dough into a well-greased bowl, cover with plastic wrap and a towel, and let rise 45 minutes, or until doubled in size. 

After the first rise, punch it down and knead again until smooth, about 5-10 minutes.  Let rise again until doubled in size, about 30 minutes.  After the second rise, form it into a ball and turn it out, seam-side up, onto a well-floured towel.  Dust the top with a bit of flour and let rise again, about 20 minutes, until doubled in size.

Prepare your oven by putting a pan of water onto the bottom rack and preheating to 410F.  Once the dough has risen a third time, turn it out, seam-side down, onto a parchment-paper lined baking sheet that has been sprinkled with cornmeal.  Bake for 15 minutes at 410F.  Reduce the heat to 340F and continue baking for 30 minutes, or till golden.   


Sunday, September 28, 2014

Levain Bakery Copycat Chocolate Chip Cookies


Last month, I finally fulfilled my long-time dream of traveling to New York City.  Talk about a foodie's paradise!  I got to eat at Bar Boulud, Cafe Boulud, Eataly, and Schnipper's Deli, all of which were absolutely fantastic.  But, if you've been following my blog, you know I'm all about the sweets.  And from hearing what other people have said about NYC, that meant it was time to go hunt down those chocolate chip cookies, namely Jacques Torres, Levain Bakery, and Thomas Keller.

To my disappointment, however, I found out that Levain Bakery's famous chocolate chip cookie is made with walnuts (I'm allergic) and they don't make a nut-free version.  My mom who came with me, on the other hand, has no such problem, and she gladly devoured the cookie we bought from there and proclaimed it the best out of the three places above.  She then went back into the bakery and promptly bought five more to take home.  Ha!

Cookie from Levain Bakery
Well, this just wouldn't do.  The "best" cookie in NYC and I can't even taste it for myself?  Oh no!  So, I had no choice but to hunt down a copycat recipe and make them myself, this time with no walnuts.  I came across this recipe on the blog, Parsley Sage & Sweet.  Since a lot of other bloggers commented on how close this one was to the real thing, I figured I couldn't go wrong.

The only thing I changed was to add 1 1/2 tsp. of vanilla.  Whether that made the cookie taste less Levain-esque, I don't know, but I simply have to have vanilla in my chocolate chip cookies.  I then followed a couple of recommendations on her blog and added 1 Tbsp. cornstarch and also froze the large cookie dough balls before baking them.  The result?  I got ooey, gooey centers in my cookies surrounded by a lovely crispy shell.  Then, there was all that chocolatey goodness melting in the middle.  Oooohhh!  I can't even describe how good that was.

My sister, who sampled one of the actual Levain cookies my mom brought back, took a taste too.  Unfortunately, she couldn't for the life of her remember what the original one tasted like, so she couldn't say whether or not this one came close.  And, since I hadn't tasted it either, I guess we'll never know.  But, what I do know was that these cookies tasted awesome!  My sister also loved the thick, chewy texture of the cookies.  She then proceeded to take a lot of them home with her to eat later on.  This one is truly a keeper!

 Levain Bakery Copycat Chocolate Chip Cookies (adapted from Parsley Sage & Sweet)

1 c. 'cold and cubed' unsalted butter (I used salted)
3/4 c. sugar
3/4 c. brown sugar
2 eggs
1 1/2 tsp. vanilla (I added this)
3 1/4 c. all-purpose flour
1 Tbsp. cornstarch
3/4 tsp. kosher salt (I omitted this)
3/4 tsp. baking powder
1/4 tsp. baking soda
1 c. semisweet chocolate chips
1 c. milk chocolate chips

Cream the butter and sugars until light and fluffy.  Beat in the eggs and vanilla.  Stir in the flour, cornstarch, salt (if using), baking powder, and baking soda until combined.  Mix in the chocolate chips.

Form into large balls, about 4 oz. each.  (I did about three of my cookies like this and made the rest of them into small, regular-sized cookies).  Freeze the dough balls for at least 30 minutes.

Preheat the oven to 350F.  Bake the large cookie dough balls for 15-20 minutes (mine took 23 minutes).  Bake the smaller, regular-sized dough balls for 12 minutes.  

Sunday, August 31, 2014

Pineapple Chicken Quinoa Pilaf


For this month's Secret Recipe Club, I was assigned to Chef John and Anne's blog, The Saturday Evening Pot.  Seeing as how Chef John graduated in culinary arts, you can bet that you're going to find some absolutely delicious recipes throughout their blog.  And their two children get to be the taste testers.  Lucky!

In going through their blog, I immediately knew I had found THE recipe to make when I saw their Hawaiian Chicken and Pineapple Rice Pilaf.  I did make a few changes to it.  I used olive oil instead of the bacon, left out the shallot, used quinoa instead of rice, and added some black pepper and red pepper chili flakes to taste.

The result was one yummy dinner indeed!  Mine didn't absorb all the liquid like it was supposed to, but I'm pretty sure that had a lot to do with the fact that I used quinoa instead of rice.  Nevertheless, it was wonderfully flavorful and I found myself going back for seconds.

Thanks Chef John and Anne for your fantastic creation!

Hawaiian Chicken and Pineapple Pilaf (adapted from The Saturday Evening Pot)

15 oz. can of pineapple chunks, juice reserved and chunks cut in half
1 c. smoked almonds, coarsely chopped (I used sliced almonds)
1 1/2 c. uncooked white quinoa
dash of allspice
1 lb. chicken tenders
3 c. chicken broth
1 c. pineapple juice
black pepper and red pepper chili flakes (to taste)

Form a layer of chicken in a 9x13 pan.  

Put 1 Tbsp. of olive oil in a non-stick skillet and heat over medium-low heat.  Add the pineapple and almonds and cook till warmed through.  Stir in the quinoa to coat completely.  Sprinkle with allspice and stir again.  Pour the pilaf mixture over the chicken, then add the combined mixture of chicken broth and pineapple juice.  

Cover with foil then bake at 350F for 1- 1 1/2 hours till all liquid is absorbed and quinoa is completely cooked.  Before serving, sprinkle with black pepper and red pepper chili flakes to taste. 


Monday, August 18, 2014

Browned Butter Chocolate Chip Muffins with Toasted Coconut and Almonds


I was recently asked by Rizzi from The New York  Baking Company if I would like to review some silicone baking cups.  Of course, I said yes!!!  Too well I remembered days of having to buy paper muffin cups again and again.  Or, if I didn't use the cups, I'd have to grease my pans and hope that the muffins would leave intact.  But, I'd heard a lot of good things about silicone products, how they make baking and cleanup so easy, how you never have to worry about greasing anything ever again.  I couldn't wait to put them to the test.   

As you can see, the baking cups come in beautiful bright colors.

I decided to make one of my favorite recipes for chocolate chip muffins from King Arthur Flour.  But, this time, I wanted to change things up a little.  So, I used browned butter, subbed in some brown sugar, and topped them off with toasted coconut and almonds.  Into the gorgeous, brightly colored silicone cups went the batter and I sat back to wait for them to bake up.

With eager hands, I took them out of the oven, let them cool, and then set about to remove the muffin from the cup.  1-2-3, out it came!  Not a bit was left on the cups and the muffins were perfectly intact.  Cleanup was a breeze too.  I was super happy.  You can bet that I'll be using these again and again!   


As for the muffins themselves, I loved how the toasted coconut and almonds gave some crunchiness to each bite.  The rest of it was soft, moist, and yummy!  If you'd like to get your hands on these cups yourself, just follow the link above. 

Thanks New York Baking Company for this great opportunity!    
 
Product Name: Silicone Baking Cups
Brand: The New York Baking Company
RRP: $8.95
Material: BPA free silicone
Browned Butter Chocolate Chip Muffins with Toasted Coconut and Almonds (adapted from King Arthur Flour)

1/2 c. browned butter
3/4 c. sugar
1/4 c. brown sugar
2 tsp. baking powder
1/2 tsp. salt
1 tsp. vanilla
2 eggs
1/2 c. milk (I used 1/4 c. Greek yogurt + 1/4 c. water)
2 c. all-purpose flour
1 c. semisweet chocolate chips
3/4 c. toasted coconut
sliced almonds

Line the muffin with with the silicone baking cups or paper liners.  Combine the browned butter with the sugars.  Beat in the eggs and vanilla.  Mix in the milk.  Stir in the baking powder, salt, and flour until just combined.  Fold in the chocolate chips. 

Divide the batter into the muffin cups.  Top each with 1 Tbsp. toasted coconut and some sliced almonds.  Bake at 350F for 30 minutes, or until a toothpick comes out clean when inserted in the center.  

Makes 12-14 muffins

Disclaimer:  I was not paid for this review.  All opinions in it are solely mine.  

Wednesday, August 13, 2014

Almond Biscotti


So, like I mentioned, I had a major cookie craving this past weekend.  As a result, one batch of cookies was just not enough.  No, I had to bake TWO different types.  But, since there must be a balance in all things, I decided that my second batch would be a little lighter, a little healthier, not quite as indulgent, but still every bit as delicious.  Which meant it was time for biscotti! 

I love biscotti.  There's just something about nibbling on those crunchy bites that fills me with delight.  Consequently, I've made many types through the years - cranberry, pumpkin, banana, gingerbread, chocolate, cinnamon . . . you get the point.  But, I've never made the quintessential almond biscotti.  It probably has something to do with the fact that I've never been a big fan of almond flavor until recently.  Hmm, must be growing up. 

Anyway, having formed a taste for it, and owing to the fact that I had a huge bag of sliced almonds I needed to use up, the time had come to try them out.  I decided to alter one of my favorite basic biscotti recipes by using almond flavoring in place of the vanilla and adding sliced almonds instead of the typical cranberries and pistachios.  It definitely worked out!  The biscotti had that lovely almond flavor to them, without it being overpowering, and tasted like those Chinese almond cookies.  My family said it's just as good as the ones from Starbucks.  Now that's a compliment! 

Normally, whenever I bake a batch of cookies, I always take some to work and share them with my co-workers.  But, I think this time, I'm just going to keep the biscotti to myself.  Don't judge me.  :)  You know you'd want to do the same. 

Almond Biscotti (adapted from Martha Stewart)

 3 c. all-purpose flour
2 tsp. baking powder
1/4 tsp. salt
4 Tbsp. unsalted butter, room temperature
3/4 c. sugar
3 eggs 
2 tsp. almond extract
1/2 c. sliced almonds

Cream the butter and sugar.  Beat in the eggs and almond extract.  Mix in the flour, baking powder, and salt until well incorporated.  Fold in the sliced almonds.  

Dust a baking sheet with flour.  Divide the dough in half and form each half into a 16x2 inch log on the sheet.  Flatten slightly.  Bake at 350F for 25 minutes.  Slice into 1/2" thick slices with a serrated knife and place cut side down on the sheet.  Bake again for 10 minutes, flip the slices over, and bake 10 minutes more.  Let cool completely.  


Monday, August 11, 2014

Brown Butter Chocolate Chip Cookies


It was a Sunday afternoon and I was craving cookies.  I'm sure you know the feeling.  I mentioned this to one of my family members and was asked, "Then, why don't you go buy some?"  Egads!  The very thought!  No, no, a thousand times no!  When I say I'm craving cookies, I don't mean that I'm craving some mass-produced, trans-fat loaded, disc with ingredients I can't even pronounce.  I want fresh, hot-out-of-the-oven, buttery, chewy, flavor loaded mouthfuls of delight.  Now that's a cookie! 

So, now that we have that out of the way, I went looking for the perfect recipe to satisfy my desires.  I was in the mood for chocolate chip and just happened to come across a link to these Brown Butter Chocolate Chip Cookies, created by Joy the Baker.  Once I saw them, I couldn't resist.  Must . . . make . . . now!!!  I made a few changes to the recipe, such as leaving out the molasses (I didn't have any), omitting the pecans (allergies), and using milk chocolate chips (since I didn't have semisweet).  I also ended up chilling the dough for two hours, instead of only 30 minutes, but that was only because I was too lazy to bake them at the 30-minute mark.   


These cookies were fantastic!  I loved that they held their shape in my oven and didn't flatten out.  The result was crispy on the outside, chewiness in the middle, and that lovely caramelly flavor from the browned butter.  Although they still don't top my favorite chocolate chip cookie recipe HERE, I have to admit that they are delicious indeed.  Craving satisfied! 

Brown Butter Chocolate Chip Cookies (slightly adapted from Joy the Baker)

2 1/4 cups all-purpose flour
1 teaspoon salt (I decreased this to 3/4 tsp.)
1 teaspoon baking soda
1 cup (2 sticks) unsalted butter, softened to room temperature
1 cup packed light brown sugar
2 teaspoons pure vanilla extract
1 teaspoon molasses (I omitted this)
1/2 cup granulated sugar
1 large egg
1 large egg yolk
1 cup bittersweet chocolate chips (I used milk chocolate chips)

Brown 1/2 cup of the butter and then let cool for 20 minutes.  Cream the brown sugar with the remaining 1/2 cup of butter until light and fluffy.  Add the vanilla and mix well.  Beat in the browned butter (brown bits and all) and granulated sugar.  Beat in the egg and egg yolk.  Mix in the flour, baking soda, and salt, until well incorporated, then mix in the chocolate chips.  Wrap the dough in waxed paper and chill for at least 30 minutes. 

Form the dough into small balls and bake at 350F for 12-14 minutes (I baked them for 13 minutes, then left them in the turned-off oven for 1 minute more).  Let cool on baking sheet for a few minutes before cooling completely or eating.   

Sunday, August 3, 2014

Pretzel Nutella Swirl Cookies


Believe it or not, due to a change in circumstances, I once again found myself assigned to the lovely Katrina's blog, Baking and Boys, for this month's Secret Recipe Club.  You mean I get another chance to peruse her never-ending list of ultimate, beyond your imagination, mouthwatering sweets?  You don't have to ask me twice!  Since this is the third time I've had her blog, you probably think that there isn't much more I can say about her, but I think I can come up with a few more tidbits. 

First of all, she has an eagle eye when it comes to finding the newest candy/cookie/etc. that's out on the market.  Whether it be those birthday cake M&Ms or the Coconut Fudge Oreos, you can bet she's already found it AND created some amazing way to use them to kick up a recipe.  As a result, I've made a lot of Target/Walmart runs in the past years just so I could see the deliciousness that she was talking about.

Secondly, she is the Rice Krispie Treat queen!  I kid you not.  I counted no less than 20 different recipes for rice krispie treats on her blog.  They are all awesome looking.  After seeing them, you may never go back to the plain ones again.  Hint:  this is where a lot of those new-fangled Oreos and M&Ms went.

After looking through numerous recipes for cakes, cookies, brownies, and other yummy treats, I finally narrowed my selection down to these Pretzel Nutella Chunk Cookies.  Salty and sweet?  I couldn't resist.  the neat thing about this recipe is that you make the "chunks" yourself by freezing the Nutella and then chopping it up to put into the cookies.  I did just that and had some lovely looking chunks, for about 5 minutes.  It was kind of a warm, humid day when I made the cookies, so the moment I added the cold chunks into the dough, they immediately melted and I got half chunks and half swirls.  Although, in my opinion, that wasn't really a bad thing.  The Nutella flavor became more prominent and the cookies themselves had a pretty marbled look.  All in all, these cookies were absolutely delish!  I'm glad the recipe only makes a small batch because otherwise I wouldn't be able to stop myself from eating even more of them.  


Thanks Katrina for your amazing ideas!  

Pretzel Nutella Swirl Cookies (slightly adapted from Baking and Boys)

1/2 cup plus 1/2 tablespoon cake flour + 1/4 cup plus 3 tablespoons bread flour (I used all-purpose flour)
1/4 teaspoon baking soda
1/2 teaspoon baking powder
1/2 teaspoon coarse salt
5 tablespoons (2  1/2 oz.) unsalted butter, softened
1/4 cup plus 1/2 tablespoon granulated sugar
1/4 cup plus 1 tablespoon packed brown sugar
1/2 a large egg
1/2 teaspoon vanilla extract
1/2 cup pretzel balls (I used broken pretzels)
1/2 cup (4 ounces) Nutella chunks**

** To make the Nutella chunks:  Spread 1/2 c. Nutella on a parchment-paper lined baking sheet, about 1/8-1/4 inch thick.  Freeze for at least an hour until set.  Cut into chunks and keep chilled until ready to use. 

Cream the butter and sugars together.  Add the egg and vanilla and mix well.  Add the flour, baking soda, baking powder, and salt and mix until just combined.  Stir the pretzels and Nutella chunks carefully into the dough.  Scoop the dough into small balls and bake for 10-12 min. at 350F.  Let sit on baking sheet for a couple minutes, then place on a wire rack to cool. 
    

Sunday, July 6, 2014

Basil Polenta with Roasted Spinach and Tomatoes - SRC


For this month's Secret Recipe Club, I received Elizabeth's blog, Food Ramblings.  Elizabeth loves to make recipes that are healthy, which means that her blog is right up my alley.  I love to cook with vegetables and whole grains and her blog is full of recipes like that.  And, if you think that healthy equals boring or tasteless, she will prove you wrong.  I actually couldn't decide between several of her recipes, so I made three, though I didn't get the chance to photograph the other two.  First, I tried her Quinoa Spinach Mac n' Cheese.  Instead of using noodles, it uses quinoa.  Fantastic!  It was such a great change.  Then, I saw her Basil Polenta with Roasted Spinach and Tomatoes.  The pictures alone were enough to convince me that I had to make it too.

The whole dish comes together in less than an hour.  And it is just beautiful with all those vibrant and contrasting colors.  Even better is that it tastes every bit as good as it looks.  I love that I found a new vegetarian recipe to share with my family.  Thanks Elizabeth for your yummy recipes!   

Basil Polenta with Roasted Spinach and Tomatoes (adapted from Food Ramblings)

2 c. grape tomatoes
2 c. fresh spinach
3 cloves garlic, minced
1 Tbsp. olive oil

instant polenta
2 tsp. dried basil (I used dried basil instead of fresh)
1/2 c. grated parmesan cheese (I added this)
salt, black pepper

Preheat the oven to 400F.  Cut the tomatoes in half and lay them out with the spinach and garlic on a baking sheet.  Lightly drizzle everything with the olive oil and add salt and pepper to taste.  Bake for 20 min.

Prepare the polenta, as directed, making enough for 2-4 servings.  (I used half water and half skim milk).  Remove from the heat and add the parmesan cheese.  Season to taste.  Top the polenta with your roasted veggies.


Sunday, June 1, 2014

Spicy Gingerbread - Secret Recipe Club


 For this month's Secret Recipe Club, I was assigned to Nicole's blog, Daily Dish Recipes.  Do you know that Nicole has a houseful of FIVE teenagers?  That's a lot of hungry people to cook for.  Luckily, from the looks of the recipes on her blog, she is a fantastic cook and baker.  I still want to make her Skinny Baked Beignets, and her Spiced Gingerbread Gooey Butter Cake.  But, for now, I settled for the Spicy Gingerbread Loaves.  I absolutely love gingerbread with that lovely dark, spicy flavor.  I think I may love it even more than chocolate (egads!).  So, I absolutely had to choose this for my assignment.

This gingerbread may look simple, but sometimes simple things are the best.  The complexity comes in the taste, where you get a harmony of spicy flavors all mingling on your tongue.  I could eat piece after piece of this and be perfectly happy.  Since I did not alter anything from the recipe, I'll link you over to her blog so you can check it out HERE.   

Thank you Nicole for one yummy recipe!