Sunday, May 3, 2015
Cinnamon Swirl Pumpkin Banana Bread
For this month's Secret Recipe Club, I was assigned to Danielle's blog, Mostly Food and Crafts. She is a stay at home mother to two lovely children. And, from the looks of her blog, she is one amazing mother too. There are so many posts about recipes and crafts that she made, not by herself, but with her children. I can only imagine how much fun they must have together and how much they are learning every day. And, since Danielle herself is a fantastic cook and crafter, you know that they're learning from the best!
While browsing through her blog, I came across some very yummy recipes that I wanted to try: Toffee Squares (which I still intend to make this week), Rosemary Sriracha Chicken (oh yes!), and her Swirled Pumpkin and Chocolate Cheesecake (decadent and so pretty). But, the recipe I decided to go with was her Cinnamon Swirl Pumpkin Banana Bread. It seemed to combine all of my favorites - banana bread, pumpkin bread, and cinnamon bread, all in one. Now how could I resist that?
The bread was super moist and flavorful. And it was interesting because sometimes you would take a bite and taste more banana, and other times you would take a bite and taste more pumpkin. Of course, all the bites were super delicious and that cinnamon swirl completed the trifecta. I thoroughly enjoyed it!
Cinnamon Swirl Pumpkin Banana Bread (adapted from Mostly Food and Crafts)
2 c. flour
3/4 tsp. baking soda
1/2 tsp. salt
1 tsp. pumpkin pie spice (I increased this to 1 1/2 tsp.)
3/4 c. pumpkin puree
2 ripe bananas, mashed
4 Tbsp. unsalted butter, melted
1/3 c. plain Greek yogurt
2 eggs
1 tsp. vanilla
For the swirl:
1/4 c. sugar
1 tsp. cinnamon (I increased this to 1 Tbsp.)
Combine the bananas and pumpkin and mix well. Add in the brown sugar, butter, and yogurt, then beat in the eggs and vanilla. Combine the dry ingredients and add to the wet ingredients, mixing till just combined. Grease 4 mini loaf pans. Fill each pan with 1/2 c. batter. Sprinkle with 1 Tbsp. of the cinnamon-sugar mixture. Top off with 1/2 c. of batter and spread evenly. Sprinkle with more cinnamon sugar. Bake at 350F for 40-45 minutes, or until a toothpick comes out clean.
Wednesday, October 22, 2014
Nutella Scones
Several years ago, I got myself a copy of the book, Baked Explorations. It had so many wonderful looking recipes in it, but for some reason or other, I never got around to making any of them. So, there it sat, on my bookshelf, gathering dust. Terrible, I know. Till one lovely Sunday I started looking for a new recipe to make. Somehow, the Internet didn't have what I was looking for and I decided that it was high time to go old school and open up a book.
Originally, I though that I'd make some cookies. But, then, my eyes landed on the recipe for scones. Not just any scones, rich, chocolatey, scones with Nutella inside AND out. Oh my gosh, did it ever look irresistible. That was it! I just had to have me some scones.
The recipe is actually quite interesting in that it's almost a process similar to making cinnamon rolls. You roll out the dough, spread the Nutella on it, then roll it up. But, instead of cutting it like you would rolls, you proceed to mash it out into a disk again, then bake. After letting them cool a bit, you then drizzle them with even more Nutella. Definitely do not skip out on this step because you can never have too much Nutella flavor.
Let me tell you, these scones were amazing! The inside was like a fudgy brownie. Then, you come upon a melty layer of Nutella in the middle of each bite. They were moist, decadent, and delectable. Perhaps a little indulgent for breakfast, but oh so worth it. I wouldn't mind trying these again and filling them with peanut butter or raspberry jam or even marshmallow fluff. Mmm, possibilities.
Nutella Scones (from Baked Explorations)
2 c. all-purpose flour
1/4 c. sugar
1/4 c. unsweetened cocoa powder
1 Tbsp. baking powder
1/2 tsp. salt
6 Tbsp. cold, unsalted butter, cut into chunks
1 large egg
1/2 c. heavy cream
1/2 c. Nutella, divided
Combine the dry ingredients. Cut the butter into the flour with a pastry cutter until the mixture is coarse. Combine the cream with the egg and stir into the flour mixture until the dough just comes together. Lay the dough on a piece of parchment paper and gently pat it out into a 6x12" rectangle. Spread with 1/4 c. of the Nutella, then roll it up into a 6" long cylinder. Flatten it again into a disk and score it into 6 or 8 wedges. Bake on a parchment paper lined baking sheet at 375F for 18-20 minutes (mine took 24 minutes). Let cool, then drizzle with 1/4 c. warmed Nutella.
Sunday, October 5, 2014
Olive Bread - Secret Recipe Club
I confess, I may have gone a little overboard with this month's Secret Recipe Club assignment. Instead of making one recipe, I tried EIGHT!!! But, seriously, if you were to go and browse Claire's blog, Claire K Creations, you would have done the same. She has so many amazing recipes that five is barely scraping the surface of all the yummy things I wanted to make. Definitely go and check out some of these other recipes on my to-do list: Dill Roasted Carrots, Greek Almond Crescent Biscuits, and Belgium Biscuits. You'll be glad you did. Just make sure to set aside an hour or two if you do because once you start looking at her blog, you won't want to stop.
Now, about Claire herself. Did you know she lives in Australia? So cool! She started her blog to share her love of food with others. And share it she does! You'll find recipes that reflect her country's unique foodie culture, such as Anzac biscuits and pavlovas. But, she doesn't only have Australian recipes, she makes food from all over the world. I felt like I was taking a little trip just browsing through it all.
Still, I had to pick one to share today. So, while I also ended up making her Condensed Milk Chocolate Chip Cookies, Orange Cookies, Chocolate Spiced Cookies, Mexican Chocolate Snickerdoodles, and Hokey Pokey Biscuits, and loved them all, I might add, I decided to share the Olive Bread to start.
You know from my blog's title that I have a major sweet tooth. But, bread is and always will be my first love. I love all the types, especially the artisan breads and one that's always caught my eye in supermarkets is Olive Bread. I've wanted to try it for the longest time, but it's so expensive for just one little loaf that I've simply resisted. Then, I found Claire's recipe. It looked so simple and would cost so much less to make it myself that I just knew I had to try it.
The interesting thing about this bread is that you have to let it rise three times instead of the usual two. But, there must be some sort of magic about the third rise because I came out with a wonderfully soft, fluffy loaf. The only change I made was to use all-purpose flour since I had run out of bread flour. The salty bits of olive gave just the right amount of flavor to each bite and every mouthful was heavenly. I savored every piece of this bread and just wanted to keep on eating it. It would surely make some awesome sandwiches, but for now, I just enjoyed eating it on its own. I know it's one that I'll make again and again, and next time I'll even try it with the bread flour.
Thanks Claire for this super fantastic bread!
Olive Bread (slightly adapted from Claire K Creations)
3 c. bread flour (I used all-purpose flour)
2 tsp. active dry yeast (I used 2 1/2 tsp.)
2 Tbsp. sugar
1 tsp. salt
1/2 c. chopped olives (I used Kalamata olives)
3 Tbsp. olive oil
1 1/4 c. warm water (110F)
Combine the yeast, warm water, and a pinch of sugar and let stand until foamy, about 5 minutes. Add in the sugar and olive oil. Then, add in the flour, salt and chopped olives. Knead the dough on a well-floured surface until smooth and elastic. Put the dough into a well-greased bowl, cover with plastic wrap and a towel, and let rise 45 minutes, or until doubled in size.
After the first rise, punch it down and knead again until smooth, about 5-10 minutes. Let rise again until doubled in size, about 30 minutes. After the second rise, form it into a ball and turn it out, seam-side up, onto a well-floured towel. Dust the top with a bit of flour and let rise again, about 20 minutes, until doubled in size.
Prepare your oven by putting a pan of water onto the bottom rack and preheating to 410F. Once the dough has risen a third time, turn it out, seam-side down, onto a parchment-paper lined baking sheet that has been sprinkled with cornmeal. Bake for 15 minutes at 410F. Reduce the heat to 340F and continue baking for 30 minutes, or till golden.
Sunday, March 9, 2014
Lime Cranberry Scones - SRC
This month, I was assigned to The Life & Loves of Grumpy's Honeybunch for Secret Recipe Club. She said that she started her blog as a way to keep a record that would provide her family with wonderful memories of her. That is such a neat idea and I'm sure that her future grandchildren will love sitting by her side as they read through the posts, laugh and smile, marvel at the delicious pictures, and then promptly beg their grandmother to run to the kitchen and make one of the recipes so they can try it.
Her love for her family shines through every post she writes and it is especially evident when she says that she made a certain dish because it's someone's favorite (i.e. Grumpy). I have no doubt that Grumpy must think his wife is the best cook/baker in the world. Definitely a lucky man.
Oh, did I mention her food? I couldn't decide what to make at first: Ginger Cookies, Mapo Tofu, Dinner Rolls, or Blueberry Scones. I finally decided on the scones because I can't resist anything with carbs, and unlike the Dinner Rolls, I wouldn't have to worry about getting dough to rise in the cold weather here. That said, I still want to make the rest of those things on my list.
I decided to change things up a little. Since I had cranberries and limes in my fridge, I decided to use that instead of the blueberries and lemon. I also added some lime zest to the dough itself. In addition, since I didn't have heavy cream, I substituted a 50/50 mixture of yogurt and water (Shelby herself used a 50/50 mixture of 2% milk and vanilla creamer).
The scones came out soft and fluffy and moist, like pillowy biscuits. And, because the scones aren't sweet by themselves, the glaze was perfect for adding that sugary touch, as well as adding a double dose of lime flavor. All in all, these would make for a delicious breakfast, and without the heavy cream, they also won't wreck your waistline. That gives them an "A" in my book.
Thanks Shelby for your lovely recipe.
Cranberry Lime Scones (adapted from Life & Times of Grumpy's Honeybunch)
1/2 teaspoon salt
2 tablespoons sugar (I increased this to 3 Tbsp.)
5 tablespoons cold unsalted butter, cut in chunks
1/2 c. plain yogurt mixed with 1/2 c. water
1 heaping cup cranberries (I used frozen)
2 Tbsp. lime zest
Combine the dry ingredients and cut in the butter with a pastry cutter until the mixture is pea-sized. Form a well in the center of the mixture and add the wet ingredients. Mix until it just starts to come together. Fold the cranberries into the dough.
Sunday, October 6, 2013
Blueberry Muffins
For this month's SRC, I was assigned to Ewa's blog, Delishhh, which is the perfect word for it since everything she makes is sensational. I especially loved looking at her Swedish recipes and still want to try making her Semla one day. But, for now, I decided to make her blueberry muffins.
Not too long ago, I tried a different blueberry muffin recipe from another site and was extremely disappointed with how they came out. Those muffins were way too dense.
Ewa's muffins, on the other hand, were sweet, fluffy, and bursting with juiciness from the blueberries in every bite. They were delicious right out of the oven and just as delicious when they cooled. I would definitely make these again, and again, and again. Right now though, I'm off to go get some butter so that I can go and eat up the rest of the muffins in my kitchen.
Thanks Ewa. Your muffins made for one yummy Sunday morning.
Blueberry Muffins (adapted from Delishhh)
2 cups all-purpose flour
1 tbsp baking powder
½ tsp salt
1 egg
1/2 tsp grated lemon zest (I omitted this)
1 cup granulated sugar
4 tbsp (2 ounces) unsalted butter, melted and cooled slightly
1¼ cups sour cream, plain yogurt or ricotta (I used 1 c. fat-free Greek yogurt + 1/4 c. water)
1½ cups fresh blueberries (I used frozen blueberries)
Preheat the oven to 350 degrees F. Grease a standard 12-cup muffin tin (or line with paper liners) and set aside.
Whisk the flour, baking powder and salt in a medium bowl untill combined. Whisk the egg in a separate medium bowl until well-combined and light-colored, about 20 seconds. Add the sugar and whisk vigorously until thick, about 30 seconds. Add the melted butter in 2 or 3 additions, whisking to combine after each addition. Add the sour cream/yogurt or ricotta in 2 additions, whisking just to combine, and then add the lemon zest.
Add the berries to the dry ingredients and gently toss just to combine. Add the sour cream, yogurt or ricotta mixture and fold with a rubber spatula until the batter comes together and the berries are evenly distributed, 25 to 30 seconds. Small spots of flour may remain and the batter will be very thick. Do not overmix.
Using a large spoon or a cookie scoop sprayed with nonstick cooking spray, divide the batter amount the muffin cups. Bake until the muffins are light golden brown and a toothpick or thin knife inserted into the center of a muffin comes out clean, 25 to 30 minutes, rotating the pan from front to back halfway through the baking time. Immediately remove muffins to a wire rack and cool for at least 5 minutes. Serve immediately or at room temperature. Store leftovers in an airtight container at room temperature.
Sunday, July 7, 2013
Butterflake Rolls - SRC
For this month's Secret Recipe Club, I was assigned to Meghan's blog, Cupcakes with Sprinkles. I just love her blog. It looks so cheerful and her food looks amazingly good. I thought about making one of her sweets (you know me), but apparently I love bread as much as I love sweets and I couldn't get my mind off her Butterflake Rolls. Plus, I had just made some peach jam and I needed something to eat it with.
What I learned as I made them is that I need to pay attention more to directions. When I first set out to make the rolls, I just copied down the ingredients, thinking that it was just like all the other bread recipes I had made. So, as a result, after making the dough, I let it rise for an hour. That's when I found out I was totally wrong. When I looked at the recipe again, including the directions, I realized that you're supposed to start rolling and buttering the dough right after you make it. In fact, the only rise you're supposed to do is after the dough has been cut and formed into the rolls. Still, I figured, I could make this work. I took my risen dough, rolled it out, buttered it, folded it, buttered it, folded and buttered again. The dough began breaking off in layers and was a complete mess and totally unsalvageable. I would have to start again. Lesson learned - follow the instructions.
The second time around, I followed everything to the letter. This time, everything came together beautifully and the dough made it into the muffin tins intact. I was kind of skeptical about only letting them rise once before baking, but if they worked for Meghan, then I trusted that they could work for me too. Sure enough, once they baked, they were a thing of beauty. It was like magic. Instead of the four pieces of dough I put into each muffin cup, the intricate layers of buttered dough had unfolded, giving me even more layers to pull apart and enjoy (kind of like the layers in a croissant). The bread itself was pillowy soft, buttery in every bite, and paired really well with my homemade peach jam. Not to mention, since they only need to rise once, they're so much quicker to make! I'm thinking that these rolls are going to make many more appearances in my house, you know, Thanksgiving, Christmas, Easter, and basically any time in between. Thanks Meghan!
Butterflake Rolls (adapted from Cupcakes with Sprinkles)
1 Tbsp. yeast
3/4 c. warm water
1/4 c. sugar (I increased this to 6 Tbsp.)
2 eggs
3/4 tsp. salt
1/2 c. buttermilk (I used 1/4 c. nonfat plain yogurt + 1/4 c. water)
3 1/2 - 4 c. flour
1/4 c. butter, softened
Spray a muffin pan with cooking spray and set aside. In a large bowl, mix yeast in 1/4 c. warm water with a pinch of sugar. Let sit till foamy, about 5 min. Whisk in the sugar, salt, and eggs. Add in the yogurt and remaining water until combined.
Use a wooden spoon to stir in about 3 cups of flour, adding more up to 4 cups, to make a soft dough. You want to be able to knead the dough and not have it stick to your fingers.
Knead dough a few times. Roll it out so that it's a 1/2" thick and spread with a thin layer of butter. Fold dough in half, then spread with butter, Repeat three more times.
After the final butter and fold, roll the dough out again to 1/2" thick and cut it into 1x2 inch squares. Place 4 squares upright in each sprayed muffin cup. Cover lightly with greased plastic wrap and let rise in a warm place for 45-60 min., or until doubled.
Preheat oven to 400F and bake rolls for 10-15 min. until golden brown.
Sunday, May 5, 2013
Barbecue Chicken Sandwich Rolls
For this month's Secret Recipe Club, I was assigned to Jessica of The Inquiring Chef. Do you know that she lives in Thailand? So lucky! I absolutely love Thai food and I can only imagine the wonderful access she must have to both the food and the exotic ingredients to make it.
Her blog is filled with yummy recipes that she came up with herself and it was with great joy that I chose to make her Barbecue Chicken Sandwich Rolls. In case you didn't know, she grew up in Kansas with some great barbecue so these rolls are part of her personality and I wanted to showcase that. Besides, I love barbecue myself as well as baking bread, so this recipe was perfect for me.
I had some chicken tenders in my freezer, so I poached those and used them instead of roasted chicken. I also made my own barbecue sauce instead of using storebought. In addition, I changed the method of making the rolls a little, but otherwise, kept the recipe the same.
Eating these rolls reminded me of my favorite baked char siu bao (now I totally want to fill them with char siu aka Chinese barbecued pork). The rolls were super fluffy and soft, slightly sweet, and paired deliciously with the barbecue chicken filling on the inside. My only regret is that I didn't use more filling in the rolls. But, even then, my family declared this recipe to be fantastic and they thoroughly enjoyed eating them. I would love to try these rolls with other fillings in them, the char siu for instance or curried chicken or even sloppy joe filling. The possibilities are endless.
And, speaking of possibilities, since I'm very much a sweets person, I went ahead and filled some of the buns with leftover chocolate ganache that I had in my fridge. Voila! Chocolate filled sweet buns. Spread them with some raspberry jam and ohhh so good. So, if you do what I did, you'll have dinner and dessert with one recipe. Can't beat that.
Thanks Jessica for your delicious recipe.
Barbecue Chicken Sandwich Rolls (adapted from The Inquiring Chef)
3 Tbsp. warm milk (I used yogurt)
2 1/2 tsp. active dry yeast
1 c. warm water
2 1/2 Tbsp. sugar (I increased this to 4 Tbsp.)
3 and ¾ cups all-purpose flour (plus about ½ cup extra for shaping the rolls) (I used 1 c. bread flour + 2 3/4 c. all-purpose flour)
1 tsp. salt
2 ½ Tbsp. unsalted butter, melted
2 large eggs (separated – 1 for dough and 1 for egg wash)
2 cups shredded and roughly chopped, roasted chicken (I used poached chicken breasts)
½ cup barbecue sauce (can use storebought or your own homemade sauce)
Combine the warm water with the yeast and a pinch of sugar and let sit for 5 min. till foamy. Combine the yeast mixture with the melted butter, sugar, milk or yogurt, and the egg and mix well. Add 1 cup of bread flour and the salt and mix well. Add the rest of the flour and mix well till combined. Knead the dough as best as you can until it forms a smooth ball. Put the dough into a well-greased bowl, cover with plastic wrap, and let rise until doubled in size, about 1-2 hours.
Combine the chicken with the barbecue sauce and mix well.
Line a baking sheet with parchment paper. Using lightly floured hands, remove 1/4 of the risen dough and gently roll it into a cylinder, approximately 8 inches long. (The dough will be quite sticky, but add only as much flour as you need to prevent it from sticking to your hands.) Using a knife or dough scraper, cut the cylinder of dough into 8 even pieces. Flatten each piece into a circle. Drop one teaspoon of the chicken mixture into the center of each dough circle. Pull the sides of the dough around the filling and twist them together firmly to seal the chicken inside. Place each filled roll, seam-side down on parchement paper.
Let sit until doubled in size, about 30 min. Preheat oven to 350F.
Brush the top of each roll liberally with a beaten egg.
Bake until the surface of the rolls are golden brown, 18-20 minutes. Serve warm or at room temperature.
Note: Alternately, you could fill each piece of dough with a teaspoon of chilled chocolate ganache.
Monday, February 4, 2013
Pumpkin Fantail Cinnamon Rolls
Though it was hard to choose, I decided on the Pumpkin Fantail Cinnamon Rolls. After all, I love baking yeast breads, I love pumpkin, and there is nothing more decadent than a cinnamon roll. Plus, I just had to try that gorgeous fantail look.
If you've ever made pull-apart bread before, these will be a snap to make. The only difference is that you put the pieces into muffin cups so, instead of one big loaf, you have a little mini one that can fit in the palm of your hand. So fun!
I did make a couple changes to the recipe by adding some spices to the dough as well as using brown sugar instead of white. I also used water instead of milk, but that was because I didn't have any milk in the house at the time. Still, the rolls came out fantastic. They were soft, they were fluffy, they were deliciously caramelized on the outside. Then, as the icing on the cake, or the bread, I should say, you top them off with a sweet cream cheese icing. Finally, with a roll in your hand (or maybe one in each hand), you pull off one cinnamony-sugary piece after another and put it into your mouth, savoring every bite. Although they do take some time and effort to make, they are so worth it. Mmmm, irresistible!
Thanks Barbara for one super recipe!
Pumpkin Fantail Cinnamon Rolls (adapted from Barbara Bakes)
1 c. whole wheat pastry flour (I used all-purpose)
2 3/4 c. bread flour
1/4 c. sugar (I used 1/2 c. brown sugar)
2 1/4 tsp. yeast
1/2 tsp. salt
1/2 c. milk, warm (105F - 110F) (I used water)
4 Tbsp. unsalted butter, melted
3/4 c. canned pumpkin puree
1 tsp. vanilla
1 tsp. cinnamon
1/4 tsp. cloves
1/4 tsp. nutmeg
1 large egg
Cinnamon Sugar Filling:
1/2 c. sugar
1 Tbsp. cinnamon
1/2 tsp. pumpkin pie spice
4 Tbsp. unsalted butter, softened
Cream Cheese Icing:
3 oz. cream cheese, room temeprature
1 c. powdered sugar
1-2 Tbsp. milk (I omitted this)
1/4 tsp. pumpkin pie spice
Combine the yeast with the warm milk and a pinch of sugar and let sit until foamy, about 5 min. Stir in the sugar, melted butter, pumpkin puree, vanilla, salt, spices, and the egg and mix to combine. Mix in the all-purpose flour. Add in the bread flour, 1/2 cup at a time, and mix until the dough no longer sticks to the bottom of the bowl. Turn out onto a floured surface and knead until the dough is smooth and elastic, about 5 min.
Put the dough into a greased bowl, cover with plastic wrap and a dishwtowel, and let sit in a warm place until doubled in size, about 1 hour (I put mine into the fridge to rise for about 4 hours).
While the dough is rising, make the cinnamon-sugar filling. Grease 12 muffin cups with butter.
After the dough has risen, punch it down. Divide it in half and roll into a 12" square. Spread half the butter evenly over the dough, then sprinkle with half the cinnamon-sugar filling. Press the cinnamon-sugar into the butter.
Cut dough in to six strips, each 2 inches wide with a pizza cutter. Stack strips, buttered sides up, and cut crosswise into six 2 inch pieces with bench scraper.
Carefully place each piece, cut edges up, in a muffin cup. Separate outer layers of each roll to fan outward. Make more rolls with remaining dough in same manner.
Loosely cover muffin pan with plastic wrap and let the dough rise in a warm place until doubled, 30 to 60 minutes.
Preheat oven to 375°F
Bake 18 to 22 minutes until rolls are golden brown. Cover the top with foil if rolls are browning too quickly. Transfer to a wire rack and let cool in the pan for 10 minutes. While bread is cooling, make the icing.
For the icing: In a mixing bowl, beat cream cheese until smooth. Add the pumpkin pie spice and beat until incorporated. Add powdered sugar and beat until smooth. Add the milk slowly, a little at a time until the icing is the desired consistency.
Drizzle icing over warm rolls or serve in bowls for dipping. Serve warm or at room temperature.
Monday, November 5, 2012
Pumpkin Cinnamon Rolls
For this month's Secret Recipe Club, I was assigned to Noelle's blog, "An Opera Singer in the Kitchen." Like her, I also love to sing and cook, so it was like finding a kindred spirit. But, she doesn't just sing as a hobby, she actually performs. How cool is that!
Her vocal talent is equally matched with her skills in the kitchen and I thoroughly enjoyed perusing through her recipes. But, the one thing I kept focusing on was PUMPKIN! I have a love affair with it and so I couldn't stop oohing and aahing over the choices on her blog - Fluffy Pumpkin Biscuits, Pumpkin Spice Cake, and Pumpkin Scones. But, I knew I was done for when I saw her Pumpkin Cinnamon Rolls. Usually, I only make cinnamon rolls during Christmastime, but I was perfectly willing to make an exception for these.
What I love is that Noelle's recipe uses less butter than others I've seen (which means less fat and calories). As I say, a little less guilt goes a long way. But, I promise that you will NOT miss it at all. Oh no, these rolls are every bit as delicious and decadent as any other. Plus, you've got that lovely spice, the pretty orange color, super fluffy, soft bread, and a cream cheese icing which is truly the icing on the cake. Plain cinnamon rolls move over. Make way for pumpkin!
Thanks Noelle for making all my pumpkin-y dreams come true.
Pumpkin Cinnamon Rolls with Cream Cheese Icing
(adapted from An Opera Singer in the Kitchen)
1/4 c. warm water, not hot, about 110 degrees)
1 pkg. (2 1/4 tsp.) active dry yeast
1/3 c. warm milk (I used Greek yogurt)
1 egg
3/4 c. pumpkin puree, either fresh or canned
1 Tbsp. melted butter
3 1/4 c. all-purpose flour
1/2 c. brown sugar
1 tsp. salt
1/2 tsp. cinnamon (I used 1 tsp.)
1/4 tsp. ground ginger (I used 1/2 tsp.)
1/4 tsp. ground cardamom (I used 1/2 tsp.)
Filling:
3 Tbsp. buttery spread, softened
1/4 c. sugar
2/3 c. brown sugar
2 tsp. cinnamon
1/2 tsp. allspice
1/2 tsp. ginger
1/4 tsp. nutmeg
1/8 tsp. cloves
1 1/4 c. pecans (I left these out due to allergies)
Cream Cheese Frosting:
4 oz. cream cheese, softened
1 tsp. vanilla
2 c. powdered sugar
1 Tbsp. milk (I used Greek yogurt)
In a large bowl, stir yeast into water to soften. Let rest for 5 minutes before stirring. Add milk, pumpkin, butter, egg, brown sugar, and spices. Stir in 2 cups of the flour and beat vigorously for 2 minutes.
Gradually add remaining flour, a little at a time, until you have a dough stiff enough to knead. Turn dough out onto a floured surface. Knead, adding flour as necessary, until you have a smooth, elastic dough.
Put dough into an oiled bowl. Turn once to coat entire ball of dough with oil. Cover with a towel and let rise until doubled, about 1 hour.
Combine the white sugar, brown sugar, cinnamon, allspice, ginger, nutmeg and cloves in a small bowl, set aside. Transfer the risen dough to a lightly greased work surface, and pat or roll it into a 16" x 12" rectangle. Spread softened butter over dough and then sprinkle with the sugar mixture.
Roll the dough into a log the long way; it'll stretch to about 20" long as you roll. Using a piece of dental floss, cut the log into 1" slices. Place slices in a greased 9x13 inch baking pan (or in two 8 or 9 inch round cake or pie pans). Cover with a towel and let rise until almost doubled, about 45 minutes.
Bake in a preheated 375°F oven. Bake the rolls till they're brown around the edges and beginning to turn golden brown across the center, about 20-30 minutes.
While rolls bake, prepare the cream cheese frosting. Beat the cream cheese, vanilla, and milk until well combined. Add the powdered sugar, 1/2 cup at a time, until well mixed and desired consistency is reached.
Frost warm rolls with the cream cheese frosting and serve immediately
Notes:
- I doubled the amount of spices in the dough and would probably triple them next time.
- The original recipe calls for all-purpose flour and whole wheat white flour. I just used all-purpose flour since that's what I had.
- I made half the recipe and got 9 rolls.
Tuesday, October 30, 2012
Cranberry Orange Pull-Apart Bread
Monday, September 3, 2012
Self-Frosting Pumpkin Nutella Muffins

For this month's Secret Recipe Club, I was assigned to Holly's blog, Phemomenon. In case you didn't know, she has some of the cutest kids ever. Lucky them, because they get to eat all of her scrumptious creations.
After searching through a ton of recipes on her blog, I finally decided to make her Self-Frosting Pumpkin Nutella Muffins. After all, I love, love, love pumpkin and it just so happened that I had some Nutella sitting in my pantry too.

Like all pumpkin-y treats, you're going to want to let these cool before you eat them. That way, the pumpkin and spice flavors have a little time to set. Believe me, it's worth the wait.

Now, let me tell you about the Nutella. The idea of putting Nutella onto the top of the muffin is pure genius. The muffins aren't that sweet themselves. But, the Nutella adds just the right amount of sugary, chocolatey goodness that will make you feel like you're having dessert for breakfast, but still eating healthy at the same time. The Nutella swirled muffin tops were so good that I was sorely tempted to make off with the tops alone, you know, just like that Seinfeld episode. I can totally relate.

Thanks Holly for one yummy recipe!
Self-Frosting Pumpkin Nutella Muffins (adapted from Phemomenon)
1 – 15 oz can pure pumpkin puree (not pie filling)
1/2 cup vegetable oil (I used melted butter)
2 large eggs
1 tablespoon pure vanilla
1/4 cup light brown sugar, packed
1/4 cup sugar
2 cups all-purpose flour
1 1/2 teaspoons ground cinnamon
1/2 teaspoon ground ginger
1/4 teaspoon freshly grated nutmeg
1 teaspoon baking powder
1/2 teaspoon baking soda
1/2 teaspoon salt
12 heaping teaspoons Nutella for topping
Preheat oven to 375 degrees F. Line or spray a 12-cup muffin pan, set aside.
In a large bowl, whisk together the flour, cinnamon, ginger, nutmeg, sugar, baking powder, baking soda, and salt. Set aside.
In a small bowl, whisk together the pumpkin puree, oil, eggs, vanilla and brown sugar. Pour the wet ingredients over the dry ingredients and whisk to combine.
Scoop the batter into the prepared muffin cups evenly (will be about 3/4 full). Scoop a heaping teaspoon of Nutella onto the top of each muffin. Use a toothpick or skewer to swirl the Nutella slightly around the top of the batter.
Bake the cupcakes for 25 to 30 minutes or until a skewer comes out clean.
Serve warm or at room temperature. Store in an airtight container.
Notes:- Holly added some cocoa powder to her muffins, but I opted to leave it out.
- These muffins tasted best after they had cooled completely. Then, you could really taste the pumpkin and spice flavors.
- I made half a batch and got 8 muffins.
Wednesday, August 15, 2012
Harvest Apple Challah

It just so happened that I had two apples in my house. Now, what should I do with those apples? Should I eat them? Well, I could, and that would be wonderful. But, why eat them when you can bake with them. I've had this Harvest Apple Challah on my mind forever and I decided that now was the perfect time to make it.
The King Arthur Flour website (love that site!) where I got this recipe has some great pictures on how to go about making it and you should really check it out if you decide to give this a try. I made a few changes like substituting brown sugar for the honey and adding more cinnamon, but other than that, I kept the recipe pretty much as is.

The bread, when baked, is a thing of beauty - all golden brown, soft and fluffy, with apples tucked in here and there. It's definitely a healthy bread that you can eat for breakfast since it's not sweet at all, with the exception of the apples adding their natural sweetness to each bite. The King Arthur Flour website also recommended drizzling it with honey before eating, which I tried and I recommend you do the same. The only thing I didn't like was that the apples were still on the crunchy side even after baking. That's fine if you like that sort of thing, but I kind of want my apples to be more tender, so I might cook the apples a little next time before tucking them into the dough. But, even though I felt it could use a little improvement, that still did not stop me from eating this every chance I could. What can I say? The carbs called out to me.
Harvest Apple Challah (adapted from King Arthur Flour)
1/2 c. lukewarm water
6 Tbsp. vegetable oil (I used melted butter)
1/4 c. honey (I used 5 Tbsp. dark brown sugar + 1 Tbsp. water)
2 large eggs
4 c. all-purpose flour (I used 3 1/4 c.)
1 1/2 tsp. salt (decreased to 3/4 tsp.)
1 Tbsp. instant yeast
Apple Filling:
2 medium-to-large apples, NOT peeled, cored and diced in 3/4" chunks
1/2 tsp. cinnamon (increased to 1 tsp.)
1/4 c. sugar
1 large egg beaten with 1 Tbsp. water (for glazing)
Combine the yeast with the water and a pinch of sugar. Let sit until foamy, about 5 min.
Combine the yeast mixture with the melted butter, the honey, and the eggs and stir well. Add 1 cup of flour at a time and mix until the dough no longer sticks to the bottom of the bowl. Knead the dough for about 6-7 min. until it is smooth and elastic. (I ended up using about 2 3/4 cups of flour to start and kneaded in 1/2 cup more.) Place the dough in a greased bowl and turn to coat the dough. Cover with plastic wrap and a dishtowel and let rise for 2 hours, or until it's puffy and nearly doubled in bulk (mine took 1 hour).
Lightly grease a 9" springform pan. Toss the apple chunks with the sugar and cinnamon.
Gently deflate the dough, transfer it to a lightly greased work surface (I used a buttered piece of parchment paper taped to my kitchen table), and flatten it into a rough rectangle, about 8" x 10". Spread half the apple chunks in the center of the dough and fold the short side of the dough over the apples to cover it, patting firmly to seal the apples and spread the dough a bit.
Spread the remaining apples atop the folded-over dough. Cover the apples with the other side of the dough, again patting firmly. Basically, you've folded the dough like a letter, enclosing the apples inside.
Take a bench knife or a knife and cut the apple-filled dough into 16 pieces (i.e. cut it in half first, then cut each half in halves and so on until you have 16 pieces). This will be very messy; the dough is slippery, apples will fall out, sugar syrup will ooze, but just keep going all the same.
Lay the dough chunks into the pan; crowd them so they all fit in a single layer. If any apple chunks fall out, simply tuck them in among the dough pieces or spread them on top.
Cover with lightly greased plastic wrap and allow to rise for 1 hour, until it's a generous 2" high. Towards the end of the rising time, preheat the oven to 325F.
Whisk the egg with the water and brush the dough with this mixture. Sprinkle with coarse sugar, if desired, or omit if you intend to drizzle the bread with honey before serving.
Place the bread in the lower third of the oven. Bake for 55 min., or until the top is at least light brown all over, with no white spots. Remove from the oven, and after 5 min., loosen the edges and carefully transfer it to a rack.
Serve the bread hot, warm, or at room temperature. Drizzle with honey just before serving, if desired; or serve with honey for dipping.
Saturday, July 21, 2012
Spiced Cranberry Sweet Rolls

This past weekend, my mother asked me to make her favorite rolls - Tyler Florence's Parker House Rolls. I was more than happy to oblige, so I made up a batch of the dough and put it in the fridge to rise overnight. Then, seeing as how it was after midnight, I began getting ready for bed.

While I was doing so, however, I kept thinking about making a new type of bread, one that would be sweetened with honey, spiced with cinnamon, and bursting with cranberries. I knew that I wouldn't be able to sleep until I tried my idea out, so back to the kitchen I went, even though it was now past 1am. I began mixing up the dough, throwing in a little of this and that as I went along - honey, dark brown sugar, cinnamon, ginger powder, and the dried cranberries. I had absolutely no idea if the bread would be any good, but I had high hopes that it would.

The next morning, I began playing with the dough even more as I decided how I wanted to shape it in the muffin cups. With some of the dough, I simply rolled it into small balls and put three into each cup. With the rest of the dough, I rolled it into a rectangle, sprinkled it with some brown sugar, cut it so that it looked like mini cinnamon buns, and then put three of those into the rest of the cups. Finally, before baking it, I brushed them with an egg wash and sprinkled them with cinnamon-sugar.

After baking them, I eagerly bit into one and they were awesome! I loved how the juicy cranberries matched so well with the cinnamon and how the fluffy bread was sweetened just to my liking. If you really wanted to get fancy, or if you have an extra sweet tooth, you could also top these with a powdered sugar glaze or even an orange powdered sugar glaze. I may try making them that way too one day, but for now, I like them just the way they are. Having these for breakfast made my day!
Spiced Cranberry Sweet Rolls (created by Sweet as Sugar Cookies)
1 Tbsp. yeast
1 c. + 3 Tbsp. warm water (105F - 110F)
5 Tbsp. honey
4 Tbsp. brown sugar
7 Tbsp. butter, melted
1 tsp. cinnamon
1/4 tsp. ginger powder
3/4 tsp. salt
3-4 c. all-purpose flour
1/2 c. dried cranberries (or more if desired)
1 egg, beaten (for egg wash)
3 Tbsp. sugar
2 tsp. cinnamon
Combine the yeast with the warm water and a pinch of sugar and let sit until foamy. Add in the honey, brown sugar, and butter and stir to combine. Add in the cinnamon, ginger powder, salt, and 2 cups of flour. Mix well. Gradually add more flour until the dough no longer sticks to the bottom of the bowl. Knead the cranberries into the dough and continue kneading the dough (adding in flour as necessary) for 5-6 min. until it is smooth and elastic (bounces back when you push your fingertip into it). Put into a greased bowl, cover with plastic wrap and a dishtowel, and let sit in a warm place for 1 hour or until doubled in size. Alternately, you can put it into the fridge to rise overnight.
Grease muffin tins. After the dough has risen, divide it into 12-16 equal pieces.
Variations:
- Roll each piece into a 2 x 4 inch long rectangle. Sprinkle with some brown sugar and roll up from the short side. Slice into three equal pieces (like mini cinnamon rolls) and put the pieces side by side in the muffin cup.
- Divide each piece into three little balls and put the pieces into the muffin cup.
Monday, June 4, 2012
Gingerbread Scones - SRC

For this month's Secret Recipe Club, it was my pleasure to be assigned to our sweet host's blog, The Heritage Cook. She had so many amazing looking recipes on her blog that I ended up with a list of about 20 different things and then had to take on the difficult task of narrowing it down. But, I finally decided on the Gingerbread Scones.

I did make a few changes to the recipe. First of all, I increased the amounts of the spices to 1 1/2 tsp. ginger powder and 1 tsp. of cinnamon. I also increased the amount of brown sugar to 4 Tbsp. In addition, since I was using a rather strong brand of molasses, I added only 3 Tbsp. of it to the recipe and used 2 Tbsp. of honey to make up the rest and mellow the taste. Finally, I drizzled the scones with some melted white chocolate and sprinkled some candied ginger on top.

These scones were delightful. I literally can't stop nibbling on them. I'm really glad I upped the sugar and spices because the flavor was spot-on gingerbready. Plus, the scones were so soft and moist right out of the oven, no dry hockey pucks here. I'm totally glad that I picked these for this month's assignment. Thanks Jane for one lovely recipe.
Gingerbread Scones (adapted from The Heritage Cook)
2 c. all-purpose flour
3 Tbsp. brown sugar (I used 4 Tbsp.)
1 tsp. ground ginger (I used 1 1/2 tsp.)
1/2 tsp. cinnamon (I used 1 tsp.)
2 tsp. baking powder
1/2 tsp. baking soda
1/2 tsp. salt (I used salted butter and omitted this)
1/4 c. cold butter
1/3 c. molasses (I used 3 Tbsp. molasses + 2 Tbsp. honey)
1/4 c. milk (I used skim milk)
1 egg, separated
melted white chocolate, for drizzling
chopped candied ginger
Preheat oven to 400F. Line a baking sheet with parchment paper.
In a large bowl, combine the dry ingredients. Cut in the butter until mixture resembles coarse crumbs. In a small bowl, combine the molasses, milk, and egg yolk until smooth; stir into the flour mixture just until moistened. Turn the dough onto a floured surface; knead gently 6-8 times. Pat into an 8-inch circle; cut into 12 wedges and place 1 inch apart on prepared baking sheet.
Beat egg white until frothy; brush over scones. Bake for 12-15 min. or until golden brown. Remove from pan to wire rack. Serve warm. If desired, drizzle with melted white chocolate and sprinkle with candied ginger.
Tuesday, April 10, 2012
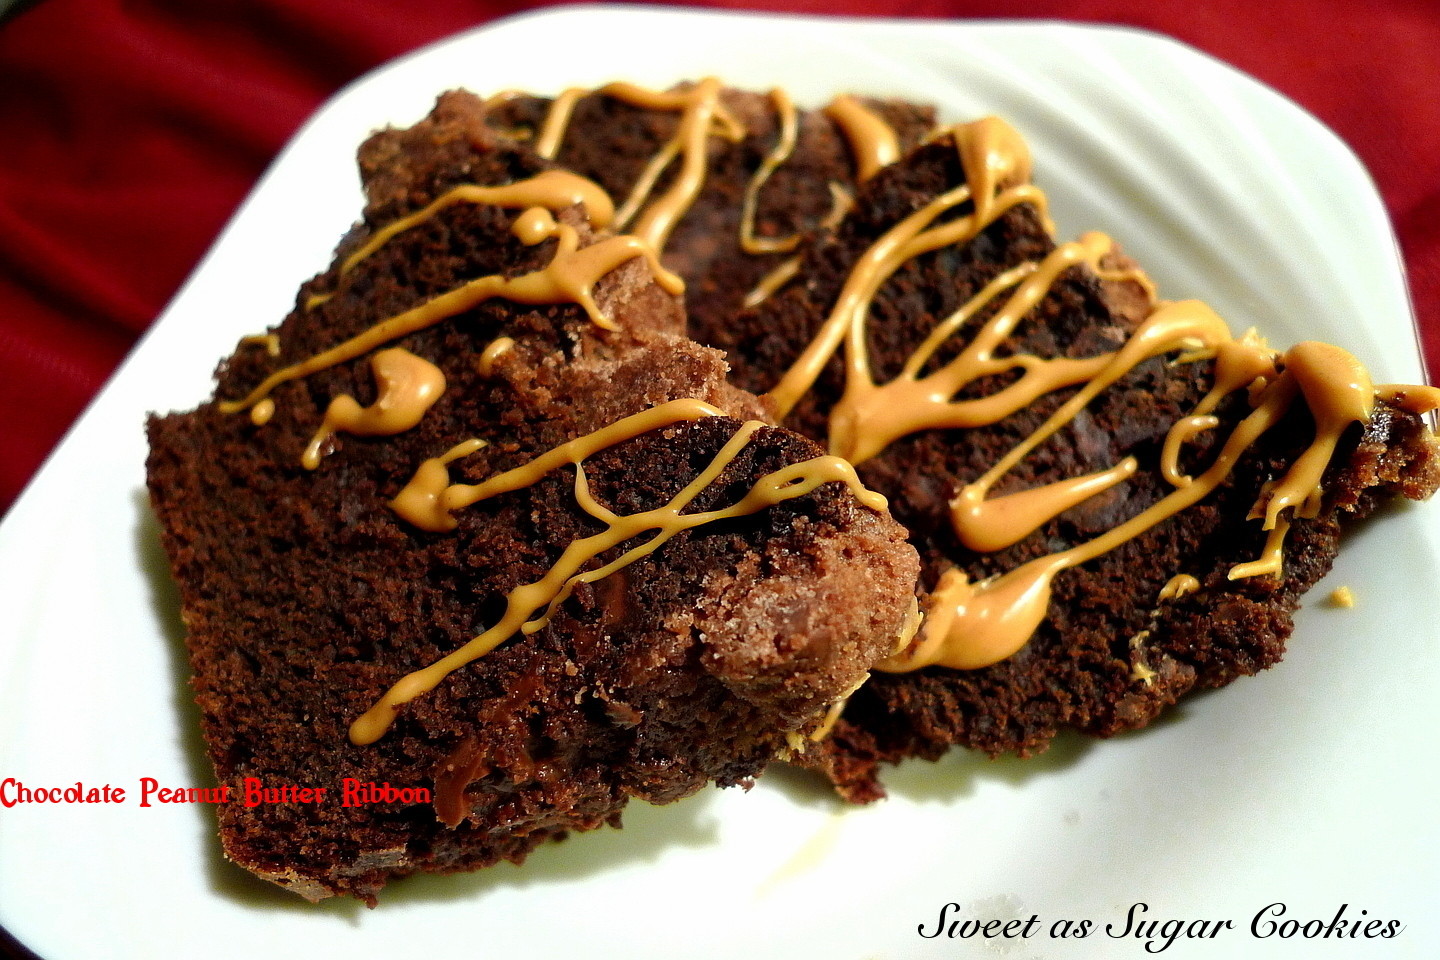
Chocolate Peanut Butter Delight Bread

After making that crumb-topped Biscoff Cinnamon Swirl Bread last week, it got me to thinking about how great a CHOCOLATE crumb topped bread would be. I literally could not get the idea out of my head, so I had no choice but to run to the kitchen to try it out.
I started with the Chocolate Loaf recipe from Baked Explorations. I've made it before and knew how amazing it was. Seriously, it is so dense and chocolatey that you'd swear you're eating a brownie. The only change I made to that recipe itself was to use melted butter in place of the oil.
Then, I got creative. First, I made a mixture of melted chocolate and peanut butter. This would be the filling in between the layers of bread. In order to keep it liquidy and smooth, I put the bowl in another bowl of warm water. It works perfectly as long as you don't get any of the water into your chocolate-peanut butter mixture.
Next, I created a chocolate crumb topping. It took a bit of tweaking and a lot of tasting to get it right. It had to be chocolatey enough, of course, and I also wanted it to be sweet enough, but not too sweet. Several yummy bites later, it was just right. If you're making this bread, you might want to make the crumb topping first so that it's ready to go when you start layering in the batter. You can put it in the fridge to keep it nice and cold until it's time to use it.
Finally, it was time to put it all together. I used mini loaf pans and filled each one with about 1/3 cup of batter to start (any more batter will cause the pans to overflow and you'll lose all your lovely crumb topping). Then, I dolloped on a layer of the chocolate-peanut butter mixture (about 3 Tbsp.). It's your choice whether you want to swirl it in or not. I did one loaf both ways to see which way I liked better. Finally, I topped it off with another 1/3 cup of batter and cobblestoned the top with large chocolatey crumbs.

The finished loaves were awesome! The chocolate bread was rich like a brownie and the chocolate-peanut butter filling was like a molten river running through it. As for the crumb topping? Well, who doesn't like crumb topping is all I can say. To finish it all off, I drizzled it with melted peanut butter. Decadent!

I even had some batter left over (since I only made half a batch), so I made muffins with them. Chocolate and peanut butter for breakfast? Don't need to ask me twice. Enjoy!

Chocolate Peanut Butter Delight Bread (adapted from BAKED Explorations and created by Lisa of Sweet as Sugar Cookies)
3/4 c. firmly packed dark brown sugar
1 1/2 c. flour
1 c. unsweetened cocoa powder
3/4 c. sugar
1 1/2 tsp. baking soda
3/4 tsp. baking powder
1 tsp. salt
2 eggs
1 egg yolk
3/4 c. buttermilk
1/2 c. unsalted butter, melted
1 tsp. vanilla
Chocolate Crumb Topping (by Sweet as Sugar Cookies):
1 1/2 c. flour
5 Tbsp. cocoa powder
14 Tbsp. sugar
1/2 c. butter, chilled
Combine the dry ingredients and whisk together well. Cut in the butter until you get pea-sized bits. Set in the fridge to chill until ready to use.
Chocolate Peanut Butter Filling (by Sweet as Sugar Cookies):
1/2 c. semisweet chocolate chips
6 Tbsp. peanut butter (creamy or chunky)
Melt the chocolate chips with the peanut butter in the microwave or in a double boiler and stir to combine. Set aside. Note: If you're worried about it solidifying before you're ready to use it, you can do what I did and put the bowl of chocolate-peanut butter into another bowl half filled with warm water (just don't let any water get into the chocolate mixture).
Preheat the oven to 350F. Grease and flour five mini loaf pans.
Combine the dry ingredients. Whisk the eggs with the egg yolk, then add the buttermilk, oil, and vanilla and whisk until combined. Add the wet ingredients to the dry ingredients mixing just until combined.
Pour 1/3 cup of the batter into each loaf pan. Dollop 3 Tbsp. of the chocolate-peanut butter filling onto the batter and spread it as evenly as you can without mixing it into the batter itself. Spread 1/3 cup more of batter onto the filling and spread evenly.
Take your crumb topping and squeeze it in your hand to form it into clumps. Pinch off pieces of the crumb topping (as big as you want) and make a layer of pieces on the top of the batter, covering the top completely. Bake for 45-60 min. or until a toothpick comes out clean.
After removing it from the oven, let cool in the pans for at least 10 min., then put in the fridge to let the chocolate filling solidify a little (to make it easier to unmold). Or, if it doesn't bother you to have it fall apart a bit, go ahead and forgo the chilling and enjoy a piece while it's still warm and the chocolate inside is deliciously gooey.
If making muffins:
Grease and flour four mini muffin tins. Fill each with about a tablespoonful of batter. Top with some of the crumb topping. Bake at 350F for about 12-15 min. (or until a toothpick comes out clean). When cooled, drizzle with melted peanut butter.
Notes:
1. If you want, you can swirl the chocolate-peanut butter mixture into the batter. Or, leave it as written and you'll have a nice ribbon of it running straight through the middle.
2. Chilling it after it has cooled a little might make it easier to unmold. If you do chill it, the chocolate-peanut butter layer in the middle will solidify to become almost like fudge. If you choose not to chill it, it might break just a little, but you'll have the benefit of enjoying a nice melty, gooey layer of chocolatey-peanut buttery goodness. It's a win-win situation either way.


.jpg)

.jpg)
.jpg)


.jpg)
.jpg)
.jpg)