Showing posts with label cookies. Show all posts

Sunday, May 31, 2015

Lime Raspberry Swirled Blondies


For this month's Secret Recipe Club, I was assigned to the blog, "Baking and Creating with Avril."  When you read her profile, you'll find that it's short and sweet.  She states that she started her blog to share her love of being in the kitchen.  Then, once you start perusing her blog, you'll find that it's totally sweet and anything but short.  She has recipes that will have you bookmarking for days, which naturally made it difficult to choose just one to share.  As a result, I went ahead and made TWO of her recipes instead - the Cranberry Almond Cake, and the Raspberry Swirl Blondies.


I dressed up the blondies a bit by adding some lime zest to the batter.  Just so you know, the batter will not look like a lot when you put it into the pan (I almost thought about making more), but it puffs up beautifully in the oven.  Once baked, I finished them off with drizzled white chocolate and chopped almonds.  The flavor combo of the raspberry and lime was fantastic!  And the blondies themselves were chewy, cakey, and melt in your mouth good.  I would love to try these out again using a different type of jam, maybe blueberry, or apricot, yummmmy!!!


Thanks Avril for giving me a keeper of a recipe!

Raspberry Swirl Blondies (adapted from Baking and Creating with Avril)

1 c. flour
1 tsp. baking powder
1/4 tsp. salt
1/2 c. unsalted butter, melted
3/4 c. sugar
1 egg
1 tsp. vanilla
1 Tbsp. lime zest (I added this)
1/3 c. raspberry jam

white chocolate, melted for drizzing
1/4 c. chopped almonds

Preheat oven to 350F.  Line an 8x8 pan with foil.  Combine the flour, baking powder, and salt.  Rub the lime zest into the sugar with your fingers until fragrant.  Combine the sugar with the melted butter, then beat in the egg and vanilla.  Stir in the dry ingredients.  Spread evenly into the pan and dollop with the raspberry jam.  Use a butterknife to swirl it into the batter.  Bake for 25-30 min., or until a toothpick comes out clean.  Let cool, then drizzle with the white chocolate and sprinkle with the chopped almonds.  


Sunday, December 14, 2014

White Chocolate Peppermint Shortbread - SRC Cookie Carnival


Ooohh, Christmas is getting closer and that means it's time for Christmas cookies, lots of them!  Every year, I give away dozens of them to neighbors, co-workers, and friends.  Naturally, I also keep back some of them for my family too.  So, I am always on the lookout for new recipes to make and add to my list of faves.  That's why, when Sarah from the Secret Recipe Club came up with the idea for this Cookie Carnival, I eagerly joined in!  What is the "Cookie Carnival" you ask?  Well, the members of the Secret Recipe Club once again received another person's blog to peruse and pick a recipe from it to make.  But, the catch is that it has to be a cookie recipe.  Then, today, we all get to show off the newest addition to our Christmas cookie platters.


I was assigned the blog, Dessert Before Dinner.  With a title like that, I think I've found a kindred spirit in Stephy.  And if you go check out her blog, you'll see that she has no shortage of dessert recipes.  The girl means business!  She has everything from the classics, like Lemon Meringue Pie and Watermelon Sorbet, to more exotic recipes like Yuzu Wasabi White Chocolate Macarons and Grapefruit Cupcakes with Avocado Frosting.  From perusing through her blog, I came to see that she's a person who is bold, daring, and inventive.  She's knows what she likes, but she's also not afraid to try new things and see where her foodie ideas will take her.  You go girl!


This time, I opted for one of her classic recipes, Tartine Bakery Shortbread Cookies.  And oh boy were they ever good.  These shortbread cookies are thick, super buttery, and just sweet enough.  One bite, and they absolutely melt in your mouth.  You'll find yourself reaching for one after another until all you have left is crumbs.  And believe me, you will devour the crumbs as well.  I decided to be a little inventive too and dipped these into white chocolate, then sprinkled them with crushed peppermint candy for a festive, Christmas-y touch.  Simply delightful!  I will definitely put this recipe into my Christmas cookie collection to make every year from now on.


Thank you Stephy for the fantastic recipe!

Tartine Bakery Shortbread (slightly adapted from Dessert Before Dinner)

1 c. + 2 Tbsp. unsalted butter, softened
1/4 tsp. salt (I increased this to 1/2 tsp.)
1 3/4 c. + 2 Tbsp. flour
1/3 c. sugar + more for sprinkling

Cream butter and sugar together.  Mix in the flour and salt until well combined.  Press the dough evenly into an 8x8 pan and sprinkle with more sugar.  Bake at 350F for 30-40 minutes until golden.  Slice while still warm.  Remove from pan once cookies are completely cooled.

If desired, dip the cookies into melted vanilla candy coating and sprinkle with crushed candy canes.  Let sit until the coating sets.   

Blogger:

Wednesday, October 15, 2014

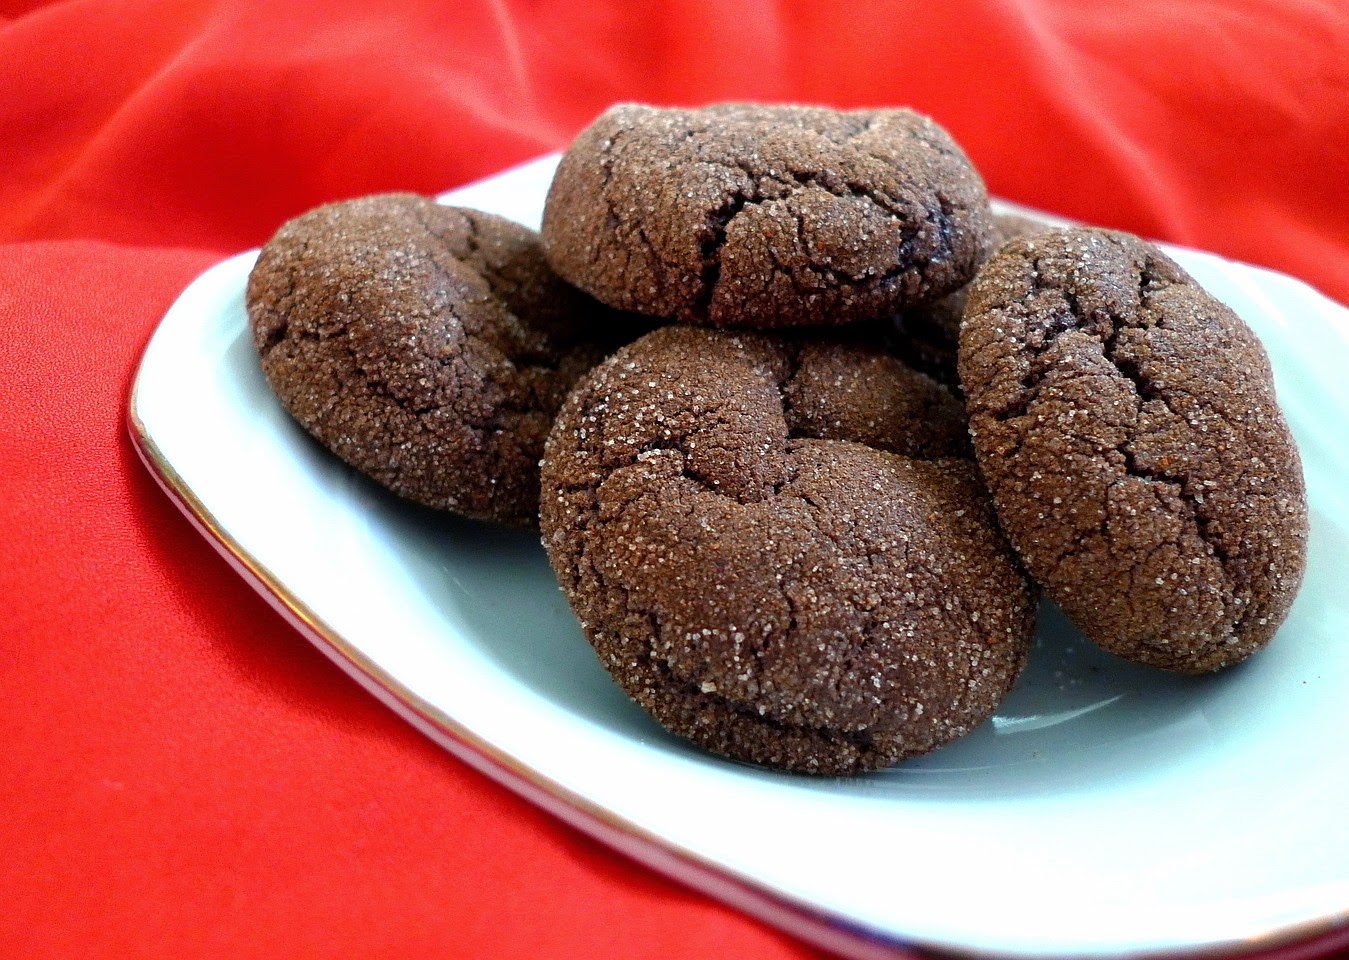
Mexican Chocolate Snickerdoodles


When I was assigned to Claire K Creations a week ago, I just couldn't resist making more than one recipe, especially when I saw all the yummy cookie recipes she had.  You know me and my sweet tooth.  And, while I'm not a chocoholic by any means, I am a spice fiend.  Which is why I just had to try the Mexican Chocolate Snickerdoodles. 


These cookies have cayenne pepper in them for a little kick.  Then, you roll them in cinnamon sugar to finish them off.  I just loved the combo of the chocolate and spices in these.  Not to mention, the texture was perfect - crisp on the outside and soft and cakey on the inside.  My sister raved about them.  I think the only change I'd make is to triple the amount of cayenne pepper in them since we couldn't really taste it, even though we also added a little cayenne pepper to the cinnamon-sugar rolling mix.  Although, that's just us.  We tend to have a high tolerance to heat and like to feel the burn in our mouths. 


I will say that I also gave these cookies to a friend of mine and the cookies were devoured in no time at all.  So, if you have a low tolerance to heat, you will love these cookies.  And, even if you have a high tolerance to heat, you will still love these cookies.  They're that 's good.  I'm definitely glad I tried more than one recipe from her blog. 

Mexican Chocolate Snickerdoodles (slightly adapted from Claire K Creations)

1/2 c. butter, softened
3/4 c. sugar
3/4 c. brown sugar, packed
1 tsp. cream of tartar
1/2 tsp. baking soda
1/2 tsp. salt
1/4 tsp. cayenne pepper
2 eggs
2 tsp. vanilla
1/2 c. unsweetened cocoa powder
2 1/4 c. all-purpose flour

For rolling:
1/4 c. sugar
2 tsp. cinnamon
pinch of cayenne pepper 

Cream the butter with the sugars.  Beat in the eggs and vanilla.  Add the dry ingredients and mix to combine well.  Chill the dough until firm, about 1 hour.  Roll the dough into small balls and roll in the cinnnamon-sugar-pepper mixture.  Place on a parchment paper lined baking sheet and bake at 350F for 10-12 minutes until cracked on top. 


Sunday, September 28, 2014

Levain Bakery Copycat Chocolate Chip Cookies


Last month, I finally fulfilled my long-time dream of traveling to New York City.  Talk about a foodie's paradise!  I got to eat at Bar Boulud, Cafe Boulud, Eataly, and Schnipper's Deli, all of which were absolutely fantastic.  But, if you've been following my blog, you know I'm all about the sweets.  And from hearing what other people have said about NYC, that meant it was time to go hunt down those chocolate chip cookies, namely Jacques Torres, Levain Bakery, and Thomas Keller.

To my disappointment, however, I found out that Levain Bakery's famous chocolate chip cookie is made with walnuts (I'm allergic) and they don't make a nut-free version.  My mom who came with me, on the other hand, has no such problem, and she gladly devoured the cookie we bought from there and proclaimed it the best out of the three places above.  She then went back into the bakery and promptly bought five more to take home.  Ha!

Cookie from Levain Bakery
Well, this just wouldn't do.  The "best" cookie in NYC and I can't even taste it for myself?  Oh no!  So, I had no choice but to hunt down a copycat recipe and make them myself, this time with no walnuts.  I came across this recipe on the blog, Parsley Sage & Sweet.  Since a lot of other bloggers commented on how close this one was to the real thing, I figured I couldn't go wrong.

The only thing I changed was to add 1 1/2 tsp. of vanilla.  Whether that made the cookie taste less Levain-esque, I don't know, but I simply have to have vanilla in my chocolate chip cookies.  I then followed a couple of recommendations on her blog and added 1 Tbsp. cornstarch and also froze the large cookie dough balls before baking them.  The result?  I got ooey, gooey centers in my cookies surrounded by a lovely crispy shell.  Then, there was all that chocolatey goodness melting in the middle.  Oooohhh!  I can't even describe how good that was.

My sister, who sampled one of the actual Levain cookies my mom brought back, took a taste too.  Unfortunately, she couldn't for the life of her remember what the original one tasted like, so she couldn't say whether or not this one came close.  And, since I hadn't tasted it either, I guess we'll never know.  But, what I do know was that these cookies tasted awesome!  My sister also loved the thick, chewy texture of the cookies.  She then proceeded to take a lot of them home with her to eat later on.  This one is truly a keeper!

 Levain Bakery Copycat Chocolate Chip Cookies (adapted from Parsley Sage & Sweet)

1 c. 'cold and cubed' unsalted butter (I used salted)
3/4 c. sugar
3/4 c. brown sugar
2 eggs
1 1/2 tsp. vanilla (I added this)
3 1/4 c. all-purpose flour
1 Tbsp. cornstarch
3/4 tsp. kosher salt (I omitted this)
3/4 tsp. baking powder
1/4 tsp. baking soda
1 c. semisweet chocolate chips
1 c. milk chocolate chips

Cream the butter and sugars until light and fluffy.  Beat in the eggs and vanilla.  Stir in the flour, cornstarch, salt (if using), baking powder, and baking soda until combined.  Mix in the chocolate chips.

Form into large balls, about 4 oz. each.  (I did about three of my cookies like this and made the rest of them into small, regular-sized cookies).  Freeze the dough balls for at least 30 minutes.

Preheat the oven to 350F.  Bake the large cookie dough balls for 15-20 minutes (mine took 23 minutes).  Bake the smaller, regular-sized dough balls for 12 minutes.  

Wednesday, August 13, 2014

Almond Biscotti


So, like I mentioned, I had a major cookie craving this past weekend.  As a result, one batch of cookies was just not enough.  No, I had to bake TWO different types.  But, since there must be a balance in all things, I decided that my second batch would be a little lighter, a little healthier, not quite as indulgent, but still every bit as delicious.  Which meant it was time for biscotti! 

I love biscotti.  There's just something about nibbling on those crunchy bites that fills me with delight.  Consequently, I've made many types through the years - cranberry, pumpkin, banana, gingerbread, chocolate, cinnamon . . . you get the point.  But, I've never made the quintessential almond biscotti.  It probably has something to do with the fact that I've never been a big fan of almond flavor until recently.  Hmm, must be growing up. 

Anyway, having formed a taste for it, and owing to the fact that I had a huge bag of sliced almonds I needed to use up, the time had come to try them out.  I decided to alter one of my favorite basic biscotti recipes by using almond flavoring in place of the vanilla and adding sliced almonds instead of the typical cranberries and pistachios.  It definitely worked out!  The biscotti had that lovely almond flavor to them, without it being overpowering, and tasted like those Chinese almond cookies.  My family said it's just as good as the ones from Starbucks.  Now that's a compliment! 

Normally, whenever I bake a batch of cookies, I always take some to work and share them with my co-workers.  But, I think this time, I'm just going to keep the biscotti to myself.  Don't judge me.  :)  You know you'd want to do the same. 

Almond Biscotti (adapted from Martha Stewart)

 3 c. all-purpose flour
2 tsp. baking powder
1/4 tsp. salt
4 Tbsp. unsalted butter, room temperature
3/4 c. sugar
3 eggs 
2 tsp. almond extract
1/2 c. sliced almonds

Cream the butter and sugar.  Beat in the eggs and almond extract.  Mix in the flour, baking powder, and salt until well incorporated.  Fold in the sliced almonds.  

Dust a baking sheet with flour.  Divide the dough in half and form each half into a 16x2 inch log on the sheet.  Flatten slightly.  Bake at 350F for 25 minutes.  Slice into 1/2" thick slices with a serrated knife and place cut side down on the sheet.  Bake again for 10 minutes, flip the slices over, and bake 10 minutes more.  Let cool completely.  


Monday, August 11, 2014

Brown Butter Chocolate Chip Cookies


It was a Sunday afternoon and I was craving cookies.  I'm sure you know the feeling.  I mentioned this to one of my family members and was asked, "Then, why don't you go buy some?"  Egads!  The very thought!  No, no, a thousand times no!  When I say I'm craving cookies, I don't mean that I'm craving some mass-produced, trans-fat loaded, disc with ingredients I can't even pronounce.  I want fresh, hot-out-of-the-oven, buttery, chewy, flavor loaded mouthfuls of delight.  Now that's a cookie! 

So, now that we have that out of the way, I went looking for the perfect recipe to satisfy my desires.  I was in the mood for chocolate chip and just happened to come across a link to these Brown Butter Chocolate Chip Cookies, created by Joy the Baker.  Once I saw them, I couldn't resist.  Must . . . make . . . now!!!  I made a few changes to the recipe, such as leaving out the molasses (I didn't have any), omitting the pecans (allergies), and using milk chocolate chips (since I didn't have semisweet).  I also ended up chilling the dough for two hours, instead of only 30 minutes, but that was only because I was too lazy to bake them at the 30-minute mark.   


These cookies were fantastic!  I loved that they held their shape in my oven and didn't flatten out.  The result was crispy on the outside, chewiness in the middle, and that lovely caramelly flavor from the browned butter.  Although they still don't top my favorite chocolate chip cookie recipe HERE, I have to admit that they are delicious indeed.  Craving satisfied! 

Brown Butter Chocolate Chip Cookies (slightly adapted from Joy the Baker)

2 1/4 cups all-purpose flour
1 teaspoon salt (I decreased this to 3/4 tsp.)
1 teaspoon baking soda
1 cup (2 sticks) unsalted butter, softened to room temperature
1 cup packed light brown sugar
2 teaspoons pure vanilla extract
1 teaspoon molasses (I omitted this)
1/2 cup granulated sugar
1 large egg
1 large egg yolk
1 cup bittersweet chocolate chips (I used milk chocolate chips)

Brown 1/2 cup of the butter and then let cool for 20 minutes.  Cream the brown sugar with the remaining 1/2 cup of butter until light and fluffy.  Add the vanilla and mix well.  Beat in the browned butter (brown bits and all) and granulated sugar.  Beat in the egg and egg yolk.  Mix in the flour, baking soda, and salt, until well incorporated, then mix in the chocolate chips.  Wrap the dough in waxed paper and chill for at least 30 minutes. 

Form the dough into small balls and bake at 350F for 12-14 minutes (I baked them for 13 minutes, then left them in the turned-off oven for 1 minute more).  Let cool on baking sheet for a few minutes before cooling completely or eating.   

Sunday, August 3, 2014

Pretzel Nutella Swirl Cookies


Believe it or not, due to a change in circumstances, I once again found myself assigned to the lovely Katrina's blog, Baking and Boys, for this month's Secret Recipe Club.  You mean I get another chance to peruse her never-ending list of ultimate, beyond your imagination, mouthwatering sweets?  You don't have to ask me twice!  Since this is the third time I've had her blog, you probably think that there isn't much more I can say about her, but I think I can come up with a few more tidbits. 

First of all, she has an eagle eye when it comes to finding the newest candy/cookie/etc. that's out on the market.  Whether it be those birthday cake M&Ms or the Coconut Fudge Oreos, you can bet she's already found it AND created some amazing way to use them to kick up a recipe.  As a result, I've made a lot of Target/Walmart runs in the past years just so I could see the deliciousness that she was talking about.

Secondly, she is the Rice Krispie Treat queen!  I kid you not.  I counted no less than 20 different recipes for rice krispie treats on her blog.  They are all awesome looking.  After seeing them, you may never go back to the plain ones again.  Hint:  this is where a lot of those new-fangled Oreos and M&Ms went.

After looking through numerous recipes for cakes, cookies, brownies, and other yummy treats, I finally narrowed my selection down to these Pretzel Nutella Chunk Cookies.  Salty and sweet?  I couldn't resist.  the neat thing about this recipe is that you make the "chunks" yourself by freezing the Nutella and then chopping it up to put into the cookies.  I did just that and had some lovely looking chunks, for about 5 minutes.  It was kind of a warm, humid day when I made the cookies, so the moment I added the cold chunks into the dough, they immediately melted and I got half chunks and half swirls.  Although, in my opinion, that wasn't really a bad thing.  The Nutella flavor became more prominent and the cookies themselves had a pretty marbled look.  All in all, these cookies were absolutely delish!  I'm glad the recipe only makes a small batch because otherwise I wouldn't be able to stop myself from eating even more of them.  


Thanks Katrina for your amazing ideas!  

Pretzel Nutella Swirl Cookies (slightly adapted from Baking and Boys)

1/2 cup plus 1/2 tablespoon cake flour + 1/4 cup plus 3 tablespoons bread flour (I used all-purpose flour)
1/4 teaspoon baking soda
1/2 teaspoon baking powder
1/2 teaspoon coarse salt
5 tablespoons (2  1/2 oz.) unsalted butter, softened
1/4 cup plus 1/2 tablespoon granulated sugar
1/4 cup plus 1 tablespoon packed brown sugar
1/2 a large egg
1/2 teaspoon vanilla extract
1/2 cup pretzel balls (I used broken pretzels)
1/2 cup (4 ounces) Nutella chunks**

** To make the Nutella chunks:  Spread 1/2 c. Nutella on a parchment-paper lined baking sheet, about 1/8-1/4 inch thick.  Freeze for at least an hour until set.  Cut into chunks and keep chilled until ready to use. 

Cream the butter and sugars together.  Add the egg and vanilla and mix well.  Add the flour, baking soda, baking powder, and salt and mix until just combined.  Stir the pretzels and Nutella chunks carefully into the dough.  Scoop the dough into small balls and bake for 10-12 min. at 350F.  Let sit on baking sheet for a couple minutes, then place on a wire rack to cool. 
    

Wednesday, May 14, 2014

Nielsen Massey Chocolate Chip Cookies


HAPPY NATIONAL CHOCOLATE CHIP COOKIE DAY!

And, what better way to celebrate than with . . . chocolate chip cookies.  But, these aren't just any chocolate chip cookies, oh no, these are special.  Wanna know why?  Well, about a month ago, Nielsen Massey contacted me to ask if I would like a sample bottle of their pure vanilla extract.  Considering that I've only ever bought cheap generic imitation vanilla, I was thrilled.  In exchange, all they asked was that I use the vanilla to make some of their awesome chocolate chip cookies and post about it today.  Seriously, quality vanilla and a batch of chocolate chip cookies to boot?  How could I say no?

The only changes I made was to use mini chocolate chips (since I didn't have any regular ones), added some grated milk chocolate, and chilled the dough.  Let me tell you, these chocolate chip cookies impressed me from the moment I saw them baking in my oven.  Unlike a lot of other recipes I've tried, these stayed thick and puffy till the very end.  Then, once I took them out, they turned into these crispy shelled, soft gooey middle-y, crinkled topped circles of buttery, vanilla-y perfection.

I took a bite and I was impressed.  What a cookie!  They had the ideal texture and were so full of flavor that I can only attribute to having used real vanilla to make them.  Thank goodness the recipe made three dozen cookies because one will not be enough for me.  Thank you Nielsen Massey for the opportunity to try your vanilla and your yummy cookie recipe!

Nielsen Massey Chocolate Chip Cookies

3/4 c. butter (I used salted butter)
1/2 c. + 2 Tbsp. sugar
1/2 c. + 2 Tbsp. brown sugar
1 1/2 tsp. Nielsen-Massey Madagascar Bourbon Pure Vanilla Extract
1 egg
2 c. all-purpose flour
1 tsp. baking soda
pinch salt  
1/2 tsp. baking powder
1/2 tsp. cream of tartar
1 c. mini semisweet chocolate chips
1/4 c. grated milk chocolate 

Cream the butter with the sugars.  Beat in the vanilla and eggs.  Mix in the flour, baking soda, salt, baking powder, and cream of tartar.  Stir in the chocolate chips and grated milk chocolate.  Chill the dough for 1 hour in the fridge or 30 minutes in the freezer.  Roll into small walnut-sized balls and place on a parchment paper lined cookie sheet.  Bake 14 minutes.  Let sit a few minutes on baking sheet before removing to cool completely on a wire rack. 

Sunday, December 8, 2013

Ginger Crunch Bars - Secret Recipe Club


Have you ever seen Leigh's blog, Chit Chat Chomp?  It's got such a warm, homey, comforting feeling to it.  Looking at the pictures of all the delicious things she makes, you just can't help but sigh in contentment and happiness.  I definitely had fun looking through her recipes.  

I just love the holiday season.  The pretty lights, the cheerful music, and, of course, the treats with their seasonal spicy flavors.  That's why I picked her Crunchy Ginger Slice for this month's SRC.  They are perfect for this time of year - minimal ingredients, super quick and easy to throw together for any party, and the gingery flavor just has Christmas written all over it. 


The only change I made was to increase the amount of ginger powder in the cookie base.  Also, since I didn't have any golden syrup, I substituted with a 50/50 mixture of light and dark corn syrups.  I think the icing was the best part of these cookies.  I don't even know how to describe it.  It's like a ginger candy/caramel that's sweet and sticky, but melts in your mouth.  Simply lovely.  I dressed up the finished bars with some Christmas-y sprinkles and now they're all ready to share with my friends.

Thanks Leigh for a sweet holiday treat!  

Crunchy Ginger Slice (adapted from Chit Chat Chomp)

1 1/4 c. all-purpose flour
1/2 tsp. baking powder
1 1/2 tsp. ginger powder
1/2 c. sugar
1/2 c. butter, softened

Ginger Icing:
1/3 c. butter, cut in small pieces
1 Tbsp. light corn syrup
1 Tbsp. dark corn syrup
2 1/4 tsp. ginger powder
3/4 c. powdered sugar

Preheat oven to 350F.  Cream the butter with the sugar.  Add the flour, ginger powder, and baking powder and mix until well combined.  Press the mixture into a parchment paper-lined 8x8 pan and bake for 35 min., or until golden and firm to the touch.  Set aside.

To make the icing:  Place the butter, corn syrups, and ginger powder in a saucepan over medium heat and cook for 2-3 min., or until butter is melted.  Add the powdered sugar and whisk to combine.  Pour icing over the cookie base.  Chill for 1 hour or until set. 

Sunday, August 4, 2013

Spiced Oatmeal Cranberry Apricot Cookies


I have to admit, when I started searching Cupcake Muffin's blog for this month's SRC, I was like a kid in a candy store.  Oohhh ooohhh look at all the yummy cookie recipes, I want that!  Wait, wait, look at all the delicious cake recipes, I want that!  What?  There's more sugary stuff over there too?  What they hey, I'll just take all of it.  Consequently, I didn't make just one recipe from Sara's blog, I actually tried three different ones over the course of the month.  But, one of those recipes was one that she made for her SRC before, so I chose not to showcase that one.  Instead, I bring you some amazing Spiced Oatmeal Cookies with Dried Cranberries and Apricots. 

I teach a group of teenage girls and I like to make their birthdays special by presenting them with an assortment of cookies.  Each month, I change things up and try new recipes and Sara's oatmeal cookie recipe looked like just the thing to make.  I didn't have any dried cherries, but I did have some dried cranberries, so I added those in instead.  I also didn't have any cardamom on hand, so I subbed in some ginger powder.


These cookies came out just like the ones in Sara's picture, all thick and chewy and full of orange and red bits of fruit that looked like jewels.  My mom saw them cooling on the counter and, after asking if it was alright to take one (she knows I gotta take pics first), promptly declared that they were really good!  I ate one myself and boy was she right.  Even better, these are totally healthy - just bursting with fiber, antioxidants, and vitamin C.  Okay, maybe you don't care about that.  In that case, they're bursting with flavor, fruitiness, and spiciness that can't be beat.

Sara, your cookies rock! My tastebuds thank you.

Spiced Oatmeal Cookies with Dried Cranberries and Apricots (adapted from Cupcake Muffin)

1-1/2 cups flour
1 tsp. baking soda
1 tsp. salt
2 tsp. cinnamon
1 tsp. freshly grated nutmeg
1/2 tsp. ginger powder
2 sticks softened butter
1-1/4 cups firmly packed dark brown sugar
1/4 cup white sugar
2 large eggs
1 tsp. vanilla
2-3/4 cups quick oats (not instant oats)
6 ounces dried cranberries
3 ounces dried apricots, diced

1. Whisk together the flour, baking soda, salt, cinnamon, nutmeg, and ginger powder and set aside.
2. Beat together the butter and sugars until smooth and creamy.  Add the eggs one at a time, beating after each addition.  Add the vanilla and beat to incorporate.
3. Add the flour mixture and stir in with a rubber spatula until the flour is mixed in enough not to fly out of the mixer.  Then beat until just incorporated.  Add the oats and beat until just combined.  Stir in the cranberries and apricots with a rubber spatula.
4. Cover the bowl and chill at least 6 hours or overnight.
5. When ready to bake, preheat the oven to 375 degrees and line two baking sheets with foil or parchment.
6.  Scoop out about 1 tablespoon of dough per cookie, and gently roll into a ball with your palms.  Bake 10-12 minutes, rotating the pans halfway through, until the cookies just begin to brown.
 7.   Let cool on a cooling rack. 


Thursday, May 9, 2013

Brown Butter Ginger Chocolate Chip Cookies


Even though I've found the BEST chocolate chip cookie HERE, I still can't resist trying yet another recipe.  Besides, this recipe was kinda different from all the others since it called for the addition of ginger.  It sounded like a delicious twist to your everyday cookie.

What I really liked about these cookies was their texture.  They stayed thick, even after baking, and had this amazing crisp exterior that gave way to an absolutely perfect chewiness within.  It was the kind of cookie that you'd get from a bakery.  And, even though I couldn't taste the ginger, they still tasted fantastic.  I gave these to someone for their birthday and was told that they couldn't get enough of them and that they were gone in no time.  Which means that these cookies are definitely worth making (and giving if you can bear to part with a few of them).

Brown Butter Ginger Chocolate Chip Cookies
(adapted from Une Gamine dans la Cuisine)

11 Tbsp. butter, softened
1 Tbsp. vanilla
1/2 c. sugar
1/2 c. + 3 Tbsp. light brown sugar
1 tsp. ginger powder
1 3/4 c. all-purpose flour
3/4 tsp. baking powder
3/4 tsp. baking soda
1/2 tsp. salt
1 egg, lightly beaten
1 c. semisweet chocolate chips

Melt 10 Tablespoons of butter in a medium saucepan (set the remaining 1 Tablespoon aside). Cook over medium heat, swirling occasionally, until the butter turns brown and develops a rich nutty aroma- about 5-8 minutes, depending on the heat. {Note: The butter will go through a "foamy" stage, once it settles down, keep a close watch on the colour.} Remove the pan from the heat and stir in the vanilla extract. Set aside to cool to room temperature. 

Combine the cooled brown butter with the remaining 1 Tbsp. butter.  Beat with the sugars.  Add the egg and beat to combine.  Combine the flour, baking powder, baking soda, salt, and ginger powder.  Add to the butter-sugar-egg mixture and mix well.  Fold in the chocolate chips.  

Line a cookie sheet with parchment paper. For each cookie, measure out about a 1/3 cup of dough (I made my cookies smaller - about 2 Tbsp. each). Form each into a ball, place on the cookie sheet, and flatten slightly (to a little less than 1/2-inch thickness). Once all the dough has been measured out, cover the sheet with plastic wrap and chill for about 12 hours. {Note: The longer you chill the dough, the better the flavour!}

When you're ready to bake: Preheat the oven to 400 F. Line another cookie sheet with parchment paper. Place about 4 cookies on the sheet--leave about 1-inch of space between each cookie. Bake for 8-11 minutes, or until the cookies are light golden in colour.


Note:  I forgot to let them chill for the 12 hours, but will definitely do it next time.  Either way, the cookies still tasted great.   

Tuesday, January 15, 2013

Apple Pie Bars


Weeks ago, Natalie, from the blog, "Once Upon a Cutting Board," linked up her Apple Pie Bars and made the Sweets for a Saturday Top 5.  Just one look at that irresistible picture and I couldn't wait to make them myself.

They reminded me of the apple crisp bars that my school cafeteria used to serve with lunch sometimes.  It was one of my favorite desserts.  I wonder, if I had thought years ago to ask them for the recipe, do you think they would have given it to me?  Well, no matter.  It's too late now and, at any rate, these Apple Pie Bars taste exactly like them.


The one difference between them is that the filling in these is made fresh rather than being canned.  Of course, that makes all the difference in the world - all natural, no preservatives, and therefore healthy (or at least healthier).  Honestly, this filling really is incredible.  A little extra time, patience, and tender loving care and you're rewarded with flavorful apple goodness that could also easily be used to top ice cream, cake, cheesecake, your choice.  Combine that with a buttery crust and cinnamony streusel and you've got a bar that is to die for.


The only changes I made was to use a variety of different apples - Gala, Fuji, and Jazz - since that's what I had in my fridge, and to add some oats to the streusel topping for extra texture and crunch.  Otherwise, I kept the recipe as is.  My family raved about this one.  As for me, eating it brought back some sweet memories.  It's definitely a keeper!  

Apple Pie Bars (adapted from Once Upon a Cutting Board)

6-7 Granny Smith or golden delicious apples, peeled, cored, and sliced into 1/4-inch thick slices (I used whatever apples I had on hand - a mixture of Gala, Fuji, and Jazz apples)
1/3 c. brown sugar
2 Tbsp. lemon juice
1 tsp. cinnamon
1/4 tsp. nutmeg

Crust:
2 1/4 c. all-purpose flour
1/2 tsp. baking powder
1/4 tsp. salt
1 c. unsalted butter
1/2 c. brown sugar
1/2 tsp. vanilla
1 large egg

Streusel:
3/4 c. all-purpose flour
1/2 c. rolled oats (I added these)
1/4 c. sugar
1/4 c. brown sugar
1 tsp. cinnamon
pinch salt
4 Tbsp. unsalted butter, cold and cubed (I increased this to 6 Tbsp.)

Combine the apples, brown sugar, lemon juice, cinnamon, and nutmeg in a saucepan over medium heat.  Cover the pan for 2-3 min., and uncover when the apples have released their juices.  Cook, stirring occasionally, until apples are golden brown and soft and there is no liquid left in the pan, about 15 min.  Set aside to cool.

Preheat oven to 375F.  Line a 9x13 baking pan with foil or parchment paper.  

In a large bowl, whisk together the flour, baking powder, and salt.  Cream the butter and sugar.  Add the egg and mix well.  Add the dry ingredients and stir to combine.  Spread the dough evenly in the pan and press down.  Prick the dough with a fork and bake for 15-18 min., until crust is golden brown and beginning to release from the sides of the pan.

For the streusel:  Whisk together the dry ingredients.  Cut in the butter with a pastry cutter until it is crumbly.  

When the crust is done, remove from oven and reduce oven temperature to 350F.  Spread the apple filling over the hot crust, and sprinkle the streusel topping evenly over the apples, pressing gently to help it stick.  Return pan to oven and bake for 20-25 min., until topping is lightly browned and crisp.  Let cool for at least 2-3 hours before removing and slicing (or you can chill it in the fridge).      


Monday, January 7, 2013

Fudgie Wudgies - SRC


Ever since I became a member of the Secret Recipe Club, I have been waiting and waiting to finally be assigned to Katrina's blog, Baking and Boys.  Not only is she the reason that I became a member of this wonderful club, but she is also a very good blogger friend of mine.  I even got to meet her and she is every bit as sweet as the treats that she makes.


Of course, I had been following her blog for quite a while, even before I knew her.  Her blog is just so fun to read as she talks about her beautiful family and her signature chocolate twists on her sweets.  I put a lot of stock into what she says.  If she mentions that a recipe was good, then I know it's good.  As a result, I've made quite a few things from her blog over the past years - Crunchy Nut Chocolate Chip Peanut Butter Cookies, Joanne Chang's Chocolate Chip Cookies (which are my all-time fave CCC), Marbled Peanut Butter Brownies, Cherry Ice Cream, and Spicy Peanut Butter Ice Cream - and they all get a double thumbs up from me.  This month's assignment gave me an excuse to make even more of the delicious things she's posted about and I couldn't wait to dive right in.

Now, if you know Katrina, then you also know about her proclaimed love for all things chocolate.  So, I just had to choose a recipe that would pay homage to that part of her personality.  And, what better recipe than her Fudgie Wudgies.  These are Katrina to a tee!  They have melted chocolate and cocoa powder in the dough, PLUS more chocolate chips added in for a triple chocolate dose.


These cookies are fantastic!  My family loved how they tasted.  They're exactly like brownies in cookie form from the crackly, papery top to the soft, chewy, fudginess inside.  I used regular cocoa powder and semisweet chocolate chips to make these, but I would love to make them again with dutch cocoa powder and a good brand of 70% chocolate to really get them chocolatey to the max.  Because, as I've learned from Katrina, there is never such a thing as too much chocolate.  

Fudgie Wudgies (from Baking and Boys)

1 3/4 c. semisweet chocolate chips
10 Tbsp. unsalted butter
6 Tbsp. all-purpose flour
1 tsp. baking powder
3 Tbsp. unsweetened cocoa powder
1/8 tsp. salt
2 large eggs
2 tsp. vanilla
3/4 c. sugar

Preheat oven to 325F.  Line baking sheets with parchment paper.

Melt 1 c. chocolate chips with the butter in a glass, microwave safe dish in 20 second intervals, stirring between each, until melted.  Allow to cool 5 min.  Sift the flour, baking powder, cocoa, and salt together in a small bowl using a wire whisk.

Beat the eggs and vanilla with a wire whisk until combined.  Add the sugar to the egg mixture and blend until the mixture is thick.  Add the melted chocolate and whisk together.  Add the flour mixture and blend just until combined.  Stir in the 3/4 c. of chocolate chips.

Drop by tablespoonfuls onto the baking sheets, about 2 inches apart.  Bake the cookies until they form a thin crust, about 14 min. 

Thursday, November 8, 2012

Rocky Road Cookie Cups


A while back, I went on a total cookie cup spree.  I tried out idea after idea for new flavors and twists and thoroughly enjoyed each one.  Along the way, I created these Rocky Road Cookie Cups - a deliciously chocolatey cookie cup filled with even more chocolate, marshmallows, and some almonds.  Crunchy, chewy, chocolatey - who could ask for anything more?  They may not look very Christmas-y, but hey, chocolate is good anytime!   Here's to Week 7 of the 12 Weeks of Christmas Treats! 


Rocky Road Cookie Cups (created by Sweet as Sugar Cookies)

1 c. salted butter, at room temperature (if using unsalted, add 1/2 tsp. salt)
1/2 c. sugar
1/4 c. + 2 Tbsp. brown sugar
2 Tbsp. powdered sugar
1 egg
1/2 tsp. vanilla
2/3 c. cocoa powder
1 1/2 c. all-purpose flour
1/2 tsp. baking powder
1/4 tsp. baking soda

mini marshmallows
chopped almonds
mini chocolate chips
melted chocolate, for drizzling

Cream the butter with the sugars. Add the egg and vanilla and beat well. Mix in the cocoa powder. Add the flour, baking powder, and baking soda and mix to combine.

Preheat the oven to 350F. Grease mini muffin tins. Fill each muffin cup about 3/4 full with the dough. Bake for 10 min. or until a toothpick comes out clean. If the cookie cups have risen above the muffin cups, simply use a spoon to flatten them down so they are level with the muffin cups.

While still warm, make a well in the center of each cookie cup with a small spoon or your finger.  Put a few mini marshmallows into each cookie cup along with some mini chocolate chips and chopped almonds.  Put the cookie cups back into the oven for a minute or two, just until the marshmallows have slightly melted.  Remove from the oven.  Chill the muffin tins in the fridge for 30-60 min. before removing the cookie cups.

When cooled, drizzle with the melted chocolate.  

Thursday, November 1, 2012

White Chocolate Lime Shortbread Bars


Can you believe we're already at the halfway point of the 12 Weeks of Christmas Treats?  Before you know it, it's already gonna be Thanksgiving and then Christmas really will be just around the corner.  But, I'm happy just enjoying the moment and these bars are perfect for doing just that.


 The filling was originally made with lemons, but I used limes instead and I don't really notice any difference.  I think the best part about these bars is that awesome crumbly shortbread topping.  Seriously, it's buttery, crunchy, melt in your mouth good and, even better, there is a lot of it on these bars.  I decided to drizzle mine with some white chocolate and that added just the right touch.  Fall may be here and winter just around the bend, but these refreshingly tart bars will help you hold onto the sweet summery feeling for just a little longer.  

White Chocolate Lime Shortbread Bars (adapted from Keep it Sweet)

2 cups all-purpose flour
1/2 pound (2 sticks) unsalted butter, softened
3/4 cups powdered sugar, sifted
1/2  cups granulated sugar
1/2 tablespoon vanilla extract

Filling:
2 extra-large eggs at room temperature
3/4 cups granulated sugar
1 1/2 tsp. grated lime zest
1/3 cup freshly squeezed lime juice
1/3 cup all-purpose flour

white chocolate (for drizzling)

Grease a 9-inch square baking dish with non-stick cooking spray and set aside. 
Sift flour; set aside.  Beat butter and sugars on high speed until light and fluffy; mix in vanilla until will combined.  Stir in flour just until combined. 

Press half of the dough into prepared dish and bake for about 15 minutes or until edges are golden brown.  Chill the rest of the dough in the fridge.

When bottom layer is done, set aside to cool and prepare filling.  Whisk together eggs, sugar, zest,juice, and flour; pour over crust.  Bake crust and filling for 20-25 minutes or until filling is starting to set.  Remove from oven and top with remaining dough but crumbling dough into pieces and distributing evenly over filling.  Bake the bars for 20-25 minutes or until top of crumbs is golden brown. Let cool, then drizzle with melted white chocolate, if desired.  Store in the fridge. 

Thursday, October 25, 2012

Pumpkin Snickerdoodles


Here we go - Week #5 of the Twelve Weeks of Christmas Treats and I decided to make a batch of Pumpkin Snickerdoodles.

I still remember the first time I ever ate a snickerdoodle.  I was probably about 8 or so and someone had kindly made us a batch.  I took one bite and thought it was the most delicious cookie ever.  You can bet I went and grabbed a second cookie after that, and maybe a third. 

Years later, I fell in love with pumpkin.  Once that happened, I just had to have the pumpkin version of everything - scones, breads, cookies, cake - you name it, I'll take it.  In my opinion, a little pumpkin makes everything twice as good (okay, maybe not everything, but certainly in most cases).

So, when I saw that there was a pumpkin version of snickerdoodles, I just knew that I had to make them.  And boy was I glad I did.  They have all the goodness of the classic snickerdoodle - the chewy cakiness and the sweet spiciness - and, in addition, they also have that added punch of pumpkin, which like I said makes everything better.  Put it all together and you've got a cookie that is tailor-made for autumn and for your pumpkin-loving tastebuds.


Pumpkin Snickerdoodles (adapted from Annie's Eats)

 3¾ cups all-purpose flour
1½ tsp. baking powder
½ tsp. salt
1 tsp. ground cinnamon
1/4 tsp. ground nutmeg
1 cup (2 sticks) unsalted butter, at room temperature
1 cup granulated sugar
½ cup light brown sugar
¾ cup pumpkin puree
1 large egg
2 tsp. vanilla extract

For the coating:
½ cup granulated sugar
1 tsp. ground cinnamon
½ tsp. ground ginger
Dash of allspice

In a medium bowl, combine the flour, baking powder, salt, cinnamon, and nutmeg.  Whisk to blend and set aside.  In the bowl of an electric mixer, beat together the butter and sugars on medium-high speed until light and fluffy, 2-3 minutes.  Blend in the pumpkin puree.  Beat in the egg and vanilla until incorporated.  With the mixer on low speed add in the dry ingredients and mix just until incorporated.  Cover and chill the dough for at least 1 hour.

Preheat the oven to 350˚ F.  Line baking sheets with silicone baking mats or parchment paper.  Combine the sugar and spices for the coating in a bowl and mix to blend.  Scoop the dough (about 2½ tablespoons) and roll into a ball.  Coat the dough ball in the sugar-spice mixture and place on the prepared baking sheet.  Repeat with the remaining dough to fill the sheets, spacing the dough balls 2-3 inches apart.  

Bake the cookies for 10-12 minutes, or until just set and baked through.  Let cool on the baking sheets about 5 minutes, then transfer to a wire rack to cool completely.  Repeat with the remaining dough.  

Note:  The flavor in the cookies deepens with time, so they're even tastier the next day.  

Thursday, October 18, 2012

Nutella Magic in the Middles


It's now Week #4 of the 12 Weeks of Christmas Treats.  I can't believe I missed the first three weeks of it, but better late than never.  What's the 12 Weeks of Christmas Treats, you might ask?  Well, each year, this fantastic group of bloggers decides to ring in the Christmas season by doing what we love best - baking.  For the 12 weeks leading up to Christmas, we each share a yummy Christmas treat.  If you want to join in the fun too, just contact Brenda from Meal Planning Magic and she'll get you all set up.


For this week's treat, I decided to share my adaptation of the Magic in the Middle Cookie.  It's a chocolate cookie that's usually filled with a peanut butter filling.  But, I just happened to have some Nutella lying around (as I'm sure most of you do) and I decided to add my own twist on these to make Nutella Magic in the Middles.  Granted, I made the peanut butter ones too, but the Nutella filled cookies were the ones that stole my heart and my tastebuds.  I didn't think I even liked Nutella all that much (I know, *gasp*), but stuff it into these cookies and suddenly I can't resist it.  To think, I was just trying to use up my leftover Nutella, but now that I have, I gotta go buy more!


Nutella Magic in the Middles (adapted from King Arthur Flour)

1 1/2 c. all-purpose flour
1/2 c. unsweetened cocoa power
1/2 tsp. baking soda
1/4 tsp. salt
1/2 c. sugar
1/2 c. brown sugar
1/2 c. butter
1/4 c. peanut butter
1 tsp. vanilla
1 egg

Filling:
6 Tbsp. peanut butter
6 Tbsp. powdered sugar

Nutella filling
(Sweet as Sugar Cookies)
6 Tbsp. Nutella
6 Tbsp. powdered sugar

Preheat the oven to 350F. Cream the butter and peanut butter with the sugars. Add the cocoa powder and mix. Add the vanilla and the egg, beating well. Combine the dry ingredients (flour, baking soda, and salt) and add.

For the filling:

Combine the peanut butter with the powdered sugar or the Nutella with the powdered sugar. Form the filling into small balls, a little less than 1" in diameter.

Scoop 1 Tbsp. of the dough, make an indentation in the center with your finger, and place a filling ball into the indentation. Bring the cookie dough up and over the filling, pressing the edges together to cover the center. Roll the cookie in the palms of your hand to smooth it out and repeat with the rest of the dough and filling.

Roll the cookie balls in sugar and place on a baking sheet. (Note: I didn't flatten mine before baking them. Instead, I flattened them about a minute before they were done baking - that gives the cookies some really pretty crinkles.). Bake the cookies for about 7-9 min., or until they're set and you can smell chocolate (mine took 12-15 min.). Remove from oven and let cool on a rack.

Monday, October 8, 2012

Caramel Apple Cheesecake Bars


I was thrilled to find out that my Secret Recipe Club assignment for this month was Peggy from the blog, "Feeding Andy."  I've been following her posts for quite a while now ever since the time that she used to blog over at, "My Fiance Likes It So It Must Be Good."  With all the great food that comes from her kitchen, I'd say that Andy is one very lucky person.

I decided to make her Caramel Apple Cheesecake Bars.  They just have autumn written all over them and combine every delicious thing into one treat.  Cheesecake?  Yum!  Streusel?  My favorite!  Caramel apple-y goodness?  You don't need to ask me twice.


The only changes I made were to double the ingredients for the crust and to use caramel ice cream topping since I had a jar of it in my fridge.  Other than that, I kept the recipe as is.  These bars were a delight to eat.  Creamy, crunchy, sweet and gooey.  Whatever you do, do not skip the caramel topping because that is what really makes these bars pop!  I shared these bars with some friends and they got some rave reviews.


Thanks Peggy for a great recipe!

Caramel Apple Cheesecake Bars (from My Fiance Likes It So It Must Be Good)

Crust:

1 cup flour
1/2 cup dark brown sugar
1/2 cup unsalted butter, slightly chilled and cubed

Filling:

16 oz. cream cheese, softened
1/2 cup sugar, plus 2 teaspoons
1 teaspoon vanilla extract
2 eggs
2 Granny Smith apples, peeled and diced (I used Gala apples)
1 teaspoon cinnamon

Streusel:

1/2 cup oatmeal
1/2 cup dark brown sugar
1/2 cup unsalted butter, slightly chilled and cubed
1 cup flour

caramel ice cream topping

To make the crust, combine flour and brown sugar in a medium bowl.  Cut the butter into the mixture with your fingers or a fork until the mixture is crumbly.

Press the dough into a 9x13 inch pan in an even and flat layer.  Bake for about 10 to 15 minutes or until lightly browned.  Set aside.

Make the filling by beating cream cheese and 1/2 cup of sugar in a large bowl.  Add eggs, one at a time, until just incorporated.  Stir in vanilla until just combined.

In a small bowl, combine the apples with the cinnamon and 2 teaspoons of sugar.  Let sit for about 1-2 minutes, then gently fold into cream cheese mixture.

Pour the batter over top of the warm crust.

Make the topping by combining the oats, flour, and brown sugar.  Cut the butter into the mixture until it is chunky and crumbly.

Top the cream cheese mixture with an even layer of the topping. 

Bake for about 30 minutes, or until cream cheese mixture is set and topping is a nice golden brown.

Drizzle caramel topping over cheesecake.


Monday, October 1, 2012

Chocolate Peanut Butter Squares


Several weeks ago, we were told about the sad passing of Daniel Saraga who blogged over at "The Haggis and the Herring."  As a tribute to him, a lot of Secret Recipe Club members decided that we would all make a recipe from his blog and post about it today.

You can read more about Daniel in this beautiful eulogy. 

I chose to make his Chocolate Peanut Butter Squares and am so glad that I did.  They are so chewy and gooey and tasted just like Reeses Peanut Butter Cups, which are one of my favorite candies in the whole world.  The neat part about them is that they're topped with two glazes - a chocolate one and a peanut butter one - which not only makes them super pretty, but also doubles the awesome peanut-buttery taste.  Plus, they've got some oatmeal in them, so maybe you can convince yourself that these are a "healthy" breakfast, you know, for those mornings when you wake up with a craving for something sweet.


Although I didn't know Daniel, I'm happy that I got the chance now to "know" a little bit more about him through his blog.  Rest in peace.

Chocolate Peanut Butter Squares (from The Haggis and the Herring)

1/2 c. sugar
1/2 c. brown sugar
1/2 c. butter, softened
1/3 c. peanut butter
1 c. all-purpose flour
3/4 c. quick cooking oats (I used rolled oats)
1/2 tsp. baking soda
1/4 tsp. salt
1/2 tsp. vanilla
1 egg

1 c. semisweet chocolate chips

Peanut butter glaze:
1/3 c. powdered sugar
2 Tbsp. peanut butter
1-2 Tbsp. milk

Preheat oven to 350F and grease a 9x13 pan.

Cream sugar, brown sugar, butter, and peanut butter in a large bowl.  Add the egg and vanilla.  Add the flour, baking soda, and salt.  Stir in the oats.  Spread evenly in the pan.

Bake for 15-20 min., or until golden brown, and then immediately sprinkle with chocolate chips.  Let stand for 5 min. or until chocolate chips have softened and then carefully spread melted chocolate over the baked layer.  (Note:  I melted the chocolate chips and then spread it over the bars.) 

Chill for about 30 min. or until chocolate is firm.  Mix all ingredients for the glaze until smooth and thin enough to drizzle.

Drizzle glaze, refrigerate again for 10 min. and cut for serving.


Tuesday, July 31, 2012

Almond Joy Cookie Cups


The cookie cups are back! For a while, I considered stopping, but I still had a few more ideas I wanted to try, so for now, stay tuned for more. This time, I decided to do a cookie cup based off of the Almond Joy candy bar - chocolate cookie stuffed with a sweet coconut filling, doused in melted chocolate, and a sprinkle of almonds on top.


Now, I'm not the biggest coconut fan in the world, but I know that a lot of other people are crazy about it, so this one's for all of you. But, even though I'd rather have, say chocolate and peanut butter, I still have to admit that these were quite yummy.


Of course, everything in moderation, so I ate one and then promptly evacuated the rest of the batch out of my house and into the hands of some very happy teenage girls.

Almond Joy Cookie Cups (created by Sweet as Sugar Cookies)

1 c. salted butter, at room temperature (if using unsalted, add 1/2 tsp. salt)
2 oz. cream cheese, softened
1/2 c. sugar
1/4 c. + 2 Tbsp. brown sugar
2 Tbsp. powdered sugar
1 egg
1/2 tsp. vanilla
2/3 c. cocoa powder
1 1/2 c. all-purpose flour
1/2 tsp. baking powder
1/4 tsp. baking soda

Coconut Filling (adapted from Over at Julie's)

3-4 oz. unsweetened coconut
5 Tbsp. sweetened condensed milk
2 Tbsp. powdered sugar

melted chocolate and chopped almonds

For the cookie cups: Cream the butter and cream cheese with the sugars. Add the egg and vanilla and beat well. Mix in the cocoa powder. Add the flour, baking powder, and baking soda and mix to combine.

Preheat the oven to 350F. Grease mini muffin tins. Fill each muffin cup about 3/4 full with the dough. Bake for 10 min. or until a toothpick comes out clean. If the cookie cups have risen above the muffin cups, simply use a spoon to flatten them down so they are level with the muffin cups.

While still warm, make a well in the center of each cookie cup with a small spoon or your finger. Chill the muffin tins in the fridge for 30-60 min.

For the coconut filling: Combine the coconut, condensed milk, and powdered sugar and mix well.

For the assembly: Put 1 tsp. of coconut filling into each cookie cup. Drizzle with melted chocolate and top with chopped almonds.