Showing posts with label bars. Show all posts
Sunday, May 31, 2015
Lime Raspberry Swirled Blondies
For this month's Secret Recipe Club, I was assigned to the blog, "Baking and Creating with Avril." When you read her profile, you'll find that it's short and sweet. She states that she started her blog to share her love of being in the kitchen. Then, once you start perusing her blog, you'll find that it's totally sweet and anything but short. She has recipes that will have you bookmarking for days, which naturally made it difficult to choose just one to share. As a result, I went ahead and made TWO of her recipes instead - the Cranberry Almond Cake, and the Raspberry Swirl Blondies.
I dressed up the blondies a bit by adding some lime zest to the batter. Just so you know, the batter will not look like a lot when you put it into the pan (I almost thought about making more), but it puffs up beautifully in the oven. Once baked, I finished them off with drizzled white chocolate and chopped almonds. The flavor combo of the raspberry and lime was fantastic! And the blondies themselves were chewy, cakey, and melt in your mouth good. I would love to try these out again using a different type of jam, maybe blueberry, or apricot, yummmmy!!!
Thanks Avril for giving me a keeper of a recipe!
Raspberry Swirl Blondies (adapted from Baking and Creating with Avril)
1 c. flour
1 tsp. baking powder
1/4 tsp. salt
1/2 c. unsalted butter, melted
3/4 c. sugar
1 egg
1 tsp. vanilla
1 Tbsp. lime zest (I added this)
1/3 c. raspberry jam
white chocolate, melted for drizzing
1/4 c. chopped almonds
Preheat oven to 350F. Line an 8x8 pan with foil. Combine the flour, baking powder, and salt. Rub the lime zest into the sugar with your fingers until fragrant. Combine the sugar with the melted butter, then beat in the egg and vanilla. Stir in the dry ingredients. Spread evenly into the pan and dollop with the raspberry jam. Use a butterknife to swirl it into the batter. Bake for 25-30 min., or until a toothpick comes out clean. Let cool, then drizzle with the white chocolate and sprinkle with the chopped almonds.
Labels:
bars,
cookies,
lime,
Secret Recipe Club
Wednesday, April 29, 2015
Lemon Almond Crumb Bars
I absolutely love lemon bars. In fact, once I went on a search for the best one and ended up making three different recipes. And it seems that my family must love lemon bars just as much as I do because they had no problem gobbling up each of the attempts. I honestly didn't think that there was a way to make them any better, but I was wrong. This recipe switches out the powdered sugar topping with a lovely, crumbly, almond-y layer. Oh my! It's a great way to counteract the sweetness of the filling and also gives a contrast in texture to the smoothness inside. I added a little candied ginger too and these bars were oh so tasty. I think I may have just found my new fave lemon bar.
Lemon Almond Crumb Bars (adapted from Bake or Break)
Crust:
1 c. all-purpose flour
pinch salt
6 Tbsp. unsalted butter
1/4 c. sugar
Filling:
1/4 c. all-purpose flour
1/2 tsp. baking powder
3 eggs
1 c. sugar
1/3 c. lemon juice
1 Tbsp. lemon zest
Topping:
6 Tbsp. all-purpose flour
1/4 c. sugar
pinch salt
2 Tbsp. unsalted butter, cold
1/4 c. sliced almonds
3 Tbsp. crystallized ginger, finely chopped
Combine the flour, sugar, and salt. Cut in the butter until mixture is pea-sized. Press into a parchment paper lined 8x8 pan and bake at 350F for 15-20 min., or until lightly browned.
For the filling:
Whisk together the eggs and sugar. Mix in the lemon juice and zest, then add in the flour. Pour over the crust and bake 15-20 min.
For the topping:
Whisk together the flour, sugar, and salt. Cut in the butter. Mix in the almonds and chopped ginger. Pinch the mixture together to make large crumbs and scatter over the filling. Bake 20-25 min. (I baked mine for 30 minutes), or till lightly browned and almonds are toasted. Let cool, then chill in the fridge before cutting into bars.
Monday, October 20, 2014
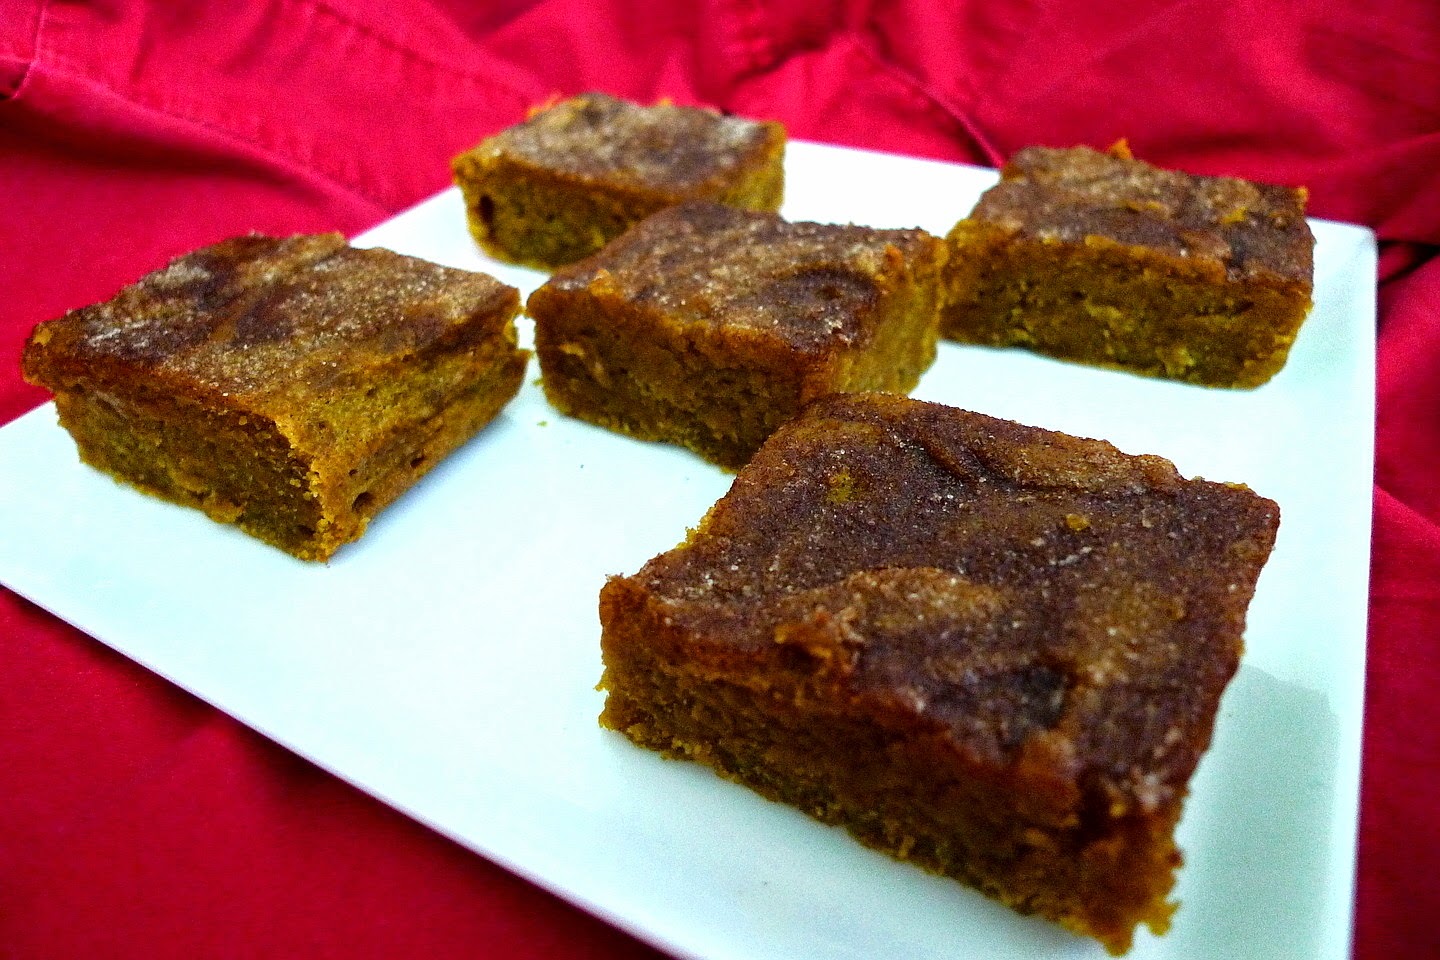
Browned Butter Pumpkin Pie Bars
It's that whole adage . . . if I knew then what I know now. Well, what I know now is how to brown butter and I also know that browned butter makes everything, and I mean everything, so much better. The smell of it alone is like the most delightful perfume in your house. Intoxicating. They should make air fresheners and candles scented like browned butter. I'm totally serious.
But, going back to these bars. Browned butter immediately adds a depth of flavor that you simply won't get with regular melted butter. It's true that it takes more time to make, a little more patience, and a bit of skill, but you really won't regret it. Once you go browned, you'll never go back. So it was with these pumpkin pie bars. One taste of them and the difference was like night and day. Oooohhh, I was in pumpkin heaven. Correction - browned butter pumpkin heaven. I eagerly shared these bars with friends of mine and they were just as over the moon about them as I was. May I never forget this important lesson - browned butter = better!
Browned Butter Pumpkin Pie Bars (slightly adapted from Brown Eyed Baker)
2 c. flour
2 1/2 tsp. cinnamon
1 tsp. ginger
1/4 tsp. nutmeg
1/2 tsp. salt
1 c. butter, browned
2 c. brown sugar
2 eggs
2 tsp. vanilla
1 can (15 oz.) pumpkin puree
For the top:
2 Tbsp. sugar
1 tsp. cinnamon
Line a 9x13 pan with parchment paper. Combine the dry ingredients and set aside. Brown the butter until it smells nutty (do not discard the browned bits). Let the browned butter cool slightly to room temperature. Combine the butter with the sugar, then beat in the eggs and vanilla. Mix in the pumpkin. Stir in the dry ingredients until just combined.
Spread the batter evenly in the pan. Sprinkle with the cinnamon sugar mixture and bake for 30 minutes, or until a toothpick comes out with moist crumbs on it. Cool completely before cutting.
Sunday, February 2, 2014
Glazed Lemon Squares
For this month's Secret Recipe Club, I was assigned to Cook Lisa Cook. If you've never seen her blog before, you simply must check it out. She makes the most delicious things and her adorable daughter gets to eat them. I must admit, I'm envious. At first, I couldn't decide whether I should make the Oatmeal Cashew and Chocolate Granola Bars (which look way better than store-bought ones), Cinnamon Bun Cookie Bars, White Chocolate Marshmallow Cranberry Cashew Bark, (perfect for Valentine's Day), or her Glazed Lemon Squares. In the end, I decided on the Lemon Squares, in part because I can't resist anything lemony, and also because these are different from any other lemon squares I've ever made. Usually, you would top them with powdered sugar. But, in this case, they're covered with a lemony glaze, giving you a double lemon kick in these bars.
I loved how these bars came out of the oven with a crackly, crispy, shatter-y crust on top. Then, hiding underneath is all that soft, lemony, melt in your mouth filling. But, the glaze, oh the glaze is what makes these bars a star. You cannot leave it off, the bars would just not be the same without them. Like I said, it adds another layer of lemon flavor that you just wouldn't get with plain, old powdered sugar. Plus, the tartness helps to even out the sweetness so that it becomes perfectly balanced.
I made this batch to share with another lemon bar lover and I think she's going to be over the moon to get them. From one Lisa to another, thanks for the yummy recipe!
Glazed Lemon Squares (from Cook Lisa Cook)
1 c. all-purpose flour
1/4 c. powdered sugar
1/2 c. butter
Filling:
2 Tbsp. flour
1/2 tsp. baking powder
2 large eggs
1 c. sugar
2 1/4 tsp. lemon zest
2 1/2 Tbsp. fresh lemon juice
Glaze:
1/2 c. powdered sugar
1 1/2 Tbsp. fresh lemon juice
Preheat oven to 350F. Combine the flour and sugar and cut in the butter until the mixture looks like coarse cornmeal. Press the dough evenly into a parchment paper-lined 8x8 pan. Bake for 15 min.
For the filling:
Whisk the eggs with the sugar until well combined. Add in the lemon zest and juice and mix well. Stir in the flour and baking powder till well combined. Once you take the crust out of the oven, pour on the lemon mixture. Bake 25 min. or until the filling has set up and starts to turn brown.
For the glaze:
Mix together the powdered sugar and lemon juice till well combined and smooth. Spread the glaze evenly over the bars once they have cooled completely. Chill for at least two hours before slicing.
Labels:
bars,
lemon,
Secret Recipe Club
Sunday, December 8, 2013
Ginger Crunch Bars - Secret Recipe Club
Have you ever seen Leigh's blog, Chit Chat Chomp? It's got such a warm, homey, comforting feeling to it. Looking at the pictures of all the delicious things she makes, you just can't help but sigh in contentment and happiness. I definitely had fun looking through her recipes.
I just love the holiday season. The pretty lights, the cheerful music, and, of course, the treats with their seasonal spicy flavors. That's why I picked her Crunchy Ginger Slice for this month's SRC. They are perfect for this time of year - minimal ingredients, super quick and easy to throw together for any party, and the gingery flavor just has Christmas written all over it.
The only change I made was to increase the amount of ginger powder in the cookie base. Also, since I didn't have any golden syrup, I substituted with a 50/50 mixture of light and dark corn syrups. I think the icing was the best part of these cookies. I don't even know how to describe it. It's like a ginger candy/caramel that's sweet and sticky, but melts in your mouth. Simply lovely. I dressed up the finished bars with some Christmas-y sprinkles and now they're all ready to share with my friends.
Thanks Leigh for a sweet holiday treat!
Crunchy Ginger Slice (adapted from Chit Chat Chomp)
1 1/4 c. all-purpose flour
1/2 tsp. baking powder
1 1/2 tsp. ginger powder
1/2 c. sugar
1/2 c. butter, softened
Ginger Icing:
1/3 c. butter, cut in small pieces
1 Tbsp. light corn syrup
1 Tbsp. dark corn syrup
2 1/4 tsp. ginger powder
3/4 c. powdered sugar
Preheat oven to 350F. Cream the butter with the sugar. Add the flour, ginger powder, and baking powder and mix until well combined. Press the mixture into a parchment paper-lined 8x8 pan and bake for 35 min., or until golden and firm to the touch. Set aside.
To make the icing: Place the butter, corn syrups, and ginger powder in a saucepan over medium heat and cook for 2-3 min., or until butter is melted. Add the powdered sugar and whisk to combine. Pour icing over the cookie base. Chill for 1 hour or until set.
Labels:
bars,
cookies,
ginger,
Secret Recipe Club
Tuesday, January 15, 2013
Apple Pie Bars
Weeks ago, Natalie, from the blog, "Once Upon a Cutting Board," linked up her Apple Pie Bars and made the Sweets for a Saturday Top 5. Just one look at that irresistible picture and I couldn't wait to make them myself.
They reminded me of the apple crisp bars that my school cafeteria used to serve with lunch sometimes. It was one of my favorite desserts. I wonder, if I had thought years ago to ask them for the recipe, do you think they would have given it to me? Well, no matter. It's too late now and, at any rate, these Apple Pie Bars taste exactly like them.
The one difference between them is that the filling in these is made fresh rather than being canned. Of course, that makes all the difference in the world - all natural, no preservatives, and therefore healthy (or at least healthier). Honestly, this filling really is incredible. A little extra time, patience, and tender loving care and you're rewarded with flavorful apple goodness that could also easily be used to top ice cream, cake, cheesecake, your choice. Combine that with a buttery crust and cinnamony streusel and you've got a bar that is to die for.
The only changes I made was to use a variety of different apples - Gala, Fuji, and Jazz - since that's what I had in my fridge, and to add some oats to the streusel topping for extra texture and crunch. Otherwise, I kept the recipe as is. My family raved about this one. As for me, eating it brought back some sweet memories. It's definitely a keeper!
Apple Pie Bars (adapted from Once Upon a Cutting Board)
6-7 Granny Smith or golden delicious apples, peeled, cored, and sliced into 1/4-inch thick slices (I used whatever apples I had on hand - a mixture of Gala, Fuji, and Jazz apples)
1/3 c. brown sugar
2 Tbsp. lemon juice
1 tsp. cinnamon
1/4 tsp. nutmeg
Crust:
2 1/4 c. all-purpose flour
1/2 tsp. baking powder
1/4 tsp. salt
1 c. unsalted butter
1/2 c. brown sugar
1/2 tsp. vanilla
1 large egg
Streusel:
3/4 c. all-purpose flour
1/2 c. rolled oats (I added these)
1/4 c. sugar
1/4 c. brown sugar
1 tsp. cinnamon
pinch salt
4 Tbsp. unsalted butter, cold and cubed (I increased this to 6 Tbsp.)
Combine the apples, brown sugar, lemon juice, cinnamon, and nutmeg in a saucepan over medium heat. Cover the pan for 2-3 min., and uncover when the apples have released their juices. Cook, stirring occasionally, until apples are golden brown and soft and there is no liquid left in the pan, about 15 min. Set aside to cool.
Preheat oven to 375F. Line a 9x13 baking pan with foil or parchment paper.
In a large bowl, whisk together the flour, baking powder, and salt. Cream the butter and sugar. Add the egg and mix well. Add the dry ingredients and stir to combine. Spread the dough evenly in the pan and press down. Prick the dough with a fork and bake for 15-18 min., until crust is golden brown and beginning to release from the sides of the pan.
For the streusel: Whisk together the dry ingredients. Cut in the butter with a pastry cutter until it is crumbly.
When the crust is done, remove from oven and reduce oven temperature to 350F. Spread the apple filling over the hot crust, and sprinkle the streusel topping evenly over the apples, pressing gently to help it stick. Return pan to oven and bake for 20-25 min., until topping is lightly browned and crisp. Let cool for at least 2-3 hours before removing and slicing (or you can chill it in the fridge).
Wednesday, December 19, 2012
Cream Cheese Swirled Snickerdoodle Blondies
My office was having a pre-Christmas cookie exchange and I was thrilled. I've never been part of a cookie exchange before and was definitely looking forward to trying everyone's treats. They were talking about peppermint truffles and these super decadent caramel chocolate bars. I just knew that I had to up my game too if I wanted my treats to be on par with theirs. So, I came up with an idea to combine two awesome recipes and make something that is truly "ultimate." I decided to make Cream Cheese Swirled Snickerdoodle Blondies. I'd never tried it before, but there's got to be a first time for everything. Besides, you really can't go wrong with snickerdoodles and cream cheese.
The recipe is truly decadent. Think of it - all that brown sugar and butter plus four eggs and an entire POUND of cream cheese. But, well, 'tis the season.
Just the smell of this alone while baking was enough to make my mouth water in anticipation. Not to mention looking in the oven and seeing that golden brown top all puffed and sweet. Even after taking them out of the oven, I still had to wait for them to chill long enough to set so that I could cut them (yes, I was very patient). Finally, it was time to taste. The blondies were out of this world good. All that cinnamony-sugary flavor with the fluffy blondie and the creamy cheesecake - match made in heaven. I have a feeling my co-workers are going to swoon over this one just like I did.
Cream Cheese Swirled Snickerdoodle Blondies
(created by Sweet as Sugar Cookies)
Blondies (by Dozen Flours)
2 2/3 c. all-purpose flour
2 tsp. baking powder
1 tsp. salt
2 c. packed brown sugar
1 c. butter, at room temperature
2 eggs
1 Tbsp. vanilla
2 Tbsp. sugar
2 tsp. cinnamon
Cream cheese swirl (by Brandy's Baking)
16 oz. cream cheese
1/2 c. sugar
2 eggs
1 tsp. vanilla
2 Tbsp. flour
Cream the butter with the brown sugar. Beat in the eggs and vanilla. Mix in the flour, baking powder, and salt.
Beat the cream cheese with the sugar. Add in the eggs and vanilla and mix well. Stir in the flour until combined.
Grease a 9x13 pan. Spread about 3/4 of the blondie batter into the pan. Pour the cream cheese mixture on top. Dollop the remaining blondie batter on top of the cream cheese layer and use a butter knife to swirl together. Combine the 2 Tbsp. sugar with the cinnamon and sprinkle evenly over the blondies. Bake at 350F for 45-50 min. until a toothpick comes out clean. After removing from the oven, let cool for about 10 min., then you can chill them in the fridge for 15 min. so that you can begin cutting them.
Labels:
bars,
cinnamon,
original recipe
Thursday, November 1, 2012
White Chocolate Lime Shortbread Bars
Can you believe we're already at the halfway point of the 12 Weeks of Christmas Treats? Before you know it, it's already gonna be Thanksgiving and then Christmas really will be just around the corner. But, I'm happy just enjoying the moment and these bars are perfect for doing just that.
The filling was originally made with lemons, but I used limes instead and I don't really notice any difference. I think the best part about these bars is that awesome crumbly shortbread topping. Seriously, it's buttery, crunchy, melt in your mouth good and, even better, there is a lot of it on these bars. I decided to drizzle mine with some white chocolate and that added just the right touch. Fall may be here and winter just around the bend, but these refreshingly tart bars will help you hold onto the sweet summery feeling for just a little longer.
White Chocolate Lime Shortbread Bars (adapted from Keep it Sweet)
2 cups all-purpose flour
1/2 pound (2 sticks) unsalted butter, softened
3/4 cups powdered sugar, sifted
1/2 cups granulated sugar
1/2 tablespoon vanilla extract
Filling:
2 extra-large eggs at room temperature
3/4 cups granulated sugar
1 1/2 tsp. grated lime zest
1/3 cup freshly squeezed lime juice
1/3 cup all-purpose flour
white chocolate (for drizzling)
Grease a 9-inch square baking dish with non-stick cooking spray and set aside.
Sift flour; set aside. Beat butter and sugars on high speed until light and fluffy; mix in vanilla until will combined. Stir in flour just until combined.
Press half of the dough into prepared dish and bake for about 15 minutes or until edges are golden brown. Chill the rest of the dough in the fridge.
When bottom layer is done, set aside to cool and prepare filling. Whisk together eggs, sugar, zest,juice, and flour; pour over crust. Bake crust and filling for 20-25 minutes or until filling is starting to set. Remove from oven and top with remaining dough but crumbling dough into pieces and distributing evenly over filling. Bake the bars for 20-25 minutes or until top of crumbs is golden brown. Let cool, then drizzle with melted white chocolate, if desired. Store in the fridge.
Monday, October 8, 2012
Caramel Apple Cheesecake Bars
I was thrilled to find out that my Secret Recipe Club assignment for this month was Peggy from the blog, "Feeding Andy." I've been following her posts for quite a while now ever since the time that she used to blog over at, "My Fiance Likes It So It Must Be Good." With all the great food that comes from her kitchen, I'd say that Andy is one very lucky person.
I decided to make her Caramel Apple Cheesecake Bars. They just have autumn written all over them and combine every delicious thing into one treat. Cheesecake? Yum! Streusel? My favorite! Caramel apple-y goodness? You don't need to ask me twice.
The only changes I made were to double the ingredients for the crust and to use caramel ice cream topping since I had a jar of it in my fridge. Other than that, I kept the recipe as is. These bars were a delight to eat. Creamy, crunchy, sweet and gooey. Whatever you do, do not skip the caramel topping because that is what really makes these bars pop! I shared these bars with some friends and they got some rave reviews.
Thanks Peggy for a great recipe!
Caramel Apple Cheesecake Bars (from My Fiance Likes It So It Must Be Good)
Crust:
1 cup flour
1/2 cup dark brown sugar
1/2 cup unsalted butter, slightly chilled and cubed
Filling:
16 oz. cream cheese, softened
1/2 cup sugar, plus 2 teaspoons
1 teaspoon vanilla extract
2 eggs
2 Granny Smith apples, peeled and diced (I used Gala apples)
1 teaspoon cinnamon
Streusel:
1/2 cup oatmeal
1/2 cup dark brown sugar
1/2 cup unsalted butter, slightly chilled and cubed
1 cup flour
caramel ice cream topping
To make the crust, combine flour and brown sugar in a medium bowl. Cut the butter into the mixture with your fingers or a fork until the mixture is crumbly.
Press the dough into a 9x13 inch pan in an even and flat layer. Bake for about 10 to 15 minutes or until lightly browned. Set aside.
Make the filling by beating cream cheese and 1/2 cup of sugar in a large bowl. Add eggs, one at a time, until just incorporated. Stir in vanilla until just combined.
In a small bowl, combine the apples with the cinnamon and 2 teaspoons of sugar. Let sit for about 1-2 minutes, then gently fold into cream cheese mixture.
Pour the batter over top of the warm crust.
Make the topping by combining the oats, flour, and brown sugar. Cut the butter into the mixture until it is chunky and crumbly.
Top the cream cheese mixture with an even layer of the topping.
Bake for about 30 minutes, or until cream cheese mixture is set and topping is a nice golden brown.
Drizzle caramel topping over cheesecake.
Labels:
apples,
bars,
cookies,
Secret Recipe Club
Monday, October 1, 2012
Chocolate Peanut Butter Squares
Several weeks ago, we were told about the sad passing of Daniel Saraga who blogged over at "The Haggis and the Herring." As a tribute to him, a lot of Secret Recipe Club members decided that we would all make a recipe from his blog and post about it today.
You can read more about Daniel in this beautiful eulogy.
I chose to make his Chocolate Peanut Butter Squares and am so glad that I did. They are so chewy and gooey and tasted just like Reeses Peanut Butter Cups, which are one of my favorite candies in the whole world. The neat part about them is that they're topped with two glazes - a chocolate one and a peanut butter one - which not only makes them super pretty, but also doubles the awesome peanut-buttery taste. Plus, they've got some oatmeal in them, so maybe you can convince yourself that these are a "healthy" breakfast, you know, for those mornings when you wake up with a craving for something sweet.
Although I didn't know Daniel, I'm happy that I got the chance now to "know" a little bit more about him through his blog. Rest in peace.
Chocolate Peanut Butter Squares (from The Haggis and the Herring)
1/2 c. sugar
1/2 c. brown sugar
1/2 c. butter, softened
1/3 c. peanut butter
1 c. all-purpose flour
3/4 c. quick cooking oats (I used rolled oats)
1/2 tsp. baking soda
1/4 tsp. salt
1/2 tsp. vanilla
1 egg
1 c. semisweet chocolate chips
Peanut butter glaze:
1/3 c. powdered sugar
2 Tbsp. peanut butter
1-2 Tbsp. milk
Preheat oven to 350F and grease a 9x13 pan.
Cream sugar, brown sugar, butter, and peanut butter in a large bowl. Add the egg and vanilla. Add the flour, baking soda, and salt. Stir in the oats. Spread evenly in the pan.
Bake for 15-20 min., or until golden brown, and then immediately sprinkle with chocolate chips. Let stand for 5 min. or until chocolate chips have softened and then carefully spread melted chocolate over the baked layer. (Note: I melted the chocolate chips and then spread it over the bars.)
Chill for about 30 min. or until chocolate is firm. Mix all ingredients for the glaze until smooth and thin enough to drizzle.
Drizzle glaze, refrigerate again for 10 min. and cut for serving.
Labels:
bars,
chocolate,
cookies,
peanut butter,
Secret Recipe Club
Tuesday, September 18, 2012
Maida Heatter Brownies

Believe it or not, I'm not tired of brownies yet. I guess I'm more of a chocoholic than I thought. Either way, I know that I could never get tired of eating these brownies from Maida Heatter.
The recipe calls for two types of chocolate - unsweetened and semisweet (though I used 70% bittersweet for extra chocolatiness). It also uses very little flour, just enough to hold everything together. With a recipe like that, you know you're in for some major gooeyness.
And OMG, these did NOT disappoint in that aspect at all. In terms of gooey fudginess, these were off the charts. I don't mean that they were so gooey as to be oozing out once you cut them. They definitely hold their shape. But, when you take a bite, all that luscious, rich, soft chocolate brownie just spreads and flows over your tastebuds. It's like chocolate velvet.

And tastewise? These are deep and dark, a grown- up type of brownie. I highly recommend using a good dark chocolate for these. Note, "good" does not mean expensive, but Nestle Tollhouse chocolate chips aren't going to cut it either. Trust me, this is the time to treat yourself.
All in all, these brownies were a heavenly experience, the likes of which I have never before known but will crave again and again. If you make them, you will too.
Maida Heatter's Dark Rich Brownies (She's in the Kitchen)
2 oz. unsweetened chocolate
4 oz. semisweet chocolate (I used 70% bittersweet chocolate)
1 stick unsalted butter
1/4 tsp. salt
1 tsp. vanilla
1 c. sugar
2 eggs
1/4 c. all-purpose flour
Combine the chocolates and butter in a double boiler and melt, stirring well until completely melted and smooth. Remove from heat.
Whisk the sugar with the eggs. Add the salt and vanilla. Whisk in the chocolate butter mixture until completely incorporated. Fold the flour in with a rubber spatula. Pour into a foil-lined 8x8 pan and bake at 350F for 30 min.
Thursday, September 13, 2012
Alice Medrich's Cocoa Brownies

I first found out about these brownies from Smitten Kitchen. Believe it or not, this was also one of my very first posts on my blog. Of course, back then, I didn't have a good camera and didn't know anything about food photography whatsoever, so the picture was awful. The brownies, however, were awesome, so into the brownie lineup they went.

Let me just say that you can never go wrong with Alice Medrich. I've heard people rave about her cookie recipes and these brownies are no exception. True, they won't give you that crackly papery thin crust on top. But, they are stain your fingers fudgy. And boy oh boy are they rich. I only used natural cocoa powder instead of Dutch (you can use either) and was plenty pleased with the chocolate punch that these had. So, whip up a batch of these brownies, grab a bowl of vanilla ice cream to go with it (you're gonna need it), and indulge in a chocolate dream come true.

Alice Medrich's Best Cocoa Brownies (from Alice Medrich's Bittersweet)
10 Tbsp. unsalted butter
1 1/4 c. sugar
3/4 c. + 2 Tbsp. unsweetened cocoa powder (I used natural cocoa powder)
1/4 tsp. salt
1/2 tsp. vanilla
2 large eggs, cold
1/2 c. all-purpose flour
Combine the butter, sugar, cocoa, and salt in a double boiler or in a bowl set over a pot of barely simmering water. Stir occasionally until the butter is melted and the mixture is smooth and hot enough that you want to remove your finger fairly quickly after dipping it in to test. Take your butter chocolate mixture off the heat and set aside briefly until the mixture is only warm, not hot.
Stir in the vanilla with a wooden spoon. Add the eggs one at a time, stirring vigorously after each one. When the batter looks thick, shiny, and well blended, add the flour and stir until you cannot see it any longer, then beat vigorously for 40 strokes with the wooden spoon. Spread evenly in an 8x8 pan lined with foil or parchment paper.
Bake at 325 for 25 min. (mine took a little longer) until a toothpick stuck in the center emerges slightly moist with batter. Let cool completely on a rack.
Tuesday, September 11, 2012
King Arthur Flour Fudge Brownies

You can always count on King Arthur Flour to provide you with a good recipe. In fact, last summer, when I did my search for the best chocolate chip cookie, the King Arthur Flour CCC was one of the top finalists. So, you can bet that I had to try their brownie recipe.
With regards to the ingredients, I did omit the espresso powder since I don't drink coffee. I also used natural cocoa powder instead of dutch-process as the recipe states. Whether that would make a difference in the flavor of the brownies or not, well, I'd find out.
The recipe says that you should combine the eggs with the cocoa powder and that you should heat the butter and sugar together until the sugar dissolves. But, reading the reviews for this recipe, a lot of people said that the egg-cocoa mixture was difficult to work with and that they also had trouble getting the sugar to dissolve. The way I figure it, changing the method isn't going to change the taste of the brownies, and that's really all I care about. So, I took a couple liberties with the recipe. I melted the butter and added the sugar but didn't worry about getting it to dissolve. Then, I added the cocoa powder to the butter-sugar mixture, then the eggs, and so on.

I was a little worried that these brownies would come out cakey due to the fact that they had more flour than other brownie recipes I've tried and they also used baking powder. But, true to their name, these brownies were super fudgy, which is just how I wanted them to be. I may have underbaked mine just a little because they were also really gooey. But, is that a bad thing? Of course not! It makes them like molten chocolate cakes.
Fudgy, gooey, and delicious. Could you ask for anything more?
King Arthur Flour Fudge Brownies (from King Arthur Flour)
2 large eggs
1/2 c. + 2 Tbsp. double-dutch dark cocoa or dutch-process cocoa (I used natural cocoa)
1/2 tsp. salt
1/2 tsp. baking powder
1/2 tsp. espresso powder (I omitted this)
1 1/2 tsp. vanilla
1/2 c. unsalted butter
1 c. + 2 Tbsp. sugar
3/4 c. all-purpose flour
Preheat oven to 350F. Lightly grease an 8x8 pan.
Crack the eggs into a bowl, and beat them with the cocoa, salt, baking powder, espresso powder (if using), and vanilla till smooth.
Melt the butter in a saucepan set over low heat, then add the sugar and stir to combine. Continue to heat briefly, just until the mixture is hot, but not bubbling; it'll become shiny looking as you stir it. Heating the mixture to this point will dissolve more of the sugar, which will yield a shiny top crust on your brownies.
Add the hot butter/sugar mixture to the egg/cocoa mixture, stirring until smooth. Add the flour and stir until smooth. Spoon the batter into the pan. Bake for about 30 min., until a cake tester inserted into the center comes out clean, or with just a few moist crumbs clinging to it. The brownies should feel set on the edges, and the center should look very moist, but not uncooked. Remove them from the oven and cool on a rack before cutting and serving.
Thursday, September 6, 2012
Alton Brown's Cocoa Brownies

Considering that Alton Brown is THE man when it comes to recipes, I just had to put his recipe for Cocoa Brownies into the lineup.
I have to admit that I didn't totally follow his method for making them. Instead of adding the sugars to the eggs, I added them to the butter. Then, I mixed in the cocoa powder (which takes care of any lumps without having to sift it first), and then I added in the beaten eggs and so on. I'm not saying that using my method versus his will make them turn out any better; it's just how I like to do things.

The brownies took 1 hour to bake in my oven and they were still just a little gooey in the middle (which is perfection in my opinion). They did puff up a little high in the oven and I worried that they would end up cakey, even though I made sure not to overbake them. But, I needn't have worried. As they cooled, the brownies flattened down nicely and turned into a dense slab of pure chocolatey fudgy insanity.

Holy smokes! These brownies are rich! They are not for the faint of heart. No, these are for the hard-core chocoholics. The intense fudginess factor just blew my mind. Having eaten boxed mix brownies for most of my life, I had no idea that brownies could even be like this. And to think, they turn out this way without having to add any melted chocolate to the batter - just cocoa powder. All I can say is wow! Alton Brown, you really are THE man!

Alton Brown's Cocoa Brownies (from Food Network)
4 large eggs
1 c. sugar, sifted
1 c. brown sugar, sifted
1 c. butter, melted
1 1/4 c. unsweetened cocoa powder, sifted
2 tsp. vanilla extract
1/2 c. flour, sifted
1/2 tsp. kosher salt
Preheat oven to 300F. Butter and flour an 8-inch square pan (I lined mine with foil).
In a mixer fitted with a whisk attachment, beat the eggs at medium speed until fluffy and light yellow (I just whisked mine by hand till they were combined pretty well). Add both sugars. Add remaining ingredients, and mix to combine.
Pour the batter into a greased and floured (or lined) 8" square pan and bake for 45 min. (mine took 1 hour). Check for doneness with the tried and true toothpick method: a toothpick inserted into the center of the pan should come out clean (I took mine out of the oven while they were still slightly gooey in the center). When done, remove to a rack to cool. Resist the temptation to cut into it until it's mostly cool (this is crucial - you want the brownies to cool some so they become all dense and fudgy).
Notes:
- I didn't sift any of my ingredients.
- I whisked my eggs by hand just till they were well combined.
- I melted the butter, then added the sugars and vanilla. Then, the cocoa powder and salt (which takes care of the lumps without sifting). Then, I added the eggs and finally folded in the flour just till combined.
Wednesday, August 8, 2012
Peach Pie Bars

What do you do when great fruit comes on sale? For instance, let's say peaches for only 49 cents a pound? Do you rush to the store, buy 10 pounds of it and start making a list of all the delicious things you're going to make with it? Because, let's face it, when it's that cheap, you don't have to use it sparingly. You have full permission to go crazy, which is exactly what I did.
This is a time that only comes around once a year and I wait for it with excitement. My head is spinning with the idea of making quarts of peach sorbet and peach sauce again, as well as trying out all sorts of new peachy keen recipes, which I've been pinning like mad.
Which brings me to this recipe for peach pie bars that I saw on Pink Parsley. The idea of a creamy, sweet, tangy, peachy filling sandwiched between a buttery crust AND topping (gotta have topping!) just made my mouth water. And what with those pounds of peaches on my counter just begging to be used, I knew this would be the way to go.
I did make several changes to the recipe. For one thing, I decided to spice up the crust and topping with some cinnamon, ginger powder, and nutmeg. Then, I used some brown sugar in the filling and increased the cinnamon. I also used Greek yogurt in place of the sour cream since that's what I had on hand.
These peach pie bars were OMG good!!! The best way to describe them would be a layer of crust on the bottom, then a thick custardy layer (almost like a clafouti), then a creamy peachy layer, all topped with a crackly cinnamony-sugary crust. And even then, that description does not do it justice in terms of how delicious this is. I'm definitely glad I spiced things up and would probably add even more spice next time. So, if you've got peaches somewhere in your house, put them towards a worthy cause and make these bars!
Peach Pie Bars (adapted from Rebecca Rather, The Pastry Queen, recipe seen on Pink Parsley)
Crust and Topping:
1 1/2 c. all-purpose flour
3/4 c. sugar
1 1/2 tsp. cinnamon
3/4 tsp. ginger powder
dash nutmeg
1/8 tsp. salt
1 1/2 sticks unsalted butter, chilled
Fruit Filling:
2 large eggs
1/2 c. sugar
1/4 c. brown sugar
1/2 c. Greek yogurt
1/4 c. + 2 Tbsp. flour
dash salt
1/2 tsp. cinnamon
1/2 tsp. vanilla
2 1/2 - 3 peaches, peeled, pitted, and chopped
Preheat the oven to 350F. Line an 8x8 inch baking pan with parchment paper.
Combine the flour, sugar, salt, and spices and whisk together. Cut the butter into 1/2" cubes and cut into the flour mixture with a pastry cutter until the mixture is crumbly.
Reserve 3/4 cup of the mixture to use as the topping. Press the remaining mixture into the bottom of the pan and bake 12-15 min. Cool for at least 10 min.
To make the filling, whisk the eggs in a large bowl, then add the sugar, brown sugar, yogurt, flour, salt, cinnamon, and vanilla extract. Gently fold in the peaches and spoon the mixture over the crust. Sprinkle the remaining flour mixture (I kept this chilled in my fridge until I was ready to use it.) evenly over the filling and bake 45-55 min. Cool at least 1 hour before cutting into bars.
Monday, April 30, 2012
Chai Cookie Dough Topped Blondies

About a couple weeks ago, I finally got around to trying out a recipe for Peanut Butter Cookie Dough Topped Brownies. I enjoyed them so much that it got me to thinking. You all know about this thing I have for chai spice. Well, I wondered, what about making a chai spiced version of those bars?
To start with, I'd use a blondie base since brown sugar flavors and spice go together hand in hand. I used the recipe for Snickerdoodle Blondies from Sweet Pea's Kitchen and altered it slightly by omitting the nutmeg from the batter. I also left off the cinnamon-sugar topping since I would be using the cookie dough on the blondies instead.

For the cookie dough topping, I turned to Brown Eyed Baker and altered the recipe she used for her Chocolate Chip Cookie Dough Topped Brownies. I used all brown sugar, decreased the vanilla, increased the flour, added my chai spice blend, and omitted the chocolate chips.
After baking the blondie base and cooling it, I slathered on the cookie dough topping and finished it off with a melted white chocolate drizzle and some chopped pistachios. I was really pleased at how it turned out and how pretty it all looked. It also tasted quite good.

But, there's always room for a little improvement. I think next time, I'd decrease the amount of sugar in the cookie dough topping. It was a little too sweet for me and reminded me more of buttercream frosting than cookie dough. Secondly, the cookie dough was a bit too soft for my taste, so I'd also decrease the amount of milk. Finally, when making the blondie base, I'd probably increase the recipe by half (just to give me a thicker bar for my base) and add more chopped pistachios to it for texture and flavor. Still, though, for a first try, it was yummy indeed. And, after I tweak it up, I have a feeling it's gonna be amazing.
Chai Cookie Dough Topped Blondies (inspired by Brown Eyed Baker and Sweet Pea's Kitchen and created by Lisa of Sweet as Sugar Cookies)
Blondies (adapted from Sweet Pea's Kitchen)
1 1/3 c. all-purpose flour
1 tsp. baking powder
1/2 tsp. salt
1 tsp. cinnamon
1 c. packed light brown sugar
1/2 c. unsalted butter, at room temperature
1 egg
1 1/2 tsp. vanilla
Chai Cookie Dough (adapted from Brown Eyed Baker)
3/4 c. salted butter, softened
1 1/2 c. brown sugar (I'd decrease this to 1 cup next time)
3 Tbsp. milk (I'd decrease this to 2 Tbsp.)
1 tsp. vanilla
1 1/2 c. all-purpose flour
2 tsp. chai spice (1 tsp. cinnamon, 1/2 tsp. ginger powder, 1/4 tsp. allspice, 1/4 tsp. cardamom, 1/8 tsp. white pepper)
melted white chocolate, for drizzling
chopped pistachios, for sprinkling on top
Preheat oven to 350F. Line a 9x13 inch pan with foil, with an overhang on all four sides. Butter the foil. Cream the butter with the sugar. Add the egg and vanilla and beat well. Add the dry ingredients and stir to combine. Spread the batter evenly in the pan and bake 25-35 min. until a toothpick comes out clean. Let cool completely or chill in the fridge to speed up the process.
For the cookie dough layer: Cream the butter and the sugar. Add the milk and vanilla and mix until combined. Mix in the flour and chai spice until just combined.
Spread the cookie dough over the cooled blondies. Sprinkle with the chopped pistachios. Drizzle with the melted white chocolate. Chill until the dough is firm, about 1 hour.
Labels:
bars,
blondies,
chai spice,
original recipe
Wednesday, April 11, 2012
No-Bake Peanut Butter Ritz Bars

Did you ever have a favorite candy growing up? For me, I loved Reeses' peanut butter cups. My way of eating them was to try and nibble off all the chocolate on the outside leaving the peanut buttery center for last.
The thing is though, that candy these days is a lot more expensive. I mean, do I really want to pay $1.50 for TWO peanut butter cups? Um, no. So, I loved it when I found this recipe on Six Sisters' Stuff where you can make a whole batch of them for a whole lot cheaper. I'm in!!! My change to the recipe, though, was that I decided to use Ritz cracker crumbs instead of graham cracker crumbs. I'm not sure if the Ritz crackers made a difference, but they sure were good! They taste exactly like Reeses' peanut butter cups and that's saying something. No more buying them from the store for me. Give me a panful of these any day!
By the way, stay tuned for next week when I show you how I took these bars to a whole different level of yum.

No-Bake Peanut Butter Ritz Bars (adapted from Six Sisters' Stuff)
1 c. butter, melted
2 c. Ritz cracker crumbs
2 c. powdered sugar
1 c. peanut butter
1 1/2 c. semisweet chocolate chips
Mix together the melted butter, cracker crumbs, powdered sugar, and peanut butter until well blended. Press evenly into the bottom of an ungreased 9x13 pan (or a 9x9 inch pan for thicker bars). Melt the chocolate chips and spread over the peanut butter layer. Chill for 1 hour before cutting into squares.
Labels:
bars,
chocolate,
peanut butter
Tuesday, March 13, 2012
Biscoff Cinnamon Toast Crunch Treats

Remember when I made those Biscoff White Chocolate Cinnamon Toast Crunch Cups? Well, it made me realize just how well Biscoff and Cinnamon Toast Crunch go together. The sweet spiciness from both complements each other very nicely. So, that got me thinking. It's time to combine them once again. This time, taking a twist on the old Rice Krispie Treat to make Biscoff Cinnamon Toast Crunch Treats.

One thing to note is that the Biscoff is on the thick side, so when you add it to the marshmallow mixture, it won't melt right away. But, put a little muscle into it and keep stirring and soon enough it'll incorporate itself in.

The other thing I found was that the taste wasn't as strong as I would have liked, initially. So, to fix that, I decided to sprinkle the treats with some spiced sugar. I used a little cinnamon, nutmeg, and cloves to go with the flavor of the Biscoff. This perked things up right away.
Finally, the white chocolate on top is an absolute must. Yes, it does make the treats look prettier, but that's not the main reason for adding it. The white chocolate adds another dimension of flavor to these bars, one that helps to tie everything together. Believe me, the bars are nowhere near as good without it.

I took these to my church again and shared them with the girls I teach. Once again, it was a success! There was nothing but compliments and requests for more. Enjoy!
Biscoff Cinnamon Toast Crunch Treats (created by Lisa of Sweet as Sugar Cookies)
3 Tbsp. butter or margarine
4 c. mini marshmallows
1/2 c. Biscoff spread
5 1/2 c. cinnamon toast crunch cereal
For sprinkling:
1 Tbsp. sugar
1/2 tsp. cinnamon
pinch nutmeg
pinch cloves
melted white chocolate (for drizzling)
Grease a 9x13 pan. Melt the butter or margarine over medium heat. Add the marshmallows and keep stirring until they're all melted. Add the Biscoff spread (it will seem tough at first, but keep stirring and it'll all soften up). Once everything is combined, remove from the heat and quickly stir in the cereal. Spread the cereal mixture evenly in the greased pan (it works great if you butter your hands). Sprinkle with the spiced sugar. Let cool for 1-2 hours. Drizzle with the melted white chocolate. It tastes even better the day after you make it.
This post is linked to:
Meatless Mondays
A Little Birdie Told Me
Crazy Sweet Tuesday
Monday, February 13, 2012
Lofthouse Sugar Cookie Bars

There was a potluck at my church and I had signed up to bring dessert. The only question was what to make. I had neither the time nor the energy to make something complicated. But, I still wanted it to be delicious and appealing (naturally) and, if possible, I wanted to try something new. Then, I remembered the much raved about Sugar Cookie Bars. Simple, quick, super easy - mix it up, throw it in a pan, and bake it up. It was exactly what I needed.

I decided to try the Lofthouse Sugar Cookie Bars that Dreaming of White Chocolate linked up to last week's Sweets for a Saturday. True to form, those bars were done in no time at all with very little mess or fuss. Whip up some pink buttercream icing (it is close to Valentine's Day after all), go sprinkle crazy, and you've got a super pretty treat that can't be beat.

Of course, looks are important, but taste is even more so, right? Well, these were amazingly soft and tender, almost like cake but a little denser. With the buttercream frosting adding the perfect sweet touch, these are melt in your mouth good.

Lofthouse Sugar Cookie Bars (Dreaming of White Chocolate)
1 c. butter, room temperature
8 oz. cream cheese, room temperature (I used lowfat cream cheese)
1 1/2 c. sugar
1 egg
2 tsp. vanilla
2 1/2 c. flour
1/2 tsp. baking soda
1 tsp. baking powder
Preheat oven to 350F. Line or grease a jelly roll pan (15x10x1).
Cream butter with cream cheese and sugar. Add in the egg and vanilla and mix until incorporated. With mixer on low, add in your dry ingredients and mix until just combined.
Spread the dough evenly into your prepared pan (dough will be sticky). Bake for 20-30 min. until edges begin to turn golden brown. Cool completely then frost with buttercream frosting.
Buttercream Frosting (by Lisa of Sweet as Sugar Cookies)
3/4 c. margarine or butter
3 c. powdered sugar
2 tsp. vanilla
milk (just enough to make it spreadable)
Cream the butter until smooth. Add the sugar one cup at a time and beat until light and fluffy. Add milk as desired until you've reached a consistency you like.
This recipe is linked to:
A Little Birdie Told Me
Crazy Sweet Tuesday
Bake with Bizzy
Cast Party Wednesday
These Chicks Cooked
Full Plate Thursday
Sweet Tooth Friday
Subscribe to:
Posts (Atom)