Pages

Saturday, January 26, 2013

Sweets for a Saturday #102

1.  Amazing Super Fudgy Brownies - The Royal Cook


2.  Strawberry Valentine Oreo Cookies - Six Sisters' Stuff


3.  Twix Bars - That Skinny Chick Can Bake


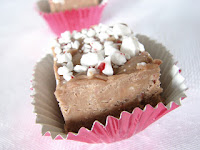
4.  Chubby Hubby Truffles - Making Memories With Your Kids


5.  Salted Caramel Chocolate Shortbread Bars - Olla Podrida


The Rules:
  1. Please link up to the URL of your post, not the URL of your main blog. When it asks for "Name", type in the name of your treat.
  2. Please leave a link back to this post in your post or Grab My Button.
  3. Share your delicious sweets from this week. If you've made more than one during the week, feel free to link them all up.
  4. Leave me a comment telling me that you've linked up.
  5. Please visit at least two others and comment on their wonderful additions to this party.

SweetasSugarCookies


Monday, January 21, 2013

Chocolate Truffle Stuffed Cupcakes with Orange Cream Cheese Frosting


A while back, one of my blogging friends mentioned that you could get a coupon for a FREE bag of Lindor Truffles.  Free chocolate?  Nobody in their right mind would pass that up, including me.  I came home that day with a bag full of Extra Dark Lindor Truffles just waiting to be used for something special.  And, what better way than to stuff a cupcake.  

I had seen the recipe for these cupcakes on The Sisters' Cafe.  But, rather than using a box mix, I intended to use my go-to chocolate cupcake recipe from RecipeGirl.  Then, because I still had a ton of oranges in my fridge, I was going to top them with orange cream cheese frosting.  Yum!


The chocolate cupcakes are super moist and have a deliciously dark chocolatey flavor.  I think they're even better than the Hershey's Chocolate Cake recipe (which was my former go-to).  The best part is when you cut these cupcakes open and the melted chocolate truffle center just flows out, almost like a chocolate lava cake.  It's one sweet surprise.


Alternately, of course, you could also chill these cupcakes which then gives you a solid rock of chocolate to bite into - your choice.  Either way, it's chocolatey orange heaven.  


Chocolate Truffle Stuffed Cupcakes with Orange Cream Cheese Frosting (adapted from RecipeGirl and The Sisters' Cafe)

1 c. all-purpose flour
1/2 c. unsweetened cocoa powder
1 c. sugar (I used 1/2 c. white sugar and 1/2 c. brown sugar)
1/2 tsp. baking soda
1/4 tsp. salt
3/4 c. hot water
1/2 c. vegetable or canola oil (I used melted butter)
1 large egg
1 1/2 tsp. vanilla

12 Lindor chocolate truffles by Lindt

 Line a muffin tin with 12 liners.  Combine the melted butter with the sugars.  Beat in the egg and vanilla.  Mix in the cocoa powder, baking soda, and salt.  Add 1/2 cup of the flour and beat well to combine.  Add in 1/2 cup of hot water and mix well.  Add in the rest of the flour, then the rest of the hot water and mix well.  Fill each cupcake liner about 2/3 full with the batter.

Bake at 350F for 5 min.   Then, lightly press a Lindor truffle into each  partially baked cupcake.  Let the cupcakes bake an additional 13-15 min. until a toothpick comes out clean.  Cool completely, then frost with orange cream cheese frosting.

Orange Cream Cheese Frosting (Sweet as Sugar Cookies)

8 oz. cream cheese (you can use 1/3 less fat)
4 Tbsp. butter, softened
1 1/4 c. powdered sugar
4 tsp. freshly squeezed orange juice
2 tsp. orange zest  

Beat the cream cheese with the butter.  Add the orange juice, zest, and powdered sugar and beat until soft and fluffy.  Spread on the cooled cupcakes.

Makes 12 cupcakes   


Saturday, January 19, 2013

Sweets for a Saturday #101

1.  Weight Watcher's Chewy Chocolate Cookies - Morrow Sunshine


2.  Candy Sushi - The Royal Cook


3.  Granola Garbage Sticks - Lady Behind the Curtain


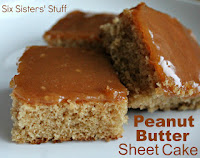
4.  Peanut Butter Sheet Cake - Six Sisters' Stuff


5.  Homemade Pop Tarts - Making Memories With Your Kids


The Rules:
  1. Please link up to the URL of your post, not the URL of your main blog. When it asks for "Name", type in the name of your treat.
  2. Please leave a link back to this post in your post or Grab My Button.
  3. Share your delicious sweets from this week. If you've made more than one during the week, feel free to link them all up.
  4. Leave me a comment telling me that you've linked up.
  5. Please visit at least two others and comment on their wonderful additions to this party.

SweetasSugarCookies


Tuesday, January 15, 2013

Apple Pie Bars


Weeks ago, Natalie, from the blog, "Once Upon a Cutting Board," linked up her Apple Pie Bars and made the Sweets for a Saturday Top 5.  Just one look at that irresistible picture and I couldn't wait to make them myself.

They reminded me of the apple crisp bars that my school cafeteria used to serve with lunch sometimes.  It was one of my favorite desserts.  I wonder, if I had thought years ago to ask them for the recipe, do you think they would have given it to me?  Well, no matter.  It's too late now and, at any rate, these Apple Pie Bars taste exactly like them.


The one difference between them is that the filling in these is made fresh rather than being canned.  Of course, that makes all the difference in the world - all natural, no preservatives, and therefore healthy (or at least healthier).  Honestly, this filling really is incredible.  A little extra time, patience, and tender loving care and you're rewarded with flavorful apple goodness that could also easily be used to top ice cream, cake, cheesecake, your choice.  Combine that with a buttery crust and cinnamony streusel and you've got a bar that is to die for.


The only changes I made was to use a variety of different apples - Gala, Fuji, and Jazz - since that's what I had in my fridge, and to add some oats to the streusel topping for extra texture and crunch.  Otherwise, I kept the recipe as is.  My family raved about this one.  As for me, eating it brought back some sweet memories.  It's definitely a keeper!  

Apple Pie Bars (adapted from Once Upon a Cutting Board)

6-7 Granny Smith or golden delicious apples, peeled, cored, and sliced into 1/4-inch thick slices (I used whatever apples I had on hand - a mixture of Gala, Fuji, and Jazz apples)
1/3 c. brown sugar
2 Tbsp. lemon juice
1 tsp. cinnamon
1/4 tsp. nutmeg

Crust:
2 1/4 c. all-purpose flour
1/2 tsp. baking powder
1/4 tsp. salt
1 c. unsalted butter
1/2 c. brown sugar
1/2 tsp. vanilla
1 large egg

Streusel:
3/4 c. all-purpose flour
1/2 c. rolled oats (I added these)
1/4 c. sugar
1/4 c. brown sugar
1 tsp. cinnamon
pinch salt
4 Tbsp. unsalted butter, cold and cubed (I increased this to 6 Tbsp.)

Combine the apples, brown sugar, lemon juice, cinnamon, and nutmeg in a saucepan over medium heat.  Cover the pan for 2-3 min., and uncover when the apples have released their juices.  Cook, stirring occasionally, until apples are golden brown and soft and there is no liquid left in the pan, about 15 min.  Set aside to cool.

Preheat oven to 375F.  Line a 9x13 baking pan with foil or parchment paper.  

In a large bowl, whisk together the flour, baking powder, and salt.  Cream the butter and sugar.  Add the egg and mix well.  Add the dry ingredients and stir to combine.  Spread the dough evenly in the pan and press down.  Prick the dough with a fork and bake for 15-18 min., until crust is golden brown and beginning to release from the sides of the pan.

For the streusel:  Whisk together the dry ingredients.  Cut in the butter with a pastry cutter until it is crumbly.  

When the crust is done, remove from oven and reduce oven temperature to 350F.  Spread the apple filling over the hot crust, and sprinkle the streusel topping evenly over the apples, pressing gently to help it stick.  Return pan to oven and bake for 20-25 min., until topping is lightly browned and crisp.  Let cool for at least 2-3 hours before removing and slicing (or you can chill it in the fridge).      


Monday, January 14, 2013

Spicy Orange Ginger Chicken


Our house has been trying to cook without salt or sodium (or very little of it).  As you can imagine, this is not easy.  It's not like I'm a salt fiend or anything, but, being Japanese, soy sauce is like a staple.  Not to mention, there's sodium in everything - ketchup, mustard, oyster sauce.  Take it all away and the results are usually so bland and tasteless that I'd rather eat anything else (even raw veggies) or starve than eat whatever sodium-free concoction appears on my table.

Well, starving is not an option and one can only live on veggies for so long, so I've been learning to be creative and I search the Internet like crazy.  Tonight, I would have liked to make soy sauce chicken, but, yeah, too much soy sauce equals too much sodium.  That's out.  Then, I came across this recipe on the site, "Moms Who Think."  It called for mostly orange juice, some brown sugar, and only a little soy sauce.  Not only did it sound delicious, but I happened to have a refrigerator bin full of oranges.  Bingo!

I changed the recipe and the method just a little.  With regards to the sauce, I doubled the amount of ginger powder and added some red pepper chili flakes (we like spicy in our house).  Then, instead of baking it all in the oven, I boiled the chicken in the sauce on the stove and thickened it with some cornstarch and water.  My family was very impressed with the way that this turned out.  In fact, we liked it so much, we're making it again for dinner tomorrow.

By the way, if you're wondering about the color of the rice in the picture, it's a mixture of Japanese sticky white rice and Korean black rice.  The black color from the Korean rice seeps into the rice water and turns everything a shade of dark purple.  The black rice also has a nutty flavor that we really enjoy.  Together with the chicken, it was the perfect, tasty meal.  And low-sodium to boot!  Gotta love that.     


Orange Ginger Chicken (adapted from Moms Who Think)

12-15 chicken breast tenderloins, defrosted or frozen
1 1/2 c. freshly squeezed orange juice
1/2 c. brown sugar
1/4 c. low-sodium soy sauce 
2 tsp. ginger powder
1 1/2 tsp. red pepper chili flakes

2 tsp. cornstarch
2 Tbsp. water

Poach the chicken breast tenders in a saucepan until they're cooked through.  Drain the water and set aside.

Combine the juice, brown sugar, soy sauce, ginger powder, and red pepper flakes and add to the chicken.  Cook on medium-high heat until the sauce is boiling.  Mix the cornstarch with the water and add to the sauce, stirring to combine.  When the sauce is thickened, turn off the heat and enjoy.    

Saturday, January 12, 2013

Sweets for a Saturday #100

Would you believe that Sweets for a Saturday turns 100 today?!!!  Awesome!  Thanks to all of you for always linking up.  And now, here are your Top 5:

1.  Dreaming of White Chocolate's Top 10 Recipes From 2012


2.  Secret Cocoa Mix - Who Needs a Cape 


3.  Ghirardelli English Toffee - The Royal Cook 


4.  Biscoff Sock-it-to-Me Pound Cake - In Cindy's Kitchen 


5.  Chicago Style Cashew Crunch - Jazzy Gourmet Cooking Studio


The Rules:
  1. Please link up to the URL of your post, not the URL of your main blog. When it asks for "Name", type in the name of your treat.
  2. Please leave a link back to this post in your post or Grab My Button.
  3. Share your delicious sweets from this week. If you've made more than one during the week, feel free to link them all up.
  4. Leave me a comment telling me that you've linked up.
  5. Please visit at least two others and comment on their wonderful additions to this party.

SweetasSugarCookies


Monday, January 7, 2013

Fudgie Wudgies - SRC


Ever since I became a member of the Secret Recipe Club, I have been waiting and waiting to finally be assigned to Katrina's blog, Baking and Boys.  Not only is she the reason that I became a member of this wonderful club, but she is also a very good blogger friend of mine.  I even got to meet her and she is every bit as sweet as the treats that she makes.


Of course, I had been following her blog for quite a while, even before I knew her.  Her blog is just so fun to read as she talks about her beautiful family and her signature chocolate twists on her sweets.  I put a lot of stock into what she says.  If she mentions that a recipe was good, then I know it's good.  As a result, I've made quite a few things from her blog over the past years - Crunchy Nut Chocolate Chip Peanut Butter Cookies, Joanne Chang's Chocolate Chip Cookies (which are my all-time fave CCC), Marbled Peanut Butter Brownies, Cherry Ice Cream, and Spicy Peanut Butter Ice Cream - and they all get a double thumbs up from me.  This month's assignment gave me an excuse to make even more of the delicious things she's posted about and I couldn't wait to dive right in.

Now, if you know Katrina, then you also know about her proclaimed love for all things chocolate.  So, I just had to choose a recipe that would pay homage to that part of her personality.  And, what better recipe than her Fudgie Wudgies.  These are Katrina to a tee!  They have melted chocolate and cocoa powder in the dough, PLUS more chocolate chips added in for a triple chocolate dose.


These cookies are fantastic!  My family loved how they tasted.  They're exactly like brownies in cookie form from the crackly, papery top to the soft, chewy, fudginess inside.  I used regular cocoa powder and semisweet chocolate chips to make these, but I would love to make them again with dutch cocoa powder and a good brand of 70% chocolate to really get them chocolatey to the max.  Because, as I've learned from Katrina, there is never such a thing as too much chocolate.  

Fudgie Wudgies (from Baking and Boys)

1 3/4 c. semisweet chocolate chips
10 Tbsp. unsalted butter
6 Tbsp. all-purpose flour
1 tsp. baking powder
3 Tbsp. unsweetened cocoa powder
1/8 tsp. salt
2 large eggs
2 tsp. vanilla
3/4 c. sugar

Preheat oven to 325F.  Line baking sheets with parchment paper.

Melt 1 c. chocolate chips with the butter in a glass, microwave safe dish in 20 second intervals, stirring between each, until melted.  Allow to cool 5 min.  Sift the flour, baking powder, cocoa, and salt together in a small bowl using a wire whisk.

Beat the eggs and vanilla with a wire whisk until combined.  Add the sugar to the egg mixture and blend until the mixture is thick.  Add the melted chocolate and whisk together.  Add the flour mixture and blend just until combined.  Stir in the 3/4 c. of chocolate chips.

Drop by tablespoonfuls onto the baking sheets, about 2 inches apart.  Bake the cookies until they form a thin crust, about 14 min. 

Saturday, January 5, 2013

Sweets for a Saturday #99

1.  13 Flavors of Fudge - The Royal Cook 


2.  Fudge Collection - Dreaming of White Chocolate


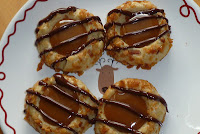
3.  Samoa Thumbprints - Pastry Chef's Baking 


4.  Peanut Butter Millionaire Fudge - Cooking with K


5. White Almond Sour Cream Cake - Amy's Confectionary Adventures


The Rules:
  1. Please link up to the URL of your post, not the URL of your main blog. When it asks for "Name", type in the name of your treat.
  2. Please leave a link back to this post in your post or Grab My Button.
  3. Share your delicious sweets from this week. If you've made more than one during the week, feel free to link them all up.
  4. Leave me a comment telling me that you've linked up.
  5. Please visit at least two others and comment on their wonderful additions to this party.

SweetasSugarCookies


Wednesday, January 2, 2013

Chocolate Marshmallows


I've seen posts about homemade marshmallows on blogs everywhere and in every flavor imaginable.  They always made it look so easy and the results were stunning.  But, the idea of trying it myself kind of intimated me.  After all, it requires the use of a candy thermometer and having to get the mixture to just the right temperature.  What if I made a mistake and my mixture was too hot or not hot enough?  And, what if the mixture didn't whip or set like it should?  So many reasons not to make them.


But, when the day ends, I love a good challenge and I decided it was high time I pushed my fears aside and tried it once and for all.  And boy am I glad that I did.  In the first place, I realized that making marshmallows is not hard at all.  As long as you pay attention to what you're doing, the process is as easy as 1-2-3.  Okay, fine, it's easy as 1-2-3 if you also watch Alton Brown's video on marshmallow-making so you can see how he does it (I always said, he's the man).  Secondly, the entire process is super fast - less than an hour.  Finally, once you taste your marshmallow you will realize that you have never really eaten a marshmallow before.  Those store-bought spongy things cannot compare.


As I found out, a "real" marshmallow is so fluffy that it feels like you're eating a cloud and so delicate that it practically melts in your mouth.  Plus, I love that I no longer have to settle for plain flavored marshmallows.  The sky's the limit when it comes to flavors and this chocolate one is absolutely sensational.  It would be a dream to have a cup of cocoa with these floating on top or to make a triple chocolate s'more.  I am just in heaven eating these and can't wait to make some more.

Chocolate Marshmallows (adapted from Bakeaway With Me)

1/3 c. cocoa powder
1 1/4 c. + 2 Tbsp. water, divided
3 envelopes gelatin
2 c. sugar (I reduced this to 1 3/4 cup)
3/4 c. light corn syrup

1/2 c. powdered sugar
2 Tbsp. cornstarch
4 Tbsp. cocoa powder

Spray a 9x13 pan with nonstick cooking spray.  Combine the powdered sugar, cornstarch, and 4 Tbsp. cocoa powder and sift some of the mixture into the pan.  Tap it around until the inside of the pan is coated.

Place 1/4 c. + 2 Tbsp. water in a small microwave-safe bowl and heat for about 30 sec. - 1 min. until it is steaming hot.  Add the cocoa powder to the water and mix to combine.

Place 1/2 cup cold water in the bowl of a large stand mixer.  Sprinkle the gelatin mixture over it and stir to combine.  Let sit for at least 5 min.

Add the warm cocoa mixture to the gelatin and stir to combine.

Combine the remaining 1/2 c. water, corn syrup, and sugar in a medium saucepan.  Stir to dissolve the sugar and insert a candy thermometer.  Cook, without stirring, on medium high heat until it reaches 240F.  Once it reaches 240F, remove it from the heat immediately.  Turn the mixture on low and slowly pour the hot syrup into the mixer bowl.  Gradually increase the speed of the mixer until it is running on high.  Whip the marshmallow mixture for 15-20 min., or until it is stiff and shiny.  You can tell it is done when you stop the mixer and lift up the beater, the marshmallow will slowly drip back down into the bowl in a thick, shiny stream.

Pour the marshmallow into the prepared pan and smooth the top with a greased spatula.  Sift more of the sugar-cornstarch mixture on top evenly and let sit for at least 8-10 hours to firm up at room temperature. 

After cutting the marshmallows, coat the sides with the remaining sugar-cornstarch mixture as needed to prevent them from sticking.