Pages

Friday, July 29, 2011

Sweets for a Saturday #28

I apologize. I haven't had a chance to comment on all your blogs or thank you all personally for linking up last week. I've just been so busy what with my new job and the nearly 90 minute commute both ways. By the time I get home, I barely have time to exercise, eat dinner, and prep for the next day before going to bed. But, I promise I will organize my time better and try to get back to everyone on the weekends.

But, going back to last weekend, here are your Top 5:

1. Brookie Bars - Piece Love & Cooking


2. Oreo Madness - Living So Abundantly


3. Icebox Oreo Dessert - Heidi's Recipes


4. Vanilla Buttermilk Cake - Penny Pinching Provisions


5. Baby Key Lime Tarts - The Sweet Swiper


The Rules:
  1. Please link up to the URL of your post, not the URL of your main blog. When it asks for "Name", type in the name of your treat.
  2. Please leave a link back to this post in your post or Grab My Button.
  3. Share your delicious sweets from this week. If you've made more than one during the week, feel free to link them all up.
  4. Leave me a comment telling me that you've linked up.
  5. Please visit at least two others and comment on their wonderful additions to this party.


SweetasSugarCookies


Wednesday, July 27, 2011

Oyster Sauce Meatballs


I grew up in an Americanized household. Unfortunately, that meant that my sisters and I didn't learn to speak Japanese the way our grandparents could. But, luckily, we still kept the Asian influence in our food. Of course, that meant that our kitchen pantry was usually stocked with 20-pound bags of rice, gallon jugs of soy sauce, and large bottles of oyster sauce. Believe me, we went through a lot of that stuff very quickly.


One of the dishes we enjoyed growing up was an oyster sauce chicken and broccoli dish. One night, however, I didn't have any chicken or broccoli, but I did have ground turkey and some other vegetables. So, I decided to improvise and made Oyster Sauce Meatballs instead. I threw in some carrots and celery too to make it healthy. I was totally pleased with how it all turned out. The flavors melded together deliciously and the red pepper flakes that I added in gave it a nice little kick. This new recipe is going to be a keeper in my book and will make an appearance in my Asian kitchen for years to come.


Oyster Sauce Meatballs (by Lisa of Sweet as Sugar Cookies)

1.25 lb. ground turkey
1 egg
1/2 c. breadcrumbs
salt, pepper
dash garlic powder
1/2 round yellow onion, chopped

2 c. water
1/2 c. oyster sauce (or less if you won't want it that strong)
3 cloves garlic, chopped
1 tsp. ginger powder
1 tsp. red pepper flakes
2 tsp. sugar
freshly ground black pepper
1 Tbsp. cornstarch mixed with 1 Tbsp. water

2-3 carrots, sliced into thin coins
3 stalks of celery, sliced diagonally

Combine the ingredients for the meatballs. Form the meatballs, then bake at 350F for about 25 min. While the meatballs are baking, combine the ingredients for the sauce in a large pan and set aside.

Saute the carrots and celery in a pan until they are tender but still crunchy, about 3-5 min. Set aside.

Add the cooked meatballs to the sauce. Put the pan over medium heat until the sauce begins to boil. Once it starts to boil, add the cornstarch and water mixture until the sauce reaches your desired thickness. Add the carrots and celery to the meatballs and keep cooking for about 10 min. until everything is heated through. Serve over rice.

This recipe is linked to:
These Chicks Cooked

Monday, July 25, 2011

Chocolate Croissants


Well, you all know my dad's favorite treats, so now I'll share one of my mom's. As I've mentioned before, my mom loves the movie, "It's Complicated." You might remember this one scene in the movie where Meryl Streep and Steve Martin are making chocolate croissants in a bakery late one night. Well, ever since watching this movie, "It's Complicated," my mom has been begging me to make her some chocolate croissants. However, as many of you know, croissants are not the easiest thing to make. They require a butter packet and turns that you need to keep track of, not to mention the fact that they start with a yeast bread which takes time. The idea of even attempting these croissants got farther and farther from my mind.


Then, I came across Sarah Flinn's recipe on her site, Call Me Fudge (she also has a great picture tutorial so you can see exactly what to do). Her croissants looked so wonderful and the best part was that they employed a simpler method. Instead of a butter packet, you simply dot the dough with butter before folding it up. I made sure to ask her a LOT of questions and she was so sweet to answer them all so that I could understand exactly how to go about making the croissants. Finally, I felt confident enough to begin.

It is still a long process since there's a lot of waiting time involved - rising, chilling, etc. So, I started making the dough the night before so that we could have them for breakfast the next morning.

I filled each one with a Hershey's nugget and dressed them up by drizzling more chocolate on top. Then, my mom and I took a bite. We marveled at all the buttery layers and were both pleased that the Hershey's nuggets had melted inside for one deliciously gooey chocolaty bite after another.


It was a long process, to be sure, and a lot of hard work, but it was all worth it to see how happy my mom was. One day, I will be daring enough to make croissants in the more conventional way, but, for now, this one is going to be my go-to recipe.


Croissants (adapted from Call Me Fudge)

1 pkg. active dry yeast
3/4 c. milk (I used skim milk)
2 c. bread flour
1/2 tsp. salt
2 Tbsp. sugar
1/2 c. butter, softened
8 milk chocolate Hershey's nuggets
1 egg yolk

1. Dissolve yeast in warm milk (about 105-115F) with 1 tsp. of sugar. Let stand 5 min. until foamy. Combine the flour with the salt and remaining sugar. Add the dry ingredients to the yeast mixture. Knead together to form a dough and shape into a ball (I had to add a tablespoon or so of water in order to get everything to hold together). Place in a greased bowl and turn your dough over so that all sides are greased. Let rise until it doubles in size (about 30 min.-1 hour).

2. Roll the dough out in a long rectangle. Dot with butter (a little more than 1 Tbsp.). Fold in thirds (like an envelope) then turn so an open side is facing you. Dot with butter and fold again. Wrap in waxed paper and refrigerate for about 30 min. (the dough will rise while it chills)

3. Roll out chilled dough into a long rectangle. Dot with butter. Fold in the left and right sides until they meet at an invisible center line and then fold it in half at that line. Turn the dough 90 degrees. Roll it out again into a long rectangle, dot it with butter, and repeat the folding step. Wrap it up and put it back in the fridge to chill for 30 min.

4. Repeat Step 3 again. Chill the dough for at least 30 min., but preferably overnight.

5. After chilling the dough, roll it out into a 12"x16" rectangle and cut into eight 4"x6" rectangles. Cut the Hershey's nuggets in half lengthwise. Put two pieces in the middle of each smaller rectangle and roll up one third of the dough (from the shorter side first) over the chocolate. Roll it over and seal it to the other side. Place the croissants on a greased cookie sheet and put it back in the fridge to chill for 30 min. (this will prevent the butter from running out of the dough)

6. Meanwhile, preheat your oven to 425F. Remove the croissants from the fridge and brush each one with the egg yolk mixed with a little water. Bake for 15-20 min. Let cool a little and drizzle with melted chocolate, if desired.

This recipe is linked to:
These Chicks Cooked
Let's Break Bread Together
Sweet Tooth Friday
My Meatless Mondays
Sweet Indulgences Sunday
Bake with Bizzy
Hearth n' Soul Hop

Friday, July 22, 2011

Sweets for a Saturday #27

Well, my week has been a sweet one. After searching for what seems like forever, I finally found a job. That's definitely a weight off of my shoulders. What with my new busy schedule, I guess I won't be having as much time to bake during the week, but that's what weekends are for, right? And speaking of weekends, here's your Top 5 from last week's Sweets for a Saturday:

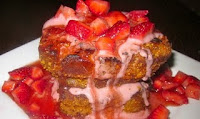
1. Cap'n Crunch Crusted Strawberry French Toast - Piece, Love, & Cooking


2. Healthy and Wise Finds - Cooking with K


3. Farm Stand Buttermilk Donuts - The Sweet Swiper


4. Cherry Rosemary Yogurt Mini Loaves - Catalina Bakes


5. Chocolate Brownie Cupcakes - Lemon Drop


The Rules:
  1. Please link up to the URL of your post, not the URL of your main blog. When it asks for "Name", type in the name of your treat.
  2. Please leave a link back to this post in your post or Grab My Button.
  3. Share your delicious sweets from this week. If you've made more than one during the week, feel free to link them all up.
  4. Leave me a comment telling me that you've linked up.
  5. Please visit at least two others and comment on their wonderful additions to this party.


SweetasSugarCookies


Thursday, July 21, 2011

Banana Banana Bread


It's been years since I last ate banana bread and so I've been craving it. Bananas were on sale so that seemed like a sign to go ahead and make it now. It was almost torture having to wait for several days while the bananas slowly ripened on my counter. When those little black spots appeared, I was overjoyed. Finally, I was going to satisfy my craving.

Unfortunately, I couldn't remember what recipe I used to use in the past but that was okay because it meant I got to try out a new one instead. The Banana Banana Bread from Allrecipes seemed like a sure thing what with all the high ratings and I liked that the ratio of flour to bananas was equal.

I eagerly mixed it all up, popped it in the oven, and then waited for what seemed like forever before they were fully baked and ready to eat. I cut myself a still warm slice marveling at how moist the bread looked. The taste was awesome. It was full of banana flavor and wasn't at all overly sweet or greasy. I still would love to try other banana bread recipes to see how they all compare, but for now, this one's a keeper.

I gave away one mini loaf and carefully wrapped up the leftover slices on a plate to savor later that afternoon. Imagine my dismay when I came home and found that ANTS and more ANTS were enjoying MY banana bread instead. And to think, I only got to eat one piece!!! Wahhhh. Oh well, I'll just have to make more.

Banana Banana Bread (Allrecipes)

2 c. all-purpose flour
1 tsp. baking soda
1/4 tsp. salt
1/2 c. butter
3/4 c. brown sugar
2 eggs, beaten
2 1/3 c. mashed overripe bananas
I added 2 tsp. vanilla

Preheat oven to 350F. Grease a 9x5 in. loaf pan or two mini loaf pans.

Combine the flour, baking soda, and salt. Cream together the butter and brown sugar. Add the vanilla. Stir in the eggs and mashed bananas until well blended. Stir banana mixture into flour mixture; stir just to moisten. Pour batter into prepared loaf pan(s).

Bake in preheated oven for 60-65 for large pan and 45-50 min. for mini loaves, or until the loaves test done. Let bread cool in pan(s) for 10 min., then turn out onto a wire rack.

Tuesday, July 19, 2011

PB & J Muffins


I've heard so many of you tell me how you found some great recipes through Sweets for a Saturday, tried them out, and loved them. Well, now it's my turn. Kathryn and Alexandra of Talking Dollars and Cents linked up a recipe for Peanut Butter Muffins and, as it turns out, that's exactly what I wanted to make. If you don't already know, they also have a Muffin Monday linky party on their blog every week and it is definitely the place to go for lots of yummy ideas.


I decided to add a dollop of strawberry jam to the center of my muffins and make mini muffin PB&Js. It turned out to be a good idea since the muffins themselves do not have a lot of sugar in them. While the peanut butter flavor was a little more subtle than I would have liked, I still found myself nibbling on these muffins throughout the day. They were simply irresistible.


Peanut Butter Muffins (Talking Dollars and Cents)

2 c. flour
1/4 c. sugar
2 tsp. baking powder
1/2 tsp. salt
2/3 c. peanut butter
2 eggs
1/4 c. butter
1 c. milk

jam/jelly (if desired)

Preheat the oven to 500F. Grease mini muffin tins.

Combine the flour, sugar, baking powder, and salt in one bowl. Combine the peanut butter, eggs, and butter in another bowl. Slowly blend one cup of milk into the peanut butter mixture. Add the flour mixture and stir just enough to blend.

Add 1/2 Tbsp. of batter to each muffin cup. Top with a tiny dollop of jam/jelly (I used strawberry jam). Cover the jelly middle with another 1/2 Tbsp. batter. Bake at 500F for 5 min. After the 5 min. are up, immediately lower the heat to 350F and continue baking for 7 min. or until muffins test done.

Monday, July 18, 2011

Spicy Black Beans


It's time for another Secret Recipe Club post. Each month, everyone gets assigned to someone else's blog and is allowed to choose one recipe from it to make and post. It's so much fun. If you want to join in, just click HERE.

I love spicy food, so when I was assigned this month to the blog, A Couple in the Kitchen, I immediately zeroed in on their recipe for Spicy Black Beans. Not only did it look good, but it also sounded so easy to make.

The recipe itself requires ingredients that you probably already have in your kitchen and can be whipped up in less than 20 minutes. You can't beat that. I did make several changes to the recipe which can be found in red below.

One taste, and wow! Those beans had kick. This would be a great as a side dish, served over rice, put into burritos, there's so many possibilities. Thanks to A Couple in the Kitchen for one delicious recipe.

Spicy Black Beans (adapted from A Couple in the Kitchen)

1 (15.5 oz.) can black beans (I used low-sodium black beans)
1 tsp. ground cumin
1/4 tsp. cayenne pepper
1 small onion, diced (I used half an onion)
2 cloves garlic, crushed (I minced mine)
ground black pepper

Place all ingredients in a medium saucepan and bring to a boil. (I sauteed the onion and garlic first for a couple of minutes until the onions were translucent. Then, I added the rest of the ingredients.) Turn down heat and cook for 10-15 minutes.


Friday, July 15, 2011

Sweets for a Saturday #26

Last week's Sweets for a Saturday went through the roof! It was the biggest one ever with 357 treats!!! I was absolutely over the moon. Thank you to all you loyal sweeties who link up every week and, to all those who are new to the party, a big welcome and I hope you'll join in often. And now, here are your Top 5 picks from last week's party:

1. Red Velvet Strawberry Shortcake Layer Cake - Piece, Love, & Cooking


2. $250 Cookies - Kimmy's Kitchen


3. Cinnamon Roll Pulls - The Boys Made Me Do It


4. Cookie Dough Ice Cream Cake - Alli n' Son


5. Chocolate Chess Pie - A Well-Seasoned Life


The Rules:
  1. Please link up to the URL of your post, not the URL of your main blog. When it asks for "Name", type in the name of your treat.
  2. Please leave a link back to this post in your post or Grab My Button.
  3. Share your delicious sweets from this week. If you've made more than one during the week, feel free to link them all up.
  4. Leave me a comment telling me that you've linked up.
  5. Please visit at least two others and comment on their wonderful additions to this party.


SweetasSugarCookies


Wednesday, July 13, 2011

Sik Hye (Korean Rice Punch)


My family and I once ate in a Korean restaurant and, after the meal, they served us small cups containing a pale liquid with some grains of rice floating on top. It was delightfully cold and refreshing and slightly sweet. I found out later on that it was called Sik Hye or Korean Rice Punch.

My mom liked it so much that I promised I would make some for her. So, after a quick trip to a Korean grocery store to pick up the malt flour, I began to make the punch. It's not a difficult process, but several of the steps do take a lot of time.

You begin by mixing the malt flour with the water and then letting it sit for about 2 hours so that all the malt can settle to the bottom, leaving a yellowish liquid on top that will be flavored with the malt. At the same time, you need to make a cup of rice either in a rice cooker or on the stove. Make sure that it is a short-grained rice (like Japanese sticky rice).

Once the water has completely separated from the malt, carefully remove it and leave the malt behind. The malt can be discarded. Then, add the water to the rice in your rice cooker or in a slow cooker. It will need to be kept on the "warm" setting for about 2-3 hours so that the rice can ferment in the water. You'll know when the fermentation process is complete because a few rice grains will float to the top. Don't worry, after this step, you're almost done.

Finally, you'll strain the fermented liquid from the rice (do save the rice) and set it in a pot on the stove with some sugar. Let it boil. Then, you can either drink it warm or you can chill it. Add a little spoonful of the reserved rice to your cup of punch.

What with the warmer summer months here, I will definitely be making this delicious drink again. It's just the thing to make you feel nice and cool on the inside and add a little sweetness to your day.


Sik Hye (Korean Rice Punch) adapted from Beyond Kimchi

1 c. malt flour
1 c. short-grained rice
6 c. water
1/2 c. sugar

Soak the barley malt in water for 2 hours. All the malt should sink to the bottom.
Meanwhile, cook the rice in a rice cooker or in a pot.

Pour off the water only from the malt mixture, taking care not to stir up the malt. Discard the malt.

Pour malt water over cooked rice and keep over low heat for 2-3 hours (either in the rice cooker or in a slow cooker on the warm setting). A few rice grains should float to the surface at the end.

Strain the rice from the liquid mixture. Put the liquid into a pot and add the sugar. Boil the mixture.
Serve chilled with a little of the reserved rice.

Note: Malt flour can be found in any Korean grocery store.

This recipe is linked to:
Cast Party Wednesday
Whisking Wednesday
These Chicks Cooked
Made it on Monday

Tuesday, July 12, 2011

Honey Corn Muffins


Don't you just love it when people come to visit you, giving you an excuse to bake up a storm? I do. Since my sister and her friend were coming, I decided to get out my cookbook and bake up something delicious. This time, the cookbook of my choice was "Baked Explorations." I recently borrowed it from the library and am absolutely loving all the recipes I see in it. I just want to try them all. But, one at a time. So, I decided to start small and made the Honey Corn Muffins.


They were super moist and are almost like little corn cakes with their slight sweetness. Since I made them in mini size, they were perfect for popping in our mouths or taking with us on the go. Plus, I just can't help but love that bright yellow sunny color. It just brightens up the kitchen. My sister loved them!!!


Honey Corn Muffins (adapted from Baked Explorations)

2 large eggs
1 c. buttermilk (I used regular milk)
1/4 c. honey
1/4 cup unsalted butter, melted and cooled (I used margarine)
1 1/4 c. yellow cornmeal
3/4 c. all-purpose flour
1 Tbsp. baking powder
1/4 c. firmly packed light brown sugar
2 Tbsp. granulated sugar
1 tsp. salt

Preheat the oven to 400F. Lightly spray each cup of a standard 12-cup muffin pan (or 4 mini muffin pans) with a little bit of vegetable spray and use a paper towel to spread the oil evenly along the bottom and up the sides of each cup.

In a medium bowl, lightly whisk the eggs. Add the buttermilk, honey, and butter and whisk again until combined. Set aside.

In a large bowl, whisk together the cornmeal, flour, baking powder, both sugars, and salt. Make a well in the middle of the dry ingredients, pour the wet ingredients into the well, and fold the dry into the wet until just mixed.

Fill each muffin cup about three-quarters full. Tap the bottom of the pan against the counter to level the batter. Bake for 12-15 min., or until the tops are golden brown and a toothpick inserted into the center of a muffin comes out clean. Transfer the pan to a wire rack to cool for 10-15 min. Pop the muffins out while they're still warm and serve them with a generous helping of butter or honey.

Notes:
  1. I made a half batch of the recipe and got 24 mini muffins.
  2. Don't worry about the fact that your muffins don't rise in the oven. From what I've read when most people made these, they stay pretty flat and mine weren't any different.
This recipe is linked to:
Muffin Monday
Cast Party Wednesday
Whisking Wednesday
These Chicks Cooked
Made it on Monday

Monday, July 11, 2011

Cherry Ice Cream


I was absolutely sure that my ice cream making days were over. But, I found out that July is actually National Ice Cream Month. Obviously, I had to do something to celebrate it. Plus, I saw this creamy, dreamy bowlful of Cherry Chocolate Chip Ice Cream that Katrina of Baking and Boys had created on her blog. The picture alone made me want to make it. I was even more overjoyed to find that the recipe didn't require any egg yolks, so it could be adapted to my skim-milk versions. To top things off, it just so happened that cherries would be on sale at the grocery store the very next day. Well, with all the stars lining up like that, how could I not make this ice cream.


So, I ran to the store, bought more milk, and got some luscious looking bright red cherries. I used skim milk and fat-free yogurt in place of the whole milk and cream. As a note, it will come out icier this way, so if you like a creamier version, you can make it the other way. In addition, I threw in some chopped cherries since I love having pieces of fruit in my ice cream.

The ice cream came together really easily. The longest part of it is spent pitting the cherries (for those of us poor souls without a cherry pitter). Still, it's all worth it when you see that gorgeous pink ice cream churning away in your machine. I also followed Katrina's instructions and added some melted chocolate during the last five minutes.


Ahhh, life is indeed a bowlful of cherries, or, in this case, a bowlful of Cherry Ice Cream. Happy National Ice Cream Month!!!

Cherry Ice Cream (adapted from Katrina of Baking and Boys)

12 oz. (1 1/2 cups) ripe sweet cherries, pitted
2 c. skim milk
1/2 c. fat-free plain yogurt
1/2 c. sugar
pinch salt
chopped cherries
melted chocolate
a few drops of red food coloring

Put cherries, 1 3/4 c. milk, sugar, and salt into a medium sized saucepan over medium heat until the mixture is just barely forming bubbles around the edge. Reduce the heat to low and let sit for 15 min. Pour the mixture into a blender and puree, being careful since the liquid is hot. Strain the mixture through a fine mesh strainer into a medium sized bowl and discard the remaining bits.

Stir in the remaining 1/4 c. milk and 1/2 c. yogurt. Chill the mixture in the fridge for at least 1 hour. Pour mixture into bowl of ice cream maker and churn according to manufacturer's instructions, 20-25 min. In the last five minutes of churning, add the chopped cherries and drizzle in some melted chocolate. Put the ice cream in an airtight container and freeze for a few hours.

Makes 1 quart

This recipe is linked to:
My Meatless Mondays
Melt in Your Mouth Monday
A Marvelous Mess
Tuesday Night Supper Club
A Little Birdie Told Me
Hearth n' Soul Hop
Tempt My Tummy Tuesday
Cast Party Wednesday
Whisking Wednesday
These Chicks Cooked
Made it on Monday
Recipes I Can't Wait to Try

Friday, July 8, 2011

Sweets for a Saturday #25

I hope you all had a fantastic 4th of July. With all your talents in the kitchen, I have no doubt that you celebrated with some delicious food. And speaking of delicious food, here are your Top 5 from last week:

1. Samoa Doughnuts - Piece, Love, & Cooking


2. Peach Cobbler Crumble Pancakes - Piece, Love, & Cooking


3.
Watermelon Cupcakes - Home is Where the Boat Is


4. Cake Batter Rice Krispy Treats - A Well-Seasoned Life


5. Crack Pie - The Sweet Swiper


The Rules:
  1. Please link up to the URL of your post, not the URL of your main blog. When it asks for "Name", type in the name of your treat.
  2. Please leave a link back to this post in your post or Grab My Button.
  3. Share your delicious sweets from this week. If you've made more than one during the week, feel free to link them all up.
  4. Leave me a comment telling me that you've linked up.
  5. Please visit at least two others and comment on their wonderful additions to this party.


SweetasSugarCookies


Thursday, July 7, 2011

No-Fuss Focaccia


I love looking at the fresh baked breads in the bakery section of the grocery store. French bread, ciabatta bread, shepherder's bread, they all look so good. But, the one that especially calls out to me is the focaccia bread. How can you possibly resist something that looks like a pizza?


Well, difficult though it may be, I do resist after seeing the $4 price tag on it. How can something made out of flour, water, yeast, and a little olive oil possibly cost so much? Wait a minute. I have all those ingredients at home. Surely I could make my own, right? Thanks to the King Arthur Flour site, I found out that anyone can make focaccia. In fact, it's so quick and easy that the recipe is called, "Blitz Bread or No-Fuss Focaccia."


All you have to do is mix up your ingredients and put the dough into a baking pan with a little olive oil in it. Let it rise, drizzle with a little more oil, season to your liking, and bake. That's it. No "secret" ingredients or complicated techniques. Soon, you'll be taking a gorgeous loaf of focaccia out of your oven and wondering why you've never done this before.

The finished focaccia was so good. It was fluffy and flavorful and every bit as good as anything from the grocery store, even better because it was fresh. This may have been my first focaccia but it most certainly will not be my last.


No-Fuss Focaccia (aka Blitz Bread)
- adapted from King Arthur Flour

3/4 c. warm water
1 Tbsp. olive oil (plus additional for drizzling)
5/8 tsp. salt
1 3/4 c. all-purpose flour
1 1/2 tsp. active dry yeast
2 tsp. sugar
2 tsp. Italian seasoning
1 tomato, de-seeded and sliced

Combine the warm water with the active dry yeast and the 2 tsp. sugar. Let stand until foamy, about 5-10 min.

Add the flour and salt gradually to the yeast mixture, about 1/2 cup at a time, until your dough no longer sticks to the sides of the bowl (the dough will be very soft).

Drizzle 1/2 Tbsp. olive oil into a 9-inch round cake pan. Place the dough into the pan. Cover and let rise for 60 min., till it's become puffy. (Note: the risen dough will be super sticky so make sure that whatever you use to cover it will not touch the dough by the end of the hour or you can grease the plastic wrap) While the dough is rising, preheat your oven to 375F. Gently poke the risen dough all over with your index finger. Drizzle it lightly with the remaining olive oil and sprinkle with Italian seasoning. Top with the tomato slices. Bake the bread till it's golden brown, about 35-40 min.

Notes:
  • The recipe as written here is for a half batch. If you bake the full batch, KAF directs you to make it in a 9x13 pan.
  • I adapted this recipe so that it could be made without a stand mixer and using active dry yeast instead of instant yeast.
  • My gas oven doesn't brown bread at all, so I baked mine for about 32 min., then put it under the broiler for 2 min. It browned up beautifully. If you do this, make sure you watch it well because you don't want it to go from browned to burnt.
This recipe is linked to:
Full Plate Thursday
These Chicks Cooked
Made it on Monday
Fat Camp Friday
Fresh Food Friday

Wednesday, July 6, 2011

Barbecue Meatballs

When I was a kid, my mom cooked dinner on top of everything else that busy moms do each and every day. Naturally, this meant that she gravitated towards recipes that didn't require a lot of work or time. To our dismay, however, our family's repertoire of such recipes was quite limited. So, chicken in the freezer meant soy sauce chicken or sweet sour chicken. Ground turkey in the freezer led to chili, meatloaf, or barbecue meatballs. You can probably imagine how often each of those dishes appeared on our table. My sisters and I would groan and ask why she couldn't make something else (more laborious) like Korean chicken or lasagna. To which she'd reply that someday when WE did the cooking, we could make what we liked.


Well, that day arrived. Now I'm the one who does a lot of the cooking, either for myself or for my family. And, wouldn't you know, I find myself making the same simple, quick recipes she did, though this time with a lot more appreciation. That's not to say that I don't enjoy the dishes, though. In fact, this barbecue meatball recipe is one of my favorites. It's so easy since all you have to do is make the meatballs, bake them, and then finish them off in a tangy, mouthwatering barbecue sauce. We even like to add some grated carrots and chopped green beans in the meatballs for an added healthiness factor. When they're finished, you can serve them with some mashed potatoes, or, if you're so inclined, put them into some buns and prepare yourself to taste the best meatball sandwiches ever.


Barbecue Meatballs

For the meatballs:
1.25 lb. ground turkey
1/2 round onion, chopped
dash garlic powder
splash of Worcestershire sauce
salt, ground black pepper
1/2 c. breadcrumbs
1 egg
1 carrot, grated
1/2 c. green beans, finely chopped

For the sauce:
1 1/2 c. ketchup
2 Tbsp. mustard
1/4 c. + 2 Tbsp. brown sugar
3 Tbsp. soy sauce
3 Tbsp. Worcestershire sauce
1/4 c. + 2 Tbsp. cider vinegar (white vinegar works well too)

Combine the ingredients for the meatballs and form into balls. Bake at 350F for 25 min. While the meatballs are baking, combine the ingredients for the sauce in a saucepan. Add the meatballs to the sauce and cook on medium heat for about 15-20 min. until everything is heated through.

This recipe is linked to:
Made it on Monday
These Chicks Cooked
Recipes I Can't Wait to Try
Whisking Wednesday
Cast Party Wednesday

Tuesday, July 5, 2011

Ladyfingers


My family and I love Honolulu. In my opinion, it's a foodie's paradise. Having been there numerous times, we now have our favorite spots that we just have to hit in order to get that special something that can't be found anywhere else (or at least not the same quality).

One of those places is Leonard's Bakery which is famed for their malasadas (Portuguese doughnuts rolled in sugar). While picking up some malasadas, however, we happened to notice that the bakery had made ladyfingers that day as well. Since we all love ladyfingers, we bought a small bag of those too. The ladyfingers were absolutely delicious, so soft and not at all dry. One bag just wasn't enough so we called the bakery the next day to see if they had more. To our dismay, we were told that the baker hadn't made any that day, and, furthermore, he wasn't planning on making more anytime soon either. Noooooooo!!! Whatever would we do?

Well, there was only one solution - find a recipe and make our own. And that's exactly what I did. I admit it's a little labor intensive since you have to whip the egg yolks and whites separately and then fold everything together. But, it was so worth it when it came time to take those spongy ladyfingers out of the oven and bite into their crisp sugar crust. My family ate them up and agreed that they were every bit as good as Leonard's (what a compliment!). So, from now on, my family will go to Leonard's Bakery for malasadas and "Lisa's Bakery" for ladyfingers.


Ladyfingers (adapted from Allrecipes)

2 eggs, separated
1/3 c. white sugar
7 Tbsp. all-purpose flour
1/4 tsp. baking powder
I added 1/4 tsp. vanilla
powdered sugar (for sprinkling)

Preheat oven to 400F. Line a 17"x12" baking sheet with parchment paper. Fit a large pastry bag with a plain 1/2" round tip.

Place egg whites in a bowl and beat on high until soft peaks start to form. Slowly add 2 Tbsp. of the sugar and continue beating until stiff and glossy. In another bowl, beat egg yolks with remaining sugar. Whip until thick and very pale in color. Add the vanilla to the yolks.

Sift flour and baking powder together on a sheet of wax paper. Fold half of the egg whites into the egg yolk mixture. Fold in flour, and then fold in the remaining egg whites. Transfer mixture to pastry bag and pipe out onto prepared baking sheet. Sprinkle with powdered sugar. Bake 7-8 min. Do not allow to turn golden brown.

Makes 18 ladyfingers

This recipe is linked to:
Hearth n' Soul Hop
Meatless Monday
A Little Birdie Told Me
Recipes I Can't Wait to Try
Cast Party Wednesday
Sweet Treats Thursday
Bake with Bizzy
Sweet Indulgences Sunday